

What the Space and Length Notation Actually Looks Like
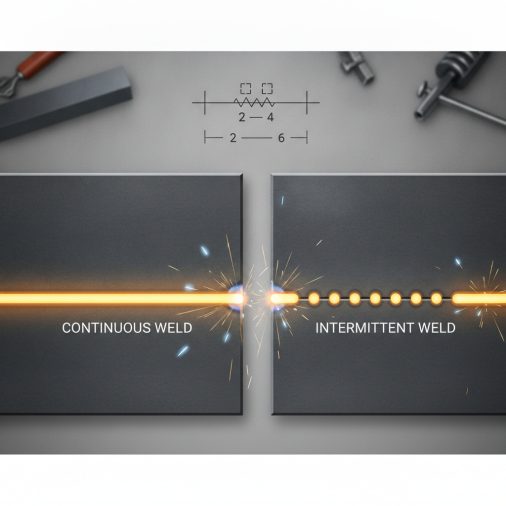
Continuous vs. Intermittent Welds
Two Types of Intermittent Welds: Chain and Staggered
The space and length notation applies to two distinct intermittent weld patterns. Which one the drawing requires changes how you position each segment on the joint.| Type | Description | Symbol Placement |
|---|---|---|
| Chain intermittent | Weld segments align directly opposite each other on both sides of the joint | Same position on both sides of reference line |
| Staggered intermittent | Weld segments on one side are offset to fall between the segments on the other side | Offset symbol placement on each side of reference line |
How to Read the Full Intermittent Weld Symbol
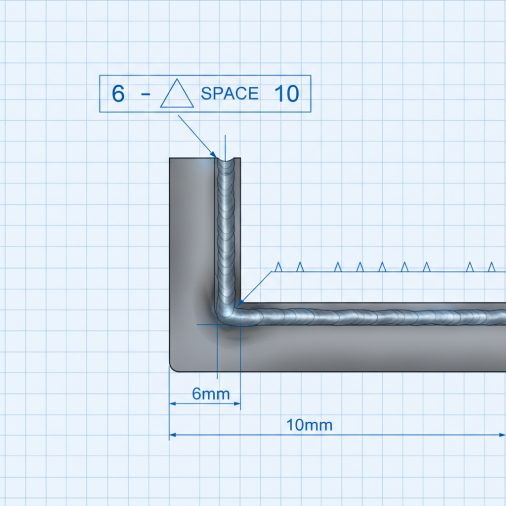
Take this example from a real fabrication drawing: A fillet weld symbol on the arrow side shows: 5 — 40-120 Breaking that down: – 5 = 5mm leg size (weld size) – 40 = each weld bead is 40mm long – 120 = the pitch (center-to-center spacing) between beads is 120mm So the gap between each bead is 120 – 40 = 80mm. Most welders make the mistake of reading the second number as the gap between beads. It’s not. It’s the center-to-center distance. Always subtract the length from the pitch to find the actual unwelded space. For a full breakdown of how all welding notation fits together on a drawing, the welding symbols chart and complete guide covers every element of the reference line in detail.Where Length and Space Symbols Appear on the Reference Line
The AWS (American Welding Society) standard governs how welding symbols are drawn and read. According to AWS A2.4, the reference line carries specific information in defined locations: – Left of the weld symbol — weld size or groove dimensions – Right of the weld symbol — length and pitch values – Above the reference line — other side weld information – Below the reference line — arrow side weld information – Tail — process, specification, or special instructions Length and pitch values always sit to the right. If you see a single number to the right, it typically indicates length only — meaning the weld does not extend the full joint but also has no repeating pattern specified.Common Mistakes When Applying Space and Length Symbols
A few errors come up repeatedly in shops when welders misread intermittent weld notations. Treating pitch as the gap is the most common. As mentioned, 40-120 means 40mm long, 120mm center-to-center — not 40mm long with a 120mm gap. Starting welds in the wrong position causes the pattern to drift, particularly over long joints. Always start from the same reference edge specified on the drawing to keep spacing consistent. Ignoring stagger requirements on two-sided joints. If symbols are offset on the drawing, the welds on the back side need to be repositioned accordingly — not simply mirrored. Misreading units on metric vs. imperial drawings. A value of 2-6 could mean 2 inches long, 6-inch pitch on an imperial drawing, or something entirely different in millimeters. Always confirm the drawing standard before starting. Weld quality issues like undercut are also more common on intermittent welds where start and stop positions repeat frequently. Proper technique at each bead start and end matters more in intermittent work. If you’re dealing with quality defects at weld terminations, reviewing how to prevent undercut in welding can help.Practical Layout Tips for Intermittent Welds
Laying out an intermittent weld pattern before striking the arc saves time and avoids costly mistakes. 1. Mark the start point on the joint, typically from the left or from a defined edge on the drawing. 2. Mark each segment length with a soapstone or marker. 3. Mark the pitch distance from the start of one segment to the start of the next. 4. Double-check the gap by calculating pitch minus length. 5. Verify stagger if the drawing specifies staggered intermittent welds on both sides. For longer joints, a flexible ruler or tape measure applied before any heat goes in is far more reliable than estimating spacing by eye.When Engineers Specify Intermittent Welds
Understanding why a drawing calls for intermittent welding helps you apply the pattern correctly without second-guessing the specification. Intermittent welds are chosen when: – Full penetration or continuous welds would cause excessive distortion – The joint only needs partial load-carrying capacity – Material costs or deposition time need to be reduced – Thin sheet metal or panel work requires controlled heat input In structural steel fabrication, you’ll see intermittent fillet welds used frequently on secondary members — web stiffeners, gussets, and bracing plates that don’t carry primary loads.FAQ
What is the difference between weld length and pitch in welding symbols? Weld length is the size of each individual weld segment — how long each bead runs. Pitch is the center-to-center distance between the start of one segment and the start of the next. To find the unwelded gap, subtract the length from the pitch. For example, a 50-150 notation means 50mm weld segments spaced 150mm center-to-center, leaving a 100mm gap between each bead. How do you calculate the gap between intermittent welds? Subtract the weld length from the pitch value. If the symbol reads 40-120, the pitch is 120mm and the length is 40mm, so the gap (unwelded space) between each segment is 80mm. This calculation is essential before laying out any intermittent weld pattern on a joint to avoid misplacing segments. What does 3-10 mean on a welding symbol? In an imperial drawing, 3-10 written to the right of a weld symbol means each weld segment is 3 inches long, with a 10-inch center-to-center pitch between segments. This leaves a 7-inch gap between each weld bead. In a metric drawing, the same notation would represent 3mm length and 10mm pitch, so context and drawing standards matter. What is a staggered intermittent weld and when is it used? A staggered intermittent weld places weld segments on opposite sides of a joint in an alternating pattern — each segment on one side falls between the segments on the other side. It’s used to distribute heat more evenly across a joint, reduce distortion in thinner materials, and improve load distribution. On a drawing, the weld symbols appear offset rather than directly aligned above and below the reference line. Can you use MIG welding for intermittent weld patterns? Yes. MIG welding is well-suited for intermittent welds, particularly in production environments where consistent bead length and positioning are important. Start-stop technique matters more in intermittent work because each segment begins and ends a new arc. Managing spatter and crater fill at each termination helps maintain quality — reducing spatter in MIG welding is especially relevant when you’re making multiple short passes. Does weld length include the crater at the end of the bead? Technically, the specified weld length refers to the effective weld length, not including the crater. In practice, most welders add a slight overrun or use a run-off tab at the end of a segment if dimensional precision is critical. For non-structural or general fabrication work, the crater is typically dressed or filled without affecting the specified length. Who defines the standards for welding symbols, including space and length notation? In the United States, the American Welding Society (AWS) standard AWS A2.4 defines all welding symbols, including how length and pitch are written and positioned on drawings. ISO 2553 is the equivalent international standard used in many European and global contexts. The two standards are similar but have some differences in symbol layout and notation conventions.Reading a length-space notation correctly the first time — before a single arc is struck — is what separates a welder who works from drawings accurately from one who guesses. The math is simple once you understand that the second number is always pitch, not gap. Mark your joint before you weld, confirm your stagger requirements if they apply, and the pattern falls into place reliably every time.


