
Image source: Bing (Web (fair-use with source credit))
Taming the Spray: Your Guide to Less Spatter in MIG Welding
If you’ve ever MIG welded, you know how frustrating excessive spatter can be. That fiery spray isn't just messy; it’s often a signal that your weld parameters aren't quite dialed in, which can affect weld quality. Learning how to reduce spatter when MIG welding is key to getting clean, strong joints and saving time on cleanup.
Our research, based on manufacturer specifications and industry best practices, indicates that consistent, controllable welds rely on understanding a few core variables. We'll walk through the most common culprits for spatter and how to fix them.
What is Weld Spatter and Why Should You Care?
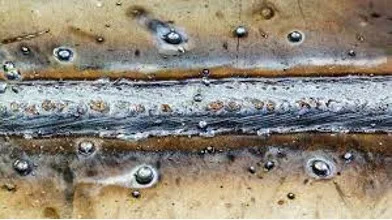
Weld spatter refers to small droplets of molten metal that leave the weld pool and adhere to the surrounding base metal. While a tiny amount can be unavoidable, excessive spatter indicates an unstable arc. This can lead to wasted filler material, significantly more time spent on grinding and cleaning after the weld, and potentially compromise the structural integrity of your joint. Aggregate user reviews suggest that the appearance of spatter is a primary indicator of proper machine setup and technique.
The Usual Suspects: Common Causes of MIG Spatter
Most welding spatter issues stem from a handful of common problems. Identifying which one is affecting your weld is the first step to fixing it.
Wire Feed Speed (Amperage) Gone Wrong
Your wire feed speed (WFS) directly controls the amperage in your weld, dictating how much energy is transferred to the base metal. When your WFS is set too high for the given voltage, the arc becomes unstable. This excess energy can cause the molten metal to eject violently from the weld pool, creating spatter. Think of it like trying to push too much material too fast.
Manufacturer specifications, such as those found on a welding chart mig wire, often highlight the relationship between WFS and amperage for optimal performance.
Voltage Settings Affecting Arc Length
Voltage controls the length of the welding arc. A common rule of thumb is that for every volt, you get a certain length of arc. If your voltage is set too high, you’ll create a long, lazy arc. This allows more time for the molten metal to become agitated before it reaches the base metal, leading to significant spatter.
Manufacturer specifications often provide voltage ranges for different wire types and thicknesses, typically around 17-23 volts for many common steel applications. Understanding these settings is crucial, much like referencing an aws welding chart.
Shielding Gas: Flow Rate, Type, and Purity
Shielding gas protects the molten weld pool from atmospheric contamination, which is crucial for a clean transfer.
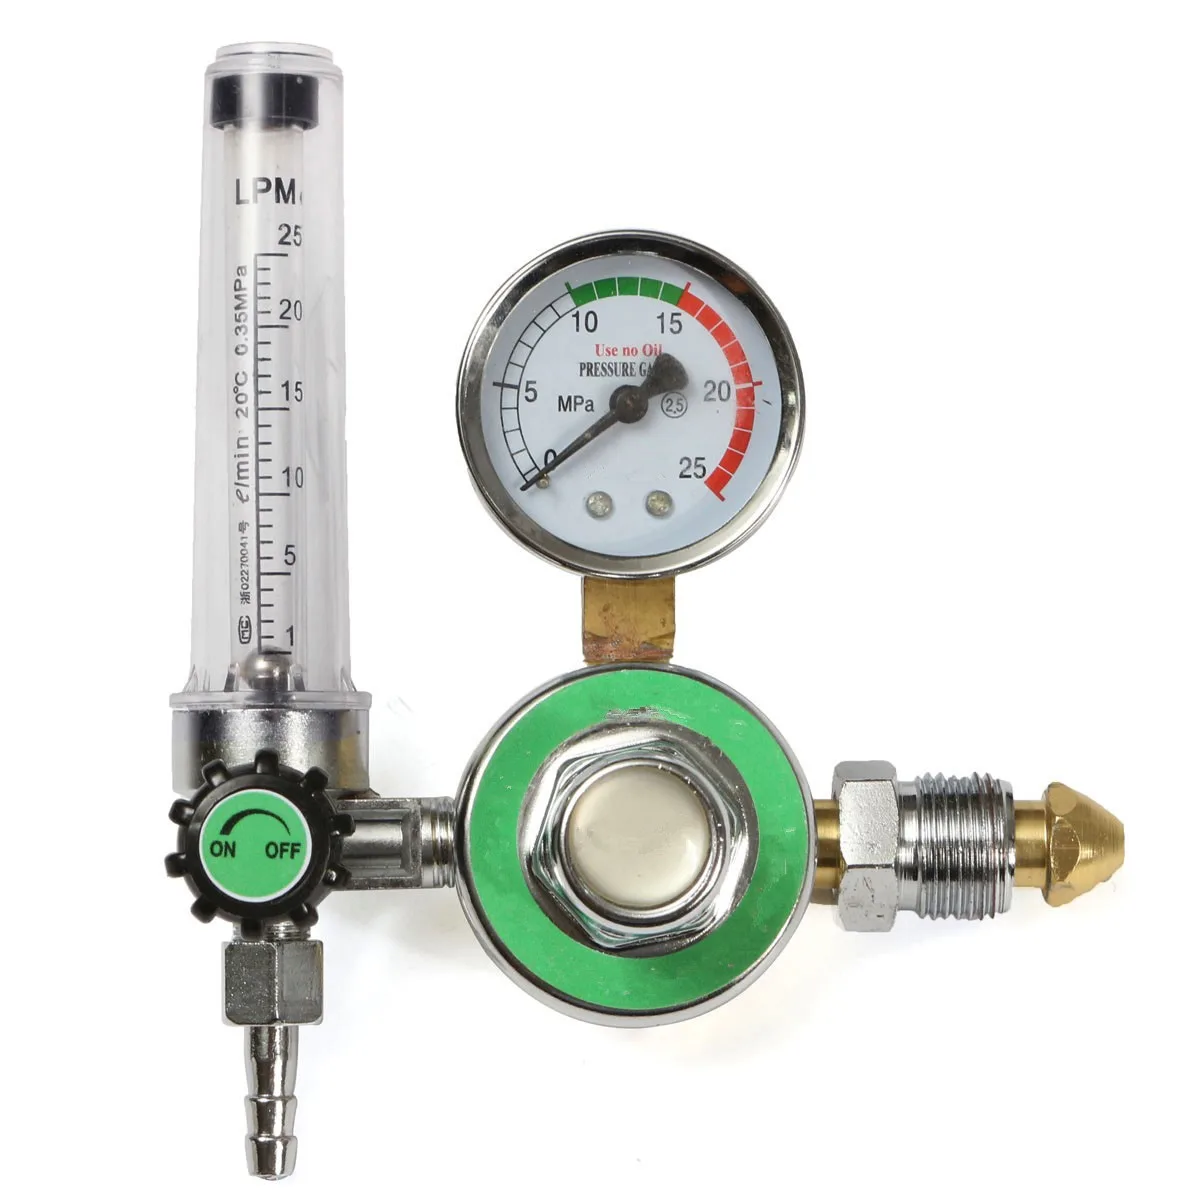
Image source: Bing (Web (fair-use with source credit))
If the flow rate is too low, the gas can't adequately shield the puddle, causing turbulence and spatter. Conversely, if the flow rate is too high, the gas can become turbulent itself and actually blow away from the weld pool, creating a similar contamination effect and more spatter. The type of gas mix is also critical; for most mild steel welding with solid wire, a 75% Argon / 25% CO2 blend is standard. Using pure CO2 or a different mix can alter the arc characteristics and increase spatter.
A best gas regulator for home setup ensures consistent flow.
Wire Quality and Condition
The quality of your welding wire plays a more significant role than many realize. Rusty, oily, or otherwise contaminated wire can feed erratically into the weld pool. This inconsistent feeding disrupts the electrical current and arc stability, directly contributing to spatter. Verified buyer feedback reports that even slight imperfections on the wire surface can disrupt the smooth metal transfer needed for a clean spray arc.
If you're facing spatter and using older wire, it might be time to consider a fresh spool.
Contact Tip Issues
The contact tip is where the welding wire makes electrical contact with the torch.
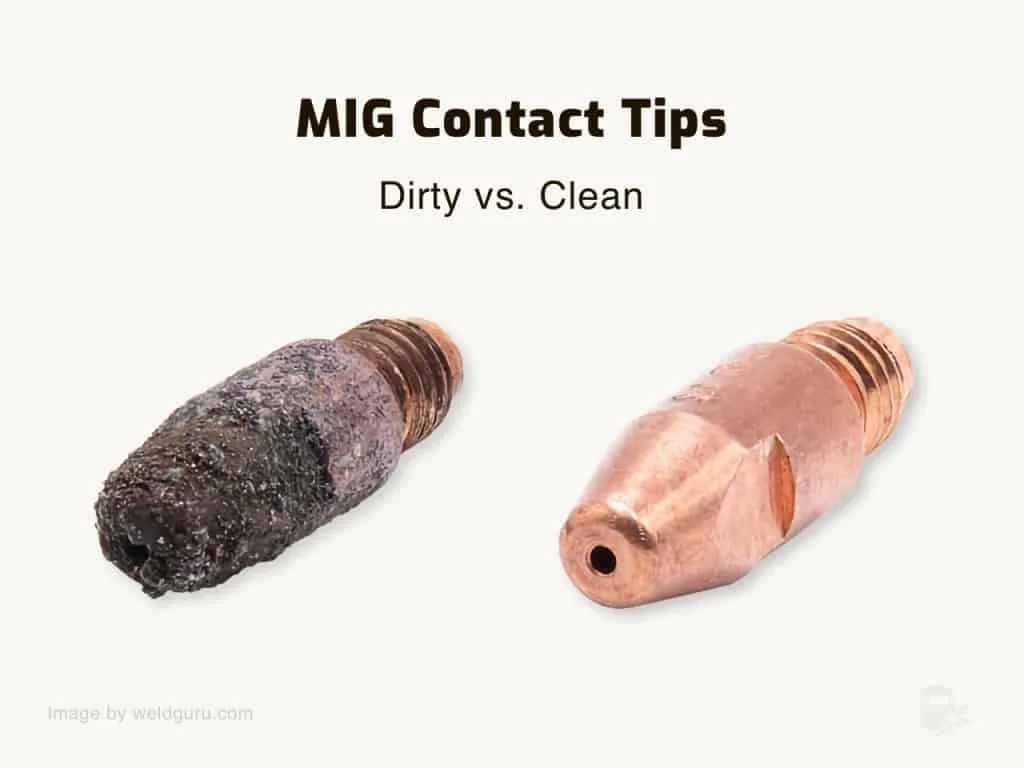
Image source: Bing (Web (fair-use with source credit))
If the tip is worn, dirty, or damaged, it can cause several problems. A worn tip might have an enlarged or deformed opening, leading to an unstable arc. If metal spatter adheres to the tip, it can impede smooth wire feeding and create electrical inconsistencies. Using the correct-sized tip for your wire diameter is also essential; an improperly sized tip can lead to poor electrical contact and, consequently, more spatter.
Regular maintenance, like cleaning the tip or replacing it when worn, is key.
Troubleshooting Spatter: A Step-by-Step Approach
When you encounter excessive spatter, it's best to approach it methodically. This process helps isolate the issue and get you back to welding cleanly.
Listening to Your Arc: What it's Telling You
The sound of your arc is one of the best indicators of its stability. A healthy MIG arc, especially in spray transfer mode, should sound like consistent, crackling bacon. If it sounds harsh, "poppy," or like a rapid spitting, that's a clear sign of instability and likely spatter. A smooth, even crackle means your settings are probably in the right ballpark.
This audio cue is something that comes with experience, but paying attention to it can save a lot of guesswork.
Adjusting WFS and Voltage for a Stable Arc
If your arc sounds spattery and your welds look wide and flat with excessive spatter, you might have too much voltage, creating a long arc. Try decreasing the voltage by half a volt to one volt at a time. Then, adjust your wire feed speed (WFS) to achieve the desired bead profile and penetration. For machines where you can directly control amperage, consider referencing a mig welder settings guide.
If you’re experiencing burnback where the wire melts back to the tip, you may need to increase WFS or slightly decrease voltage.
Fine-Tuning Shielding Gas Settings
Shielding gas issues are a frequent spatter culprit. Start by verifying your gas flow rate. A common range for most steel applications is between 20-25 cubic feet per hour (CFH). Too low, and you'll get contamination; too high, and you risk turbulent gas flow.
Listen to the hiss at the nozzle, it should be consistent, not a roar. You also want to ensure you’re using the correct gas for your wire type; typically, a 75% Ar / 25% CO2 mix is standard for solid steel wire.
Checking and Replacing Contact Tips
A worn or dirty contact tip is a prime suspect for spatter. Regularly inspect the tip for any buildup of molten metal or signs of erosion. A slightly enlarged or misshapen tip opening can significantly disrupt the arc. You can clean minor buildup with a wire brush or a dedicated tip cleaner tool.
If the tip is noticeably damaged or excessively worn, it's time to replace it. Always ensure the new tip matches your wire diameter precisely.
Correcting Burnback Issues
Burnback occurs when the weld wire melts back and fuses to the contact tip rather than the workpiece. This is almost always a sign of too much heat or insufficient wire feed. If you're experiencing burnback, the first adjustments to make are increasing the wire feed speed or slightly decreasing the voltage. Consistent voltage and proper WFS are interconnected; often, fixing one requires re-evaluating the other.
This is a common area addressed in guides like how to calculate wire feed speed in mig welding.
Technique Matters: Gun Angle and Stickout
Beyond machine settings, how you hold the welding gun and how much wire extends from the tip (stickout) can dramatically impact spatter. These technique-related factors influence how effectively your shielding gas protects the weld pool.
Optimizing Your Travel and Work Angles
Your welding gun's angle relative to the workpiece affects gas coverage and bead formation. For most MIG welding on steel, a slight "push" angle of about 10 to 15 degrees is generally recommended. This helps to direct the shielding gas effectively over the weld puddle.
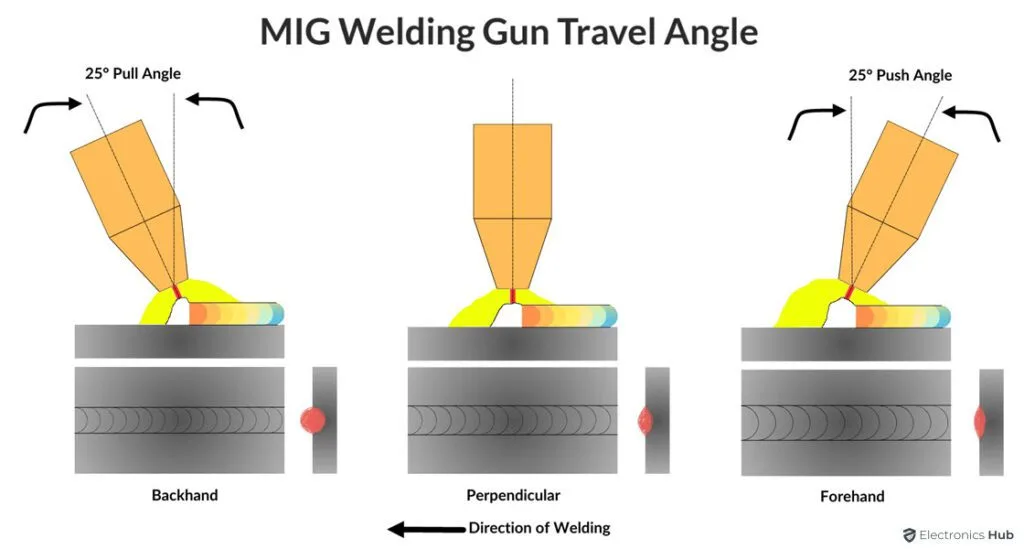
Image source: Bing (Web (fair-use with source credit))
A steep push angle can still cause turbulence, so finding that sweet spot is important. The work angle (the angle of the gun relative to the joint itself) should also be consistent. Holding the gun at extreme angles can disrupt gas flow and lead to inconsistencies and spatter.
Setting the Right Wire Stickout
Stickout, also known as wire extension, is the length of welding wire that protrudes from the tip of the contact tip. This measurement is critical for arc stability and spatter control. Manufacturers' specifications often suggest a stickout of roughly 1/4 to 1/2 inch (6 to 12 mm) for typical steel applications. If your stickout is too long, it increases electrical resistance, potentially leading to an unstable arc and more spatter.
If it’s too short, the contact tip can overheat, causing burnback and also contributing to spatter. Maintaining a consistent stickout from weld to weld is a mark of good welding technique.
Don't Forget the Metal: Surface Preparation
Even with perfect machine settings and technique, welding on dirty metal will cause problems. Rust, paint, oil, mill scale, and other contaminants on your base material will vaporize in the arc. This vaporization creates an unstable arc, leading to significant spatter and potentially weak welds. Always ensure the metal you are welding is clean.
A wire wheel, grinder, or appropriate solvent can be used to remove these contaminants before you begin welding. If rust is a pervasive issue, resources like how to use rustoleum on rusted metal can help prepare surfaces.
Pro Tips for Minimizing Spatter
Beyond the fundamental settings and techniques, a few advanced tips can further refine your MIG welding results. Many experienced fabricators swear by these subtle adjustments.
- Anti-Spatter Aerosols: While not a fix for underlying problems, a good quality anti-spatter spray applied to the nozzle and contact tip (be sure to let it dry before welding) can make cleanup much easier by preventing spatter from sticking. Some newer machine designs also incorporate features that help manage the arc more effectively, reducing spatter inherently.
- Wire Brush: Keep a dedicated wire brush handy. A quick brush on the tip and nozzle can remove small spatter deposits between welds.
- Listen to the "Sizzle": As mentioned, the sound of the arc is key. A steady, consistent sizzle is what you're aiming for. If it sounds uneven or "poppy," pause and re-evaluate your settings. As of 2026, advanced welding machines often offer synergistic controls that link WFS and voltage automatically for specific wire/gas combinations, simplifying this process.
When to Seek Help: Recognizing Deeper Issues
Sometimes, even after adjusting all the usual suspects, your MIG welding still produces excessive spatter. This might point to an issue with your equipment itself.
- Internal Machine Problems: Power source malfunctions, faulty rectifier boards, or issues within the wire feeder mechanism can all lead to unstable arcs and spatter. If you've exhausted all other troubleshooting steps, it might be time to consult your welder's manual or contact the manufacturer for support.
- Ground Clamp Issues: A poor connection from the ground clamp to the workpiece can cause arc instability. Ensure the clamp is firmly attached to clean metal. Corroded or loose clamps are trouble.
- Incorrect Machine Settings for Material: While this guide focuses on general mild steel, different materials like stainless steel or aluminum have very specific MIG welding stainless steel settings and wire/gas requirements that heavily influence spatter.
Final Verdict: Achieving Cleaner MIG Welds
Reducing spatter in MIG welding boils down to mastering the interplay between your machine settings, consumables, and technique. By systematically addressing wire feed speed, voltage, shielding gas, contact tips, and your gun mechanics, you can achieve consistently clean welds. Don't underestimate the impact of a clean wire and workpiece.


