
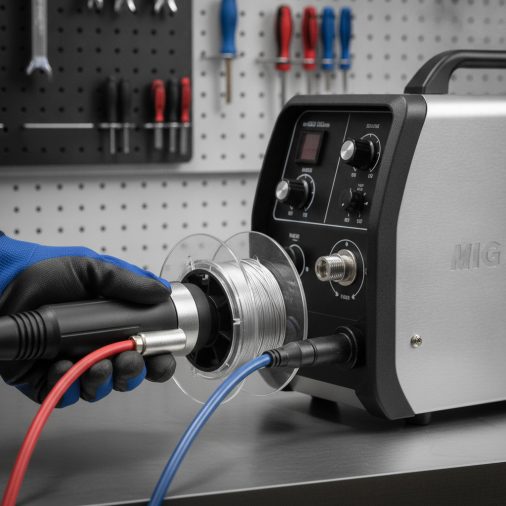
Connecting a spool gun to your MIG welder opens up aluminum welding and makes feeding soft wire far more reliable. But the process trips up a lot of welders — not because it’s complicated, but because the steps vary by machine and most manuals skip the details that actually matter.
This guide walks you through the full connection process, from checking compatibility to making your first test weld. Whether you’re setting up for the first time or troubleshooting a connection that isn’t working right, you’ll find clear, practical answers here.
Quick Answer
To connect a spool gun to a MIG welder, plug the spool gun’s Euro connector or proprietary connector into the welder’s designated spool gun port, connect the work clamp, route the trigger control cable to the correct port, and select “spool gun” mode in the welder’s settings. Load wire into the spool gun hub, set your voltage and wire feed speed, and test the trigger response before welding.
Check Compatibility Before You Touch a Single Cable
Not every spool gun works with every MIG welder. This is the step most people skip, and it causes the most frustration.
What to verify before buying or connecting a spool gun:
– Dedicated spool gun port — Many mid-range and professional MIG welders (Lincoln Electric, Miller, ESAB, Hobart) include a dedicated spool gun receptacle. Budget machines often don’t.
– Trigger control compatibility — The spool gun’s trigger signal must match what the welder expects. Some use a simple two-pin trigger circuit; others use a proprietary multi-pin connector.
– Amperage rating — Confirm the spool gun’s rated amperage matches or exceeds your welder’s output. A 150A spool gun on a 250A machine is a mismatch.
– Wire diameter range — Most spool guns handle .023″–.035″ aluminum or steel wire. Verify the drive roller and liner match your intended wire size.
If your welder doesn’t have a dedicated spool gun port, some manufacturers offer an adapter kit or a push-pull upgrade. In other cases, the machine simply isn’t compatible, and forcing a connection can damage the trigger circuit.
What You’ll Need

Gathering everything before you start saves time and avoids mid-job interruptions.
| Item | Purpose |
|---|---|
| Spool gun (compatible model) | Feeds wire from a small onboard spool |
| MIG welder with spool gun port | Powers and controls the gun |
| Work clamp and cable | Completes the welding circuit |
| Wire spool (typically .030″–.035″ ER4043 or ER5356 for aluminum) | Welding filler material |
| Drive roller matching wire size | Feeds wire without crushing it |
| Contact tip matching wire size | Transfers current to the wire |
| Allen wrench / screwdriver set | Opens spool gun housing |
| Gas hose and regulator (argon or argon/CO2 mix) | Shielding gas supply |
For aluminum welding — which is the primary reason most welders add a spool gun — you’ll want 100% argon shielding gas. For steel with a spool gun, a 75/25 argon/CO2 mix works well.
Step-by-Step: How To Connect a Spool Gun to a MIG Welder
Follow these steps in order. Rushing the sequence, especially skipping the polarity check, is a common cause of poor welds and equipment damage.
Step 1: Power Down the Welder
Turn the welder completely off and unplug it from the power source. Never connect or disconnect a spool gun with the machine energized. The trigger circuit carries low voltage, but the main power terminals do not.
Step 2: Remove the Standard MIG Gun
Disconnect your existing MIG gun from the Euro connector or the front panel connection. Coil the cable neatly and set it aside. If your welder uses a brass nut to secure the gun, use the correct wrench size — typically 7/8″ or 22mm — to avoid rounding it off.
Step 3: Connect the Spool Gun Power Cable
Plug the spool gun’s main connector into the welder’s positive output terminal or Euro connector port. On most machines, this is clearly labeled. Tighten the connector firmly — a loose connection here causes arc instability and heat buildup at the terminal.
– Miller machines (Millermatic 211, 252, etc.) use a dedicated spool gun receptacle on the front panel.
– Lincoln machines (Lincoln 210MP, Power MIG series) use a similar front-panel port with a locking ring.
– Hobart machines (Handler series) may require an adapter depending on the model year.
Step 4: Set Polarity
Most spool gun welding — especially aluminum — requires DCEP (Direct Current Electrode Positive), meaning the gun is connected to the positive terminal. Check your wire manufacturer’s data sheet to confirm. Inside the welder, you may need to swap the polarity jumper or cables if you were previously running flux-core wire (which uses DCEN).
Step 5: Connect the Trigger Control Cable
Route the spool gun’s trigger control cable to the trigger port on the welder. This is typically a small 2-pin or multi-pin receptacle near the main connection port. Plug it in and ensure it seats fully. A poorly seated trigger cable is one of the most common reasons a spool gun won’t fire.
Step 6: Connect the Work Clamp
Attach the work clamp cable to the welder’s negative output terminal. Clamp the other end to clean, bare metal on your workpiece — not to paint, rust, or anodizing. A poor work clamp connection causes erratic arc starts and voltage fluctuations.
Step 7: Connect the Shielding Gas
Run the gas hose from your regulator to the gas inlet on the spool gun or the welder’s rear gas fitting, depending on your setup. For spool guns, gas typically flows through the welder and out through the gun’s nozzle. Tighten all fittings by hand, then snug them with a wrench — don’t overtighten brass fittings.
Step 8: Load Wire Into the Spool Gun
Open the spool gun housing using the latch or screws on the side. Mount the wire spool on the hub with the wire feeding off the bottom (or as directed by the gun’s manual). Thread the wire through the inlet guide, over the drive roller, and through the liner until it exits about 1/2″ past the contact tip. Close the housing and set the drive roll tension — firm enough to feed consistently, but not so tight it deforms the wire.
Step 9: Select Spool Gun Mode on the Welder
Power the welder back on. Navigate to the spool gun setting in the control panel. On digital machines, this is usually in the process or setup menu. On analog machines, there may be a physical toggle switch labeled “Spool Gun / MIG.” Selecting this mode tells the welder to read the trigger signal from the spool gun port rather than the front panel gun port.
Step 10: Set Wire Feed Speed and Voltage
Start with the manufacturer’s recommended settings for your wire diameter and material thickness. For .030″ aluminum at 1/8″ thickness, a starting point is typically around 18–20V and 250–300 IPM wire feed speed. Run a short test bead on scrap material and adjust from there.
Why the Spool Gun Trigger Isn’t Responding — Common Fixes
If you pull the trigger and nothing happens, work through this checklist before assuming the gun or welder is faulty.
Trigger not firing:
– Confirm spool gun mode is selected on the welder — this is the most common cause
– Check that the trigger control cable is fully seated in the port
– Test the trigger cable continuity with a multimeter if available (should show continuity when trigger is pressed)
Wire feeding but no arc:
– Check polarity — incorrect polarity prevents arc initiation
– Inspect the contact tip — it may be the wrong size for the wire diameter
– Verify the work clamp has a solid connection to bare metal
Erratic wire feeding:
– Drive roll tension may be too loose or too tight
– The liner may be kinked or contaminated — aluminum wire is especially sensitive to liner condition
– Wire spool hub tension may be too tight, causing the motor to struggle
Porosity in the weld:
– Shielding gas flow rate is likely too low (typically 20–25 CFH for aluminum)
– Check for gas leaks at all hose connections
– Confirm you’re using 100% argon for aluminum, not a CO2 mix
Spool Gun vs. Push-Pull Gun: Which Setup Makes More Sense
If you’re deciding between a spool gun and a push-pull system, the choice depends on your typical workload and budget.
| Feature | Spool Gun | Push-Pull Gun |
|---|---|---|
| Wire feed distance | Short (gun-mounted spool) | Long (up to 25 ft from feeder) |
| Aluminum wire handling | Excellent | Excellent |
| Cost | Lower ($150–$400) | Higher ($500–$1,500+) |
| Mobility | Limited by cable weight | Better reach and flexibility |
| Setup complexity | Simple | More complex |
| Best for | Occasional aluminum work, shop use | Production welding, long runs |
For most hobbyists and light fabrication shops, a spool gun is the practical choice. Push-pull systems earn their cost in production environments where consistent feeding over long cable lengths matters.
FAQ
Can I use a spool gun on any MIG welder?
No. The welder needs a compatible spool gun port and trigger circuit. Most professional and mid-range machines from Miller, Lincoln, Hobart, and ESAB include this. Budget import machines often don’t support spool guns at all. Check your welder’s manual or the manufacturer’s spool gun compatibility chart before purchasing.
Do I need to change polarity when switching to a spool gun for aluminum?
In most cases, no — if you were already running solid wire MIG, you’re already on DCEP (electrode positive), which is correct for aluminum. However, if you were running flux-core wire (which uses DCEN), you’ll need to swap polarity back to DCEP before using the spool gun.
What wire should I use in a spool gun for welding aluminum?
ER4043 and ER5356 are the two most common aluminum MIG wires. ER4043 is softer, flows better, and is easier to weld with — it’s the better starting choice for most applications. ER5356 is stronger and better for structural work but feeds slightly harder and is more sensitive to hot cracking on certain alloys.
Why does my spool gun keep birdnesting or jamming?
Birdnesting in a spool gun is usually caused by drive roll tension that’s too high, a worn or incorrect contact tip, or a liner that’s too long or kinked. Aluminum wire is soft and deforms easily under excessive pressure. Back off the drive roll tension until the wire feeds smoothly without slipping, and replace the contact tip if it shows any wear.
How do I know if my spool gun is getting enough shielding gas?
Set your flow rate to 20–25 CFH for aluminum and check for porosity in test welds. Porosity (small holes or pits in the weld bead) is the clearest sign of inadequate shielding. Also check that the nozzle is clean — spatter buildup restricts gas flow significantly. Clean or replace the nozzle regularly when welding aluminum.
Can I use a spool gun for steel or stainless, or is it only for aluminum?
Spool guns work fine for steel and stainless wire. The main advantage — eliminating the long liner run — is less critical for steel wire since it’s stiffer and feeds reliably through standard MIG guns. But in situations where the cable must bend sharply or where wire feed consistency is critical, a spool gun is a legitimate option for any wire type.
What’s the correct drive roll type for aluminum wire in a spool gun?
Use a U-groove (rounded groove) drive roll for aluminum wire. The standard V-groove rolls used for steel wire have sharper edges that can shave or deform soft aluminum wire, causing feeding problems and contaminating the liner. Most spool guns ship with a U-groove roll already installed, but verify before loading wire.
Final Thoughts
Getting a spool gun connected correctly comes down to three things: confirming compatibility before you start, following the connection sequence without skipping the polarity and trigger cable steps, and selecting spool gun mode on the welder before pulling the trigger. Most connection problems trace back to one of those three points.
Once it’s dialed in, a spool gun is one of the most reliable ways to weld aluminum — far more consistent than trying to push soft wire through a long standard MIG liner. Take ten minutes to run test beads on scrap before moving to your actual workpiece, and adjust wire feed speed and voltage until the arc sounds smooth and steady.
Meta Description:
Learn how to connect a spool gun to a MIG welder with this step-by-step guide — covering compatibility, polarity, trigger setup, and common fixes.


