
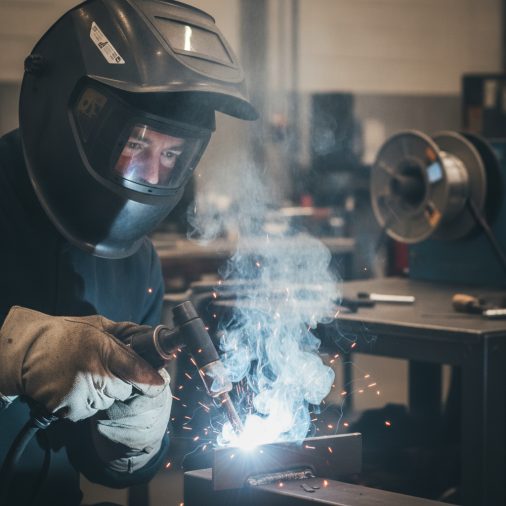
Struggling to see your weld puddle clearly is one of the most frustrating problems in MIG welding. Poor visibility leads to inconsistent beads, missed joints, and wasted material. Whether you’re a beginner just starting out or someone who’s been welding for a while and keeps running into this issue, the root causes are usually fixable. This article walks through every common reason you can’t see when MIG welding and gives you practical solutions you can apply immediately.
Quick Answer
Can’t see when MIG welding? The most common causes are the wrong lens shade, a dirty or scratched lens, poor torch angle blocking your sightline, insufficient lighting in your work area, or spatter buildup on the nozzle creating smoke and fume obstruction. Most visibility problems are solved by adjusting your shade number, cleaning your equipment, and repositioning your torch angle.
Why Visibility Matters More Than Most Beginners Realize

Seeing the weld puddle clearly is the foundation of good MIG welding. The puddle tells you everything — travel speed, penetration, heat input, and whether you’re tracking the joint correctly.
When you can’t see it, you’re essentially welding blind. You end up guessing at travel speed, which causes either cold laps or burn-through. Most weld defects trace back to the welder not being able to read what the puddle is doing in real time.
This isn’t just a comfort issue. It directly affects weld quality, consistency, and safety.
The Lens Shade Problem: Too Dark or Too Light
The single most common reason welders can’t see properly is using the wrong shade number on their helmet.
MIG welding typically requires a shade between 9 and 13, depending on amperage. Many beginners default to shade 10 or 11 regardless of what they’re welding, which works for mid-range amperages but causes problems at the extremes.
General shade guide for MIG welding:
| Welding Current (Amps) | Recommended Shade |
|---|---|
| Under 60A | Shade 7–8 |
| 60–160A | Shade 10 |
| 160–250A | Shade 11–12 |
| 250–500A | Shade 12–13 |
If your shade is too dark for the amperage you’re running, the puddle looks black and featureless. You can see the arc but nothing else. Drop one shade number and the difference is immediate.
If the shade is too light, the arc is overwhelming and you’ll instinctively look away. Neither extreme gives you useful visual information.
Auto-Darkening Helmet Issues That Kill Visibility
Auto-darkening helmets (ADHs) are excellent tools, but they introduce their own set of visibility problems when they malfunction or are set up incorrectly.
Common ADH problems:
– Slow reaction time — Older or budget helmets may darken a fraction too late, causing a brief flash that makes your eyes tighten up before you can see the puddle.
– Sensors blocked — If your arc sensors are covered by your hand, the torch, or a piece of metal, the helmet won’t darken properly. This is a common issue when welding in tight corners or overhead.
– Low battery or solar panel failure — A dying battery causes inconsistent darkening or the lens staying in a permanent dark state, making everything look dim even before the arc starts.
– Incorrect sensitivity setting — Set too low, the helmet won’t trigger from a low-amperage arc. Set too high, it triggers from ambient light in the shop.
Check your sensitivity and delay settings first. Most quality ADHs have both adjustments. The delay setting controls how long the lens stays dark after the arc stops — if it’s set too long, your eyes are still adjusting when you restart.
Torch Angle and Body Position Are Blocking Your View
This is a technique problem that no equipment upgrade will fix. Many welders hold the torch at an angle that physically puts the nozzle and wire between their eyes and the puddle.
For MIG welding, a 10–15 degree drag angle (torch tilted back slightly in the direction of travel) is standard. This angle keeps the nozzle out of your direct line of sight while still maintaining proper gas coverage.
If you’re pushing the torch (tilting it forward into the direction of travel), the nozzle blocks the puddle almost completely. Pushing is sometimes used intentionally for specific applications, but it makes visibility significantly harder.
Practical positioning tips:
– Position your head slightly to the side of the torch, not directly behind it.
– Adjust your body so your dominant eye has a clear, unobstructed angle to the puddle.
– For flat position welding, try shifting your head 10–15 degrees off-center from the torch axis.
– Weld toward your dominant eye side when possible.
In practice, experienced welders often unconsciously adjust their head position to maintain sightline. Beginners tend to focus on hand position and forget that eye position is equally important.
Smoke, Fumes, and Spatter Blocking the Arc
Smoke rising from the weld zone directly between your eyes and the puddle is a real visibility problem — and a health hazard on top of it.
Causes of excessive smoke during MIG welding:
– Contaminated base metal — Oil, rust, paint, or mill scale burns off during welding and creates thick smoke that obscures the puddle.
– Spatter-clogged nozzle — A nozzle packed with spatter restricts shielding gas flow, causes turbulence, and produces more spatter and smoke in the weld zone.
– Wrong shielding gas or flow rate — Too little gas flow causes porosity and excess spatter. Too much creates turbulence that pulls in atmospheric contamination.
– Wire feed issues — Inconsistent wire feed causes the arc to sputter, producing more smoke and spatter than a stable arc.
Clean your base metal before welding. A wire brush and acetone wipe removes most surface contamination. Apply anti-spatter spray to your nozzle before each session and clean it regularly with a nozzle reamer or pliers.
Shielding gas flow rate for most MIG applications should be between 15–25 CFH (cubic feet per hour). Too low and you get porosity and smoke. Too high and you get turbulence.
Lighting Conditions in Your Work Area
The area around the weld is completely dark when you’re behind a welding helmet. Your eyes are adapted to the bright arc, and anything outside that zone disappears.
This becomes a problem when:
– You’re welding in a dark shop with no ambient lighting
– You’re working on a joint that’s recessed, like inside a box section or pipe
– You need to see where the joint is before the arc starts
A simple work light positioned to illuminate the joint from the side — not shining directly into your face — makes a significant difference. Some welders use a small LED flashlight clipped to their helmet or torch to pre-illuminate the joint before striking the arc.
For recessed or internal welds, a headlamp worn under the helmet (positioned to light the work area before you lower the shield) helps you locate the joint precisely before you start.
Lens Condition: Scratches, Spatter, and Fogging
A scratched or spatter-coated outer lens creates visual distortion and glare that makes it hard to see clearly even with the right shade.
Most welding helmets use a replaceable outer cover lens specifically because it takes the abuse. These are inexpensive — typically a few dollars — and should be replaced regularly.
Signs your cover lens needs replacing:
– Visible scratches or pitting from spatter
– Fogging that doesn’t wipe clean
– Discoloration or yellowing from heat exposure
– Any cracking or crazing in the lens surface
The inner lens (the actual auto-darkening cartridge or fixed shade lens) should also be inspected. Spatter that gets past a damaged cover lens can permanently damage the inner lens, which is expensive to replace.
Troubleshooting Checklist: Can’t See When MIG Welding
Use this as a quick diagnostic reference:
| Symptom | Likely Cause | Fix |
|---|---|---|
| Puddle looks black, no detail | Shade too dark | Reduce shade by 1–2 numbers |
| Arc is blinding, can’t look at it | Shade too light | Increase shade number |
| Helmet flashes before darkening | Slow ADH reaction / dying battery | Replace battery, upgrade helmet |
| Sensors not triggering | Sensors blocked | Reposition torch or body |
| Heavy smoke obscuring puddle | Contaminated metal or clogged nozzle | Clean metal, clean nozzle |
| Can see arc but not joint edges | Poor ambient lighting | Add work light to joint area |
| Blurry or distorted view | Scratched cover lens | Replace cover lens |
| Puddle hidden behind nozzle | Wrong torch angle | Switch to drag angle, reposition head |
FAQ
What shade should I use for MIG welding mild steel?
For most mild steel MIG welding at typical hobby or light fabrication amperages (100–200A), shade 10 or 11 works well. If you’re running lower amperages on thin sheet metal, shade 9 may give you a clearer view of the puddle without sacrificing eye protection. Always adjust based on your actual amperage, not just the material type.
Why does my auto-darkening helmet seem dim even before I start welding?
A helmet that looks dark before the arc starts usually has a failing battery or solar panel. Some budget helmets also have a fixed dark state that’s too dark for the ambient light in your shop. Check the battery first — most ADHs use standard coin cells or AA batteries. If the battery is fine, check whether the sensitivity is set too high, causing it to trigger from shop lighting.
Can I weld with a fixed shade lens instead of auto-darkening?
Yes, and many experienced welders prefer fixed shade lenses for their optical clarity. The trade-off is that you must flip the helmet down before striking the arc, which requires more practice to position accurately. Fixed shade lenses are typically sharper and have no electronics to fail, making them reliable in dusty or high-heat environments.
Why can I see the arc clearly but can’t tell where the joint is?
This is a lighting and contrast issue. The arc is the brightest point in your field of view, and everything else appears dark by comparison. Adding a side-positioned work light to illuminate the joint before and during welding helps significantly. Some welders also use a soapstone or marker line on the joint to create a visible reference point.
Is it normal to see spots after MIG welding?
Occasional afterimages (spots) are normal after welding, similar to looking at a bright light. If you’re experiencing persistent spots, pain, or sensitivity hours after welding, you may have experienced arc flash — UV exposure from an inadequate or malfunctioning lens. This requires medical attention. Consistent spots suggest your shade is too light or your helmet isn’t triggering reliably.
Why does my view get worse as I weld longer?
Spatter accumulates on the outer cover lens during a session. After extended welding, enough spatter builds up to noticeably reduce clarity. Replacing the cover lens mid-session is the fix. Anti-spatter spray applied to the outer lens before welding significantly slows this buildup.
Does the type of shielding gas affect visibility?
Indirectly, yes. Pure CO2 shielding gas produces a more violent arc with more spatter than a 75/25 Argon/CO2 mix (C25). More spatter means more smoke and a dirtier lens. Switching to C25 from straight CO2 typically produces a cleaner, more stable arc that’s easier to see and track.
Final Thoughts
Most visibility problems in MIG welding come down to three things: wrong shade number, dirty or damaged equipment, and poor torch or body positioning. Fix those three areas and the majority of welders see an immediate improvement. If you’re still struggling after addressing all of them, your helmet itself may be the limiting factor — budget auto-darkening helmets often have inferior optical clarity and slower reaction times that make puddle reading genuinely difficult. Investing in a quality helmet with a high optical clarity rating (1/1/1/1 is the best) pays off in weld quality, not just comfort.
Meta Description: Struggling to see when MIG welding? Discover the real causes — wrong shade, dirty lenses, torch angle, and more — plus practical fixes to improve visibility immediately.


