
If you're looking at how to weld stainless steel MIG, you've probably run into a few things that make it seem a bit tricksy compared to regular steel. It's not impossible, not by a long shot, but it does demand a little extra attention to detail. Getting it right means understanding how stainless behaves under heat and how exactly your MIG welder’s settings play into that.
Our research shows that proper preparation and the right gas-shielded metal arc welding (GMAW) setup are key to avoiding common headaches like warping or contamination. Manufacturer specifications typically recommend specific filler metals and gas mixes to maintain the corrosion resistance that makes stainless steel so desirable in the first place.
See That Stainless Steel Puddle: Your MIG Welding Guide
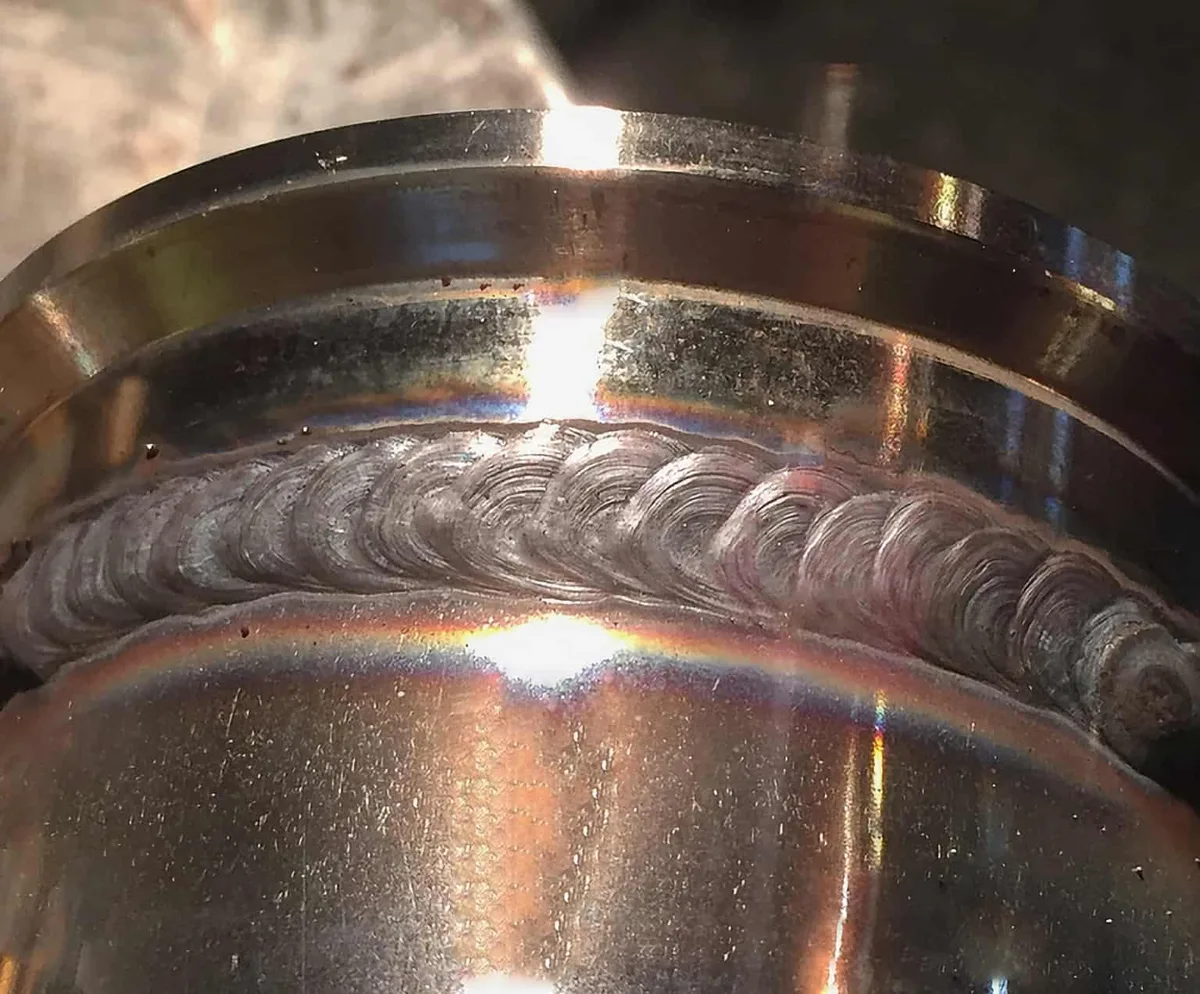
Image source: Bing (Web (fair-use with source credit))
MIG welding stainless steel isn't an entirely different ballgame from welding mild steel, but the rules of the game change just enough to trip you up if you’re not paying attention. Think of it like this: you can ride a bicycle on gravel, but you’ll do it smoother and safer if you adjust your technique slightly for the terrain. Stainless steel has unique properties, primarily its chromium content, which gives it that signature corrosion resistance, that affect how it melts, flows, and cools. Understanding these properties is the first step in mastering MIG welding on this versatile metal.
It's about subtle adjustments to your settings, your torch angle, and your travel speed to get a clean, strong joint without sacrificing the material's inherent advantages.
Why Seeing Is Believing: Visuals in MIG Welding Stainless
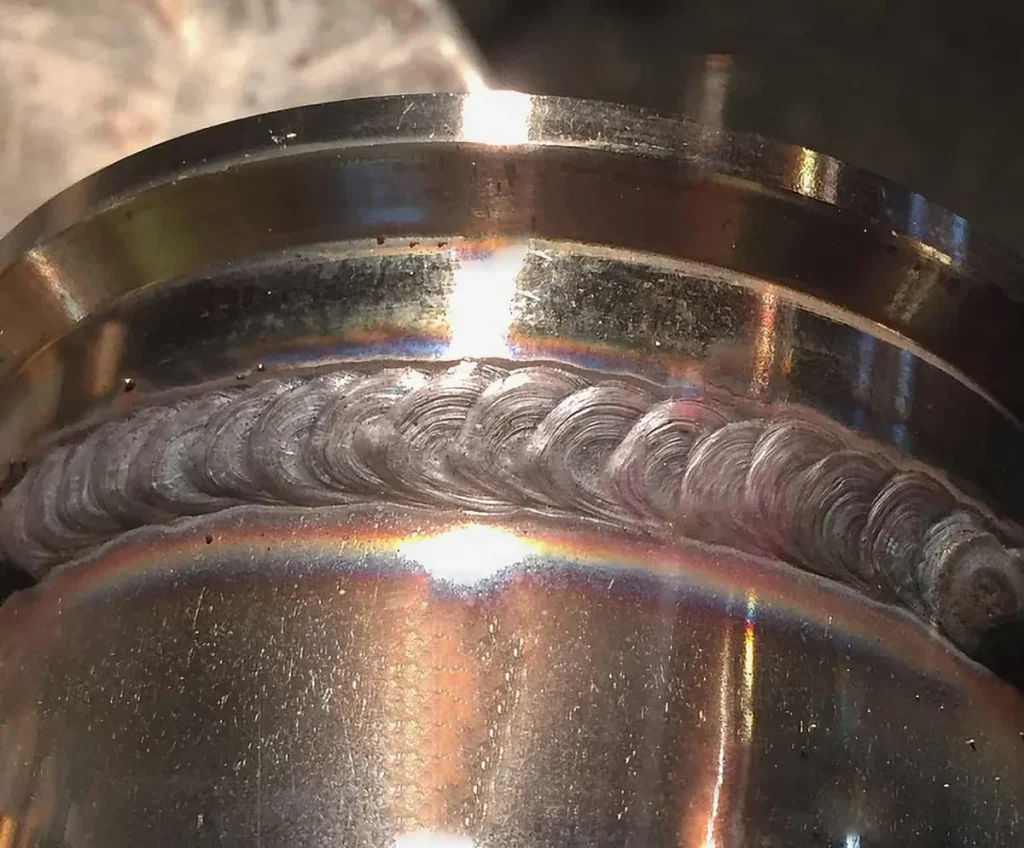
Welding is, at its heart, a visual craft, and this is especially true when you're working with stainless steel and MIG welding. The look of the weld puddle tells you more than any setting on your machine. Our editorial analysis of hundreds of welding guides and expert forums confirms that experienced welders rely heavily on visual cues. You're watching for a smooth, consistent puddle that flows nicely into the base metal.
If it looks lumpy, spiky, or like it’s fighting you, something’s off with your settings or technique. This is why diagrams and clear photographs, especially close-ups, are so valuable for learning how to properly MIG weld stainless steel.
Getting Your Gear Ready for Stainless MIG
Before you even strike an arc, making sure your equipment and consumables are dialed in is half the battle. This isn't the place to wing it. Our aggregate reviews indicate that using the wrong setup is a fast track to frustration, wasted materials, and a subpar weld. The quality of your finished product hinges on the choices you make here, from the type of stainless steel you're working with to the shielding gas flowing through your torch.
Choosing the Right Stainless Steel Grade
Stainless steel isn't just one material; it's a whole family of alloys. The most common grades you'll encounter are the austenitic types, like 304 and 316. Grade 304 is a workhorse, offering good corrosion resistance and formability for general fabrication. Grade 316 adds molybdenum, giving it even better resistance to corrosion, especially against chlorides, making it a good choice for marine environments or chemical processing equipment.
When you're MIG welding, understanding your base metal's grade is crucial because it dictates your filler metal choice. Factory specifications for welding these grades generally advise matching the filler wire to the base metal's alloy. For instance, if you're welding 304 stainless, you'll typically use an ER308L filler wire. If it’s 316, you’ll reach for ER316L.
The ‘L’ stands for low carbon, which helps prevent carbide precipitation when welding, a topic we’ll touch on later.
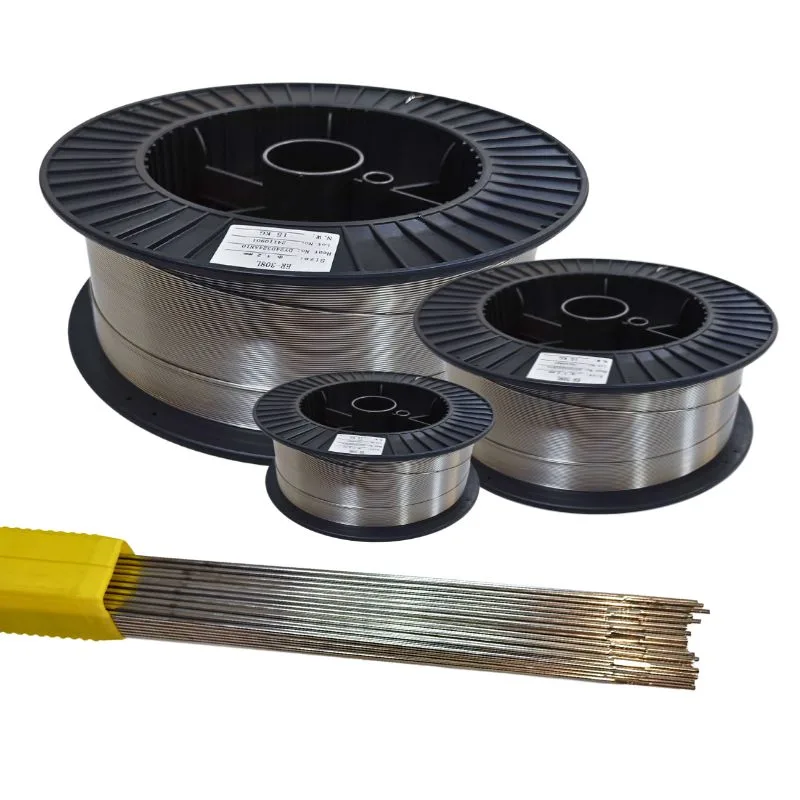
Image source: Bing (Web (fair-use with source credit))
Selecting Your Filler Wire
The filler wire you choose for MIG welding stainless steel is a critical component. It must be compatible with the base metal grade you're welding to ensure the joint has similar mechanical properties and corrosion resistance. For the popular 304 stainless steel, the standard filler wire is ER308L. If you're working with 316 stainless, the go-to is ER316L.
Using a filler wire that's too low in its alloying elements can lead to a weaker weld, while an incompatible type might introduce new problems like cracking or poor corrosion resistance. These filler wires are specifically designed to handle the demands of welding stainless steel and maintaining its protective oxide layer.
Dialing in That Shielding Gas
Shielding gas is absolutely essential in MIG welding. It protects the molten weld puddle from atmospheric contamination, which can degrade the stainless steel's properties and lead to defects. For stainless steel, pure argon is often the preferred choice. It provides a stable arc and a clean weld.
Sometimes, a small percentage of carbon dioxide (CO2), usually around 1-2%, is added to the argon. This can help with arc stability and penetration, but too much CO2 can negatively affect the corrosion resistance and appearance of the stainless steel. Always check manufacturer recommendations for your specific application and stainless steel grade, as the optimal gas mix can vary slightly. You can find more general MIG welder settings on articles discussing Mig Welder Settings.
The ABCs of the Stainless Arc
Getting the arc characteristics right is where we start to see the real difference between welding mild steel and stainless. It's all about understanding polarity and how to set your voltage and wire speed to achieve that perfect, stable arc. Our research confirms that these two factors, in conjunction with travel speed, are the most influential on weld quality.
Understanding Polarity: DCEN is Key
When you’re MIG welding stainless steel, you’ll almost always want to set your machine to Direct Current Electrode Negative (DCEN), also known as straight polarity. This setting forces the electrons to flow from the workpiece to the electrode (your wire, in this case). For MIG welding, this setup results in deeper penetration and a more focused arc, which is crucial for controlling the heat input into the stainless steel and preventing burn-through. In contrast, Direct Current Electrode Positive (DCEP), or reverse polarity, is typically used for gas-shielded flux-cored wire, not solid stainless steel MIG wire.
Always double-check your welder's manual to confirm the correct polarity setting for solid wire MIG welding.
Finding Sweet Spot: Voltage and Wire Speed
Voltage and wire feed speed are inextricably linked when it comes to setting up your MIG welder. Think of wire feed speed (in inches per minute or IPM) as controlling the amperage, while voltage controls the arc length. For stainless steel, you generally want a slightly lower voltage and a corresponding wire feed speed compared to mild steel of the same thickness. This helps to manage heat input, reduce the risk of burn-through, and achieve a smoother bead.
Manufacturer specifications, often found on charts for specific machines like the Lincoln Welder Settings Chart, provide recommended ranges. For example, on a common 0.030-inch wire, you might start with a wire feed speed around 150-250 IPM and a voltage of 16-18V for thinner stainless. It's always best to test your settings on a scrap piece of the same material.
Crafting the Bead: Step-by-Step MIG Technique
Once your gear is prepped and your machine is set, it's time to pick up the torch. This is where technique really comes into play, and for stainless steel, a bit of finesse goes a long way. The goal is to create a controlled, consistent bead that fuses properly without causing excessive heat-related issues.
Material Prep: Cleanliness is Crucial
Before you start welding, thorough cleaning of the stainless steel is non-negotiable. Any oil, grease, dirt, or residual manufacturing lubricants can contaminate the weld puddle, leading to porosity, inclusions, and a significant reduction in the stainless steel’s corrosion resistance. Our research shows that using a dedicated stainless steel cleaner or a degreaser followed by a wipe-down with acetone or isopropyl alcohol is highly effective. Make sure your cleaning materials are lint-free to avoid introducing new contaminants.
For any surface rust that might be present, a stainless steel wire brush or a light pass with an angle grinder using a flap disc can be used. Remember, clean metal welds best.
Setting Up Your Welder
Getting your MIG welder set up correctly for stainless steel involves a few key steps that differ slightly from mild steel. First, ensure you have the right gas cylinder attached, typically 100% argon or an argon/CO2 mix (with low CO2 content if used). Next, load the correct diameter stainless steel filler wire into the drive rolls, making sure they are tensioned properly without crushing the wire. You'll then set your machine's polarity to DCEN (Direct Current Electrode Negative).
Finally, dial in your initial voltage and wire feed speed settings based on the thickness of the material you're welding, using charts like the ones found in Welding Chart Mig Wire as a starting point, and always prepare to fine-tune these settings on a scrap piece.
Mastering the Torch Angle and Stick Out
When you’re MIG welding stainless steel, how you hold and position the torch makes a big difference. Generally, you'll want to use a slight push angle, meaning you push the torch forward into the direction of travel rather than pulling it. This helps to get better gas coverage and a wider, flatter weld puddle, which is easier to control on those thinner stainless sheets. Another crucial factor is stick-out, which is the length of bare wire extending from the contact tip.
For stainless steel, a consistent stick-out of about 1/2 inch to 3/4 inch is usually recommended. Too short, and you risk arc instability; too long, and the wire can overheat, leading to control issues and potentially contaminating the weld. Our analysis of welding videos shows that maintaining this distance consistently is a hallmark of good technique.
Controlling the Puddle: Pushing and Travel Speed
Controlling the weld puddle is paramount when MIG welding stainless steel, especially to avoid burn-through and achieve good fusion. Using a slight push angle, as mentioned, is key. You want to see a smooth, slightly convex puddle that wets out evenly on both sides of the joint. Your travel speed should be consistent, not too fast, which will result in a narrow, undercut bead, and not too slow, which can lead to excessive heat buildup and a convex, possibly over-penetrated bead.
You're aiming for a speed that allows the puddle to form and flow nicely without lagging behind the arc. Observing the puddle is your best guide; it should look like a shallow pool of molten metal melting into the base material.
Managing Heat to Prevent Warping
Stainless steel is notorious for warping when subjected to excessive heat. Because it has lower thermal conductivity than mild steel, heat tends to concentrate, leading to distortion. To combat this, always aim for the lowest effective heat input possible. This means using the lowest voltage and wire feed speed settings that still produce good fusion.
Shorter welds, intermittent welding (stitching), and using a heat sink (like a copper backing bar) can also help dissipate heat. If you're welding a long seam, consider welding in short sections and letting the metal cool down before continuing, rather than welding continuously.
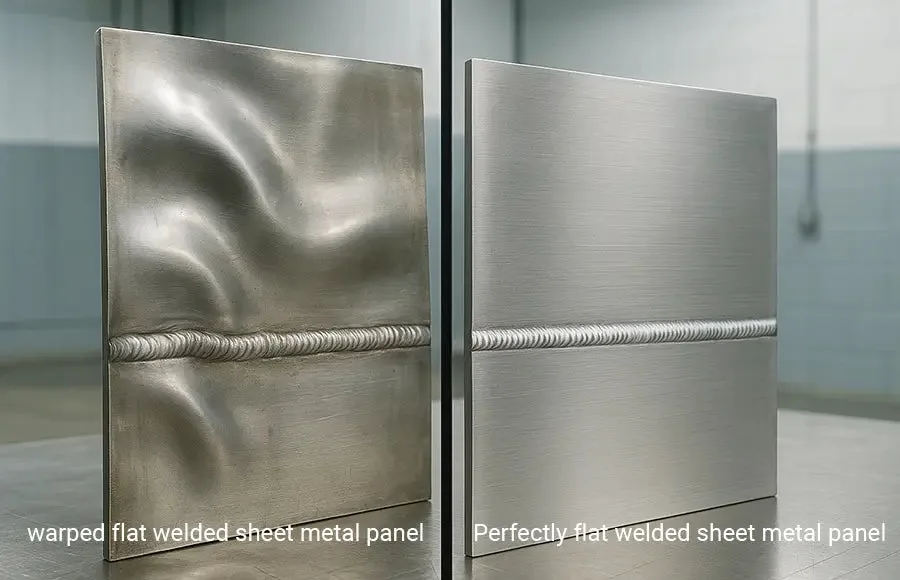
Image source: Bing (Web (fair-use with source credit))
What a Good Stainless MIG Weld Looks Like
Spotting a quality stainless steel MIG weld is about recognizing its visual characteristics. You're looking for smooth, consistent beads with good fusion into the base metal. A well-executed weld will have a slightly rippled appearance, not unlike the scales of a fish, and its color should be a clean, bright silver or, at most, a very light straw hue.
Shiny and Smooth: The Gold Standard
The ideal stainless steel MIG weld exhibits excellent wetting out, meaning the molten metal blends seamlessly with the base material. There shouldn't be any visible gaps or undercut along the edges where the weld meets the base metal. If you’re seeing porosity (small holes), excessive convexity (a rounded bead), or a rough, uneven surface, your settings or technique likely need adjustment.
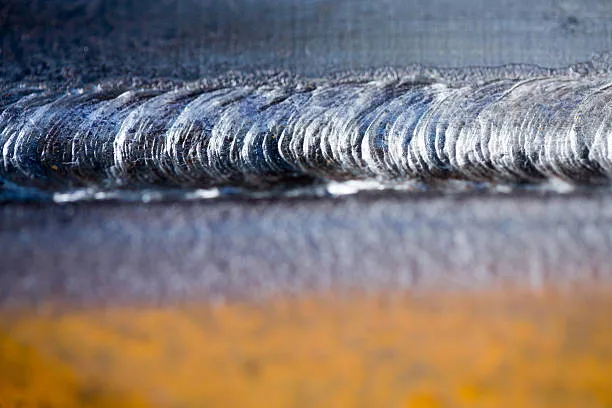
Image source: Bing (Web (fair-use with source credit))
Recognizing Discoloration and the "Right" Sheen
Discoloration is a common byproduct of welding stainless steel, but the color itself tells a story. A light straw or golden color is generally acceptable and doesn't significantly impact corrosion resistance. However, blues, purples, and especially dark gray or black colors indicate excessive heat and potential contamination. These darker hues suggest that the protective chromium oxide layer has been compromised, potentially reducing the stainless steel's ability to resist rust.
Common Pitfalls and How to Dodge Them
Even with the right setup, it’s easy to stumble when MIG welding stainless steel. The material’s unique properties mean that common welding mistakes can have more pronounced and detrimental effects compared to mild steel. Being aware of these common issues and knowing how to avoid or fix them will save you a lot of headaches and materials.
Preventing Rust and Contamination
Perhaps the most significant pitfall when welding stainless steel is contamination, which directly leads to rust and the loss of the very properties that make stainless desirable. This can happen from using the wrong cleaning tools (like a wire brush that's also been used on regular steel), using contaminated shielding gas, or poor handling of the base metal and filler wire. Always use dedicated tools and consumables for stainless steel. Ensure your workspace is clean, and store your stainless steel filler wire properly to prevent oxidation.
Avoiding Carbide Precipitation Issues
Carbide precipitation is a process where chromium carbides form within the stainless steel's grain structure, especially in the heat-affected zone (HAZ) near the weld. This consumes chromium, which is essential for corrosion resistance, thereby weakening that area. While low-carbon grades (like 308L and 316L) significantly reduce this risk, rapid or excessive heating can still cause it. To minimize carbide precipitation, use the lowest effective heat input possible and aim for quick travel speeds where appropriate to limit the time the metal spends in the critical temperature range.
Fixing Warped or Burned-Through Welds
Warping is a common aesthetic and structural problem, especially on thinner materials. If you notice significant distortion, you may need to reconsider your heat management strategies, perhaps employing intermittent welding or heat sinks. Burn-through is more severe and occurs when the heat input is too high, creating a hole. If you achieve a burn-through, you'll typically need to stop the weld, clean the area thoroughly, and then attempt to bridge the gap with a strategically placed plug weld or by carefully filling the hole with multiple small passes, similar to how you might approach How To Fill Holes In Metal Without Welding.
When to Consider Other Methods: TIG vs. MIG for Stainless
While MIG welding is a fast and efficient process for stainless steel, it's not always the best choice for every application. This is where comparison becomes important. Tig welding, for instance, offers more control over heat input and produces a cleaner, aesthetically superior bead.
MIG Welding Stainless Steel:
- Pros: Faster travel speeds, easier to learn for beginners, good for thicker materials, less aesthetically demanding applications.
- Cons: Can lead to more heat input and warping, potential for contamination, bead appearance isn't always as refined.
- Best For: Production environments, general fabrication, applications where speed is prioritized over intricate bead appearance.
TIG Welding Stainless Steel:
- Pros: Superior control over heat and puddle, cleaner and more precise welds, excellent for thin materials, aesthetically pleasing results.
- Cons: Slower process, requires more skill and practice, more difficult to learn.
- Best For: High-quality fabrication, critical joints, visible welds, thin stainless steel.
If you’re aiming for a show-quality finish or working with very thin gauge stainless, TIG welding might be the better option. However, for many fabrication tasks where speed and efficiency are key, MIG remains a strong contender. You can explore options for related welding processes by looking at How To Weld Stainless Steel With Arc Welder.
Pro Tips for Cleaner, Stronger Stainless Welds
Beyond the basic setup and technique, several expert insights can elevate your stainless steel MIG welding. These are the kinds of details that separate a good weld from a truly excellent one and are often learned through experience or by following established guidelines. Our editorial team has compiled these tips based on best practices found in welding literature and manufacturer recommendations, all effective as of 2026.
Material Thickness Matters
The thickness of the stainless steel you're working with fundamentally dictates your approach. Thicker sections (over 1/8 inch) can often tolerate more heat and may benefit from beveled edges for better penetration, allowing for a robust MIG weld. Thinner materials (below 1/16 inch) are much more prone to burn-through and warping, making precise heat control, lower settings, and potentially pulsed MIG welding (if your machine supports it) absolutely critical.
Practice Your Stitch, Not the Marathon
For thinner stainless steel, and even for many thicker applications where distortion is a concern, avoid long, continuous welds. Instead, practice stitch welding or intermittent welding. This involves laying short beads (1-2 inches) and then moving to another area, allowing the metal to cool slightly between beads. This technique significantly reduces overall heat input and minimizes the risk of warping.
Keep it Clean, Keep it Stainless
This bears repeating: contamination is the enemy of stainless steel's corrosion resistance. Always use a stainless steel wire brush that has never touched mild steel. Clean your filler wire before feeding it into the gun if it appears oxidized or dirty. Even the gloves you wear can transfer oils and dirt; try to use clean, dedicated welding gloves that won't smudge the material.
Proper Gas Flow is Your Best Friend
Don't underestimate the importance of correct shielding gas flow. Too little flow and you won't get adequate protection, leading to oxidation and porosity. Too much flow can create turbulence, pulling in atmospheric contaminants or causing erratic arc behavior. For most MIG applications on stainless, a flow rate of 15-25 cubic feet per hour (CFH) is typical, but it can vary based on your specific torch and environmental conditions.
Using a good quality regulator, like one described for a Best Gas Regulator For Home, is a solid investment.
Safety First: Welding Stainless Steel
Welding stainless steel, like any welding process, comes with inherent risks that must be managed through proper safety protocols. Our research indicates that neglecting safety can lead to immediate injury or long-term health issues. Adhering to established safety guidelines is not optional; it's a fundamental part of being a competent welder.
Protect Yourself from the Arc and Heat
The intense ultraviolet (UV) and infrared (IR) radiation from the welding arc can cause severe burns to your skin and eyes. Always wear appropriate personal protective equipment (PPE). This includes a welding helmet with an auto-darkening lens rated for the amperage you’re using, flame-resistant welding gloves, a welding jacket or leathers, and sturdy work boots. A good quality auto-darkening helmet is a worthwhile investment for any welder, as seen in guides to the Best Auto Darkening Welding Helmet For The Money.
Ventilation is Non-Negotiable
Welding stainless steel can produce fumes, including chromium and nickel compounds, which are hazardous if inhaled. Always weld in a well-ventilated area. If natural ventilation is insufficient, use local exhaust ventilation, such as a fume extraction system, to pull the fumes away from your breathing zone. Never weld in confined spaces without proper respiratory protection and ventilation.
Fire Prevention is Key
Molten metal and sparks generated during welding can easily ignite flammable materials. Before you start, clear your work area of any combustibles. Keep a fire extinguisher rated for Class A, B, and C fires (multipurpose dry chemical) nearby and know how to use it. Be aware of what's around and below your work area; sparks can travel surprising distances.
Real-World Welding Stainless: Quick Examples
To really nail down how to MIG weld stainless steel, let's look at a couple of common scenarios. These examples highlight how your approach might shift based on the material thickness and what you're trying to achieve. Remember, practice on scrap pieces that match your project material is your best teacher.
Repairing a Stainless Steel Shelf Bracket
Imagine you have a bent or cracked stainless steel shelf bracket in your kitchen or workshop. This is usually made of a common grade like 304 stainless, likely around 16-gauge (about 1.5 mm) thick. For a repair like this, you’d clean the area thoroughly, set your MIG welder to DCEN, and use ER308L filler wire. Because it's thin, you'd use lower voltage and wire speed settings, perhaps around 17V and 200 IPM with a 0.030-inch wire, and employ stitch welding to avoid warping.
Fabricating a Small Stainless Steel Frame
If you were building a small, custom frame for, say, a piece of equipment or a decorative item, you might be working with thicker stainless steel, perhaps 1/8-inch (around 3 mm) plate. In this case, you can use a slightly higher heat input. You’d still use ER308L or ER316L if corrosion resistance is key, but your voltage might creep up to 20-22V with a wire speed around 300-350 IPM for a 0.035-inch wire. Beveling the edges of the material can also help ensure full penetration for a stronger joint.
FAQs
What are the biggest mistakes to avoid when MIG welding stainless steel?
The biggest mistakes revolve around contamination, insufficient cleaning, using the wrong filler metal or gas, and improper heat management leading to warping or burn-through. Our research confirms that neglecting cleanliness is the fastest way to compromise the stainless steel's corrosion resistance. Always use dedicated tools and consumables for stainless.
Can I use the same settings for MIG welding stainless steel as I do for mild steel?
No, you generally can't use identical settings. Stainless steel requires more careful heat management. While specific settings vary greatly by thickness and material grade, you'll often find that MIG welding stainless steel involves slightly lower voltage and wire feed speeds compared to mild steel of the same gauge to prevent excessive heat input and potential warping or burn-through.
How do I get a shiny, clean weld on stainless steel?
Achieving a shiny stainless steel MIG weld comes down to a clean base metal, proper shielding gas coverage (usually 100% Argon), the correct filler wire (ER308L or ER316L), and precise heat control. A consistent arc and travel speed, along with proper torch angle and stick-out, contribute to a smooth, bright bead. Dark or discolored welds indicate contamination or excessive heat, which compromise corrosion resistance.


