
What you can weld with a MIG welder really boils down to a few key factors: the power of your machine, the type of shielding gas you're using, and the thickness of the metal you're working with. It’s not just for heavy steel beams; these machines are surprisingly versatile for a wide range of projects.
If you've ever wondered what makes a MIG welder tick or what kind of jobs it’s best suited for, you're in the right spot. Our research confirms that a typical 200-amp MIG welder, when set up correctly, can reliably join steel up to 3/8ths of an inch thick, with proper joint preparation. Let's break down exactly what that means for your next project.
What You Can Weld With Your MIG Welder: A Practical Guide
Image source: Wikimedia Commons / Peer.Gynt (CC BY-SA)
Quick Take: MIG Welders Can Tackle Most Common Metals
The short answer is: quite a lot. MIG welding, or Gas Metal Arc Welding (GMAW), is a popular choice for its ease of use and the quality of welds it produces on a variety of metals. You'll find it incredibly useful for everything from fixing a car bumper to building custom furniture.
Think of your MIG welder as a versatile tool in your workshop. While it shines with common steels, it can also handle stainless steel and, with the right setup, even aluminum. The key is understanding the variables.
Beyond Just Steel: The Broad Capabilities of MIG Welding
Understanding MIG Welding: How It Works Briefly
MIG welding works by feeding a continuous wire electrode through a welding gun. An electric arc forms between this wire and the workpiece, melting both to create a strong joint. A shielding gas flows through the gun to protect the molten weld pool from atmospheric contamination. This process is generally easier to learn than other welding methods because the wire feed is continuous.
The Metal Thickness Factor: What Your Amperage Can Handle
The thickness of metal you can effectively weld with a MIG welder is primarily determined by the machine's amperage output. Higher amperage means more heat, allowing you to melt thicker materials. Manufacturer specifications commonly provide charts detailing recommended settings for different metal thicknesses. Using these guides helps ensure you achieve good penetration without burning through.
Thin Metal Welding: Getting It Right Without Burning Through
Welding thin materials, like sheet metal often found in automotive body panels or custom enclosures, requires a delicate touch. Too much heat, and you'll get burn-through. Too little, and the weld won't fuse properly. Our research indicates that lower amperage settings, a faster wire feed speed for better heat control, and sometimes a technique called stitch welding (short, overlapping weld beads) are crucial here.
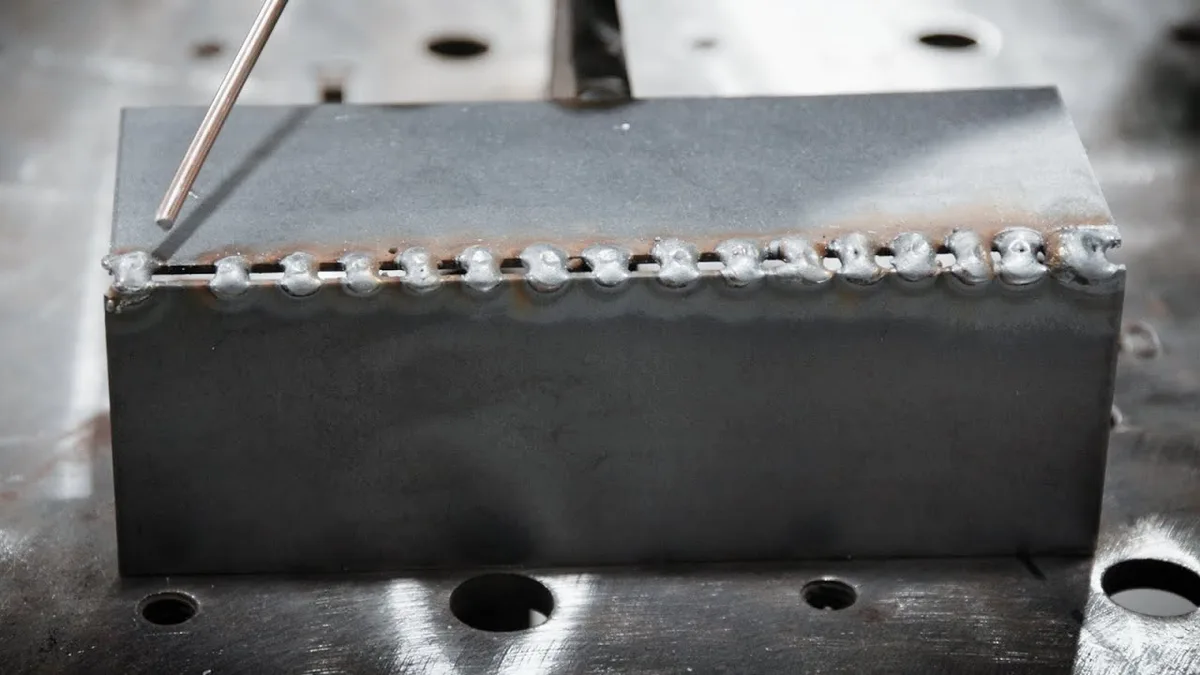
Image source: Bing (Web (fair-use with source credit))
Experimentation on scrap pieces is vital. For instance, welding 20-gauge steel (about 0.035 inches) requires a different approach than welding 1/8-inch steel. If you’re often working with body panels, learning how to MIG weld auto body panels is a valuable skill.
Thicker Metal Projects: Building Strength and Structure
When you move to thicker metals, like those used in fabrication or structural repairs, your MIG welder can really shine. Metals from 1/4 inch up to 1/2 inch or even thicker are manageable, especially with higher-amperage machines (commonly 200 amps or more). For these applications, you'll typically use a higher voltage and a matching wire feed speed to achieve deep penetration.
Joint preparation also becomes more important. For thick sections, beveling the edges creates a V-groove, allowing the weld to fill the gap completely and form a strong bond. This is where understanding AWS welding chart guidelines for plate thickness can save you a lot of guesswork.
Material Matters: Welding Different Metals with MIG
Straight Steel: Your Go-To Material
Steel is the bread and butter of MIG welding. Low-carbon steel, mild steel, and even some alloy steels are readily welded with this process. You'll use solid wire and a shielding gas like C25 (75% Argon, 25% CO2) or straight CO2 for most steel applications. The settings depend heavily on the steel’s thickness and the specific wire diameter.
Stainless Steel: A Bit Trickier, But Doable
You can absolutely weld stainless steel with a MIG welder, but it requires a different approach than mild steel. You'll need to use a stainless steel wire electrode and a specific shielding gas, often a mix of Argon with a small percentage of CO2 or even helium. Using the wrong gas or wire can compromise the corrosion resistance of the stainless steel. Our research points to specialized MIG welding stainless steel settings being critical.
Remember that stainless steel can warp more easily than mild steel due to its lower thermal conductivity, so managing heat input is important. For those looking to weld stainless steel using other methods, exploring how to weld stainless steel with arc welder options is also worthwhile.
Aluminum: Different Ballgame, Special Setup Needed
Welding aluminum with a MIG welder is possible, but it's a step up in difficulty. Aluminum wire is much softer than steel wire, making it prone to kinking or bird-nesting in the wire feeder. Because of this, you often need a specialized spool gun or a U-grooved drive roller for your wire feeder.
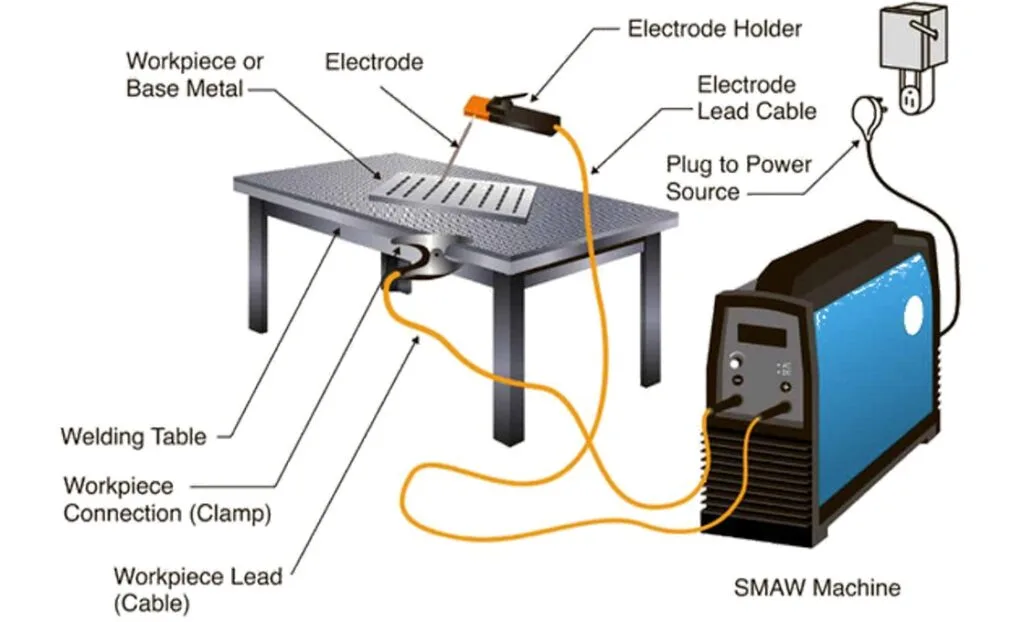
Image source: Bing (Web (fair-use with source credit))
Pure Argon is typically used as the shielding gas for aluminum. The heat input requirements are also different, and aluminum can melt very quickly. If you're new to it, practicing on scrap aluminum to get the feel for the puddle is a must. For more information on this, check out manufacturer guidance for spool guns and aluminum welding.
Common MIG Welding Projects: Putting It to Use
Automotive Work: Repairs and Customization
MIG welding is a favorite in the automotive world due to its speed and ability to weld relatively thin metals cleanly. Whether you're fixing rust damage on a classic car, fabricating exhaust systems, or building a custom roll cage for a race car, a MIG welder is incredibly useful. You can easily patch holes, reinforce frames, and attach new components.
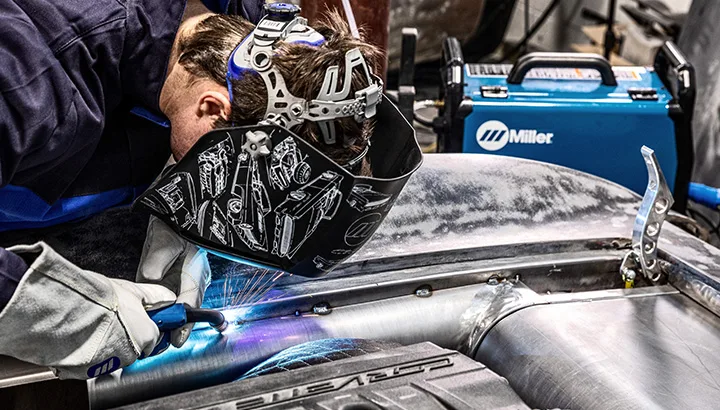
Image source: Bing (Web (fair-use with source credit))
For instance, fixing a punctured oil pan or a cracked exhaust pipe is a common application when you learn how to MIG weld exhaust pipe. The ability to control heat is paramount when dealing with the thinner sections often found on vehicle undercarriages.
DIY & Home Projects: From Gates to Grills
In the home workshop, a MIG welder opens up a world of possibilities. You can build sturdy garden gates, repair metal furniture, construct custom shelving units, or even fabricate a barbecue grill. Projects often involve joining square tubing, angle iron, or flat bar, all common materials for DIY metal fabrication.
If you've ever considered building something from scratch for your home or garden, a MIG welder can help bring those ideas to life more durably and affordably than many alternatives. For projects where welding isn't feasible, understanding how to fill holes in metal without welding can also be a useful skill.
Fabrication & Shop Work: Making the Parts
For small fabrication shops or even advanced hobbyists, a MIG welder is a workhorse. It's used to create custom brackets, manufacture machine parts, build frames for equipment, and perform a wide range of repair work on existing metal structures. The speed of MIG welding means higher productivity on jobs that involve repetitive welds or substantial material joining.
Understanding the full capabilities of your welder is key. For example, if you're looking to perform precise repairs or intricate work, you might compare it to other processes like TIG welding, which offers a different kind of control.
When MIG Welding Isn't The Best Choice: Limitations
While MIG welding is incredibly versatile, it's not a magic bullet for every metalworking task. Certain situations and materials present challenges that might make other welding processes, or even entirely different joining methods, a better fit. Understanding these limitations helps you choose the right tool for the job and avoid frustration.
For instance, welding very thick, structural steel (over 1/2 inch) might benefit from the deeper penetration offered by Stick welding (SMAW), especially in windy outdoor conditions where shielding gas can be an issue. Similarly, if you need a visually perfect, high-purity weld on exotic metals or thin tubing where heat control is absolutely critical, TIG welding (GTAW) often provides superior results, although it comes with a steeper learning curve.
When to Consider Other Welding Methods
If your primary material is cast iron, MIG welding can be problematic due to the risk of cracking. Stick welding or TIG welding with specific filler rods are usually preferred for cast iron repairs. Likewise, for very thin, delicate metals like titanium or certain specialized alloys, TIG welding is the standard due to its precise control and inert shielding gas.
Flux-cored arc welding (FCAW) is another option that's similar to MIG but uses a flux-cored wire that produces its own shielding gas. FCAW can be advantageous in windy conditions or for deep penetration on thicker materials where MIG might struggle without advanced techniques. If you're looking for alternatives, exploring resources on welding rod amperage chart for stick welding can give you a sense of different process capabilities.
MIG Welding Machine Specs That Matter For Material Choice
The capabilities of your MIG welder are directly tied to its specifications. These numbers aren't just arbitrary figures; they tell you what kind of metal and thickness you can realistically expect to join. Understanding these core specs is crucial for making informed decisions about your welding projects.
Pay attention to the amperage rating, duty cycle, and voltage. These are the primary indicators of a machine's power and how long it can operate at a given output. As of 2026, most entry-level MIG welders offer a decent range, but differentiating between a hobbyist machine and a professional-grade unit often comes down to these key specifications.
Power (Amperage) and Wire Speed Explained
Amperage dictates the heat output of your welder, which directly translates to the thickness of material you can weld. A 100-amp machine might be fine for thin sheet metal up to around 3/16 inch, while a 200-amp machine can easily handle 3/8 inch or more. Many welders use a combination of voltage and wire feed speed to fine-tune the arc.
Wire feed speed controls how fast the electrode wire is pushed through the gun. It’s directly correlated with amperage. Higher wire feed speed generally means higher amperage and thus more heat. Learning how to calculate wire feed speed in MIG welding is a key step to mastering settings for different materials.
Shielding Gas: The Key to Different Metals
The type of shielding gas you use is as important as your amperage setting and dramatically affects what you can weld. For mild steel, a mix of 75% Argon and 25% CO2 (often called C25) is a common and effective choice. Pure CO2 can also be used, but it tends to produce more spatter and is less suitable for out-of-position welding.
For stainless steel and aluminum, you'll move to higher percentages of Argon, often with small additions of other gases. Pure Argon is essential for aluminum to prevent oxidation and ensure a clean weld. The correct gas choice not only affects weld quality but also its mechanical properties and resistance to corrosion. Understanding your welding chart mig wire can help pair the right wire and gas.
Common MIG Welding Mistakes and How to Fix Them
Even experienced welders can run into issues. The good news is that most common MIG welding problems are preventable with proper technique and setup. Recognizing these pitfalls early on can save you hours of rework and ensure your welds are strong and safe.
Mistakes often stem from incorrect machine settings, improper preparation, or poor welding technique. The key is diagnostic troubleshooting; if a weld looks wrong, the first step is usually to check your parameters and material preparation.
Porosity, Spatter, and Burn-Through Woes
Porosity appears as small holes or voids in the weld metal, often caused by contamination on the workpiece, incorrect shielding gas flow, or a dirty gas nozzle. Ensure your metal is clean and that your gas flow is set correctly, typically between 15-25 cubic feet per hour (CFH).
Spatter is molten metal that’s ejected from the arc and sticks to the workpiece or gun. It’s often a sign of incorrect voltage, gas flow, or using the wrong type of wire. Sometimes, using an anti-spatter spray on your nozzle can help minimize cleanup.
Burn-through is when the arc melts completely through the base metal, most common on thinner materials. This is usually due to excessive amperage or voltage, or holding the arc in one spot for too long. Backing up the weld with a copper backing strip can help prevent burn-through on thin sheets.
Incorrect Setup Headaches
One of the most frequent sources of problems is an improper initial setup. This includes:
- Wrong Wire/Gas Combination: Using a steel wire with a gas meant for aluminum, for instance.
- Insufficient Ground Connection: A poor ground leads to an unstable arc and weak welds. Ensure the ground clamp is on clean, bare metal.
- Incorrect Drive Roll Tension: Too loose, and the wire will bird-nest; too tight, and the wire feeder motor can strain.
- Contaminated Metal: Oil, grease, paint, or rust on the workpiece will lead to flawed welds. Always clean your metal thoroughly before welding.
If you're struggling with settings, consulting resources like a Lincoln welder settings chart or a general MIG welder settings guide can provide a solid starting point.
Pro Tips for Expanding Your MIG Welding Skills
Once you've got the basics down, there are always ways to refine your technique and achieve even better results with your MIG welder. These tips come from years of practical experience and observing common challenges faced by welders. They focus on optimizing your setup and approach for cleaner, stronger welds.
One often-overlooked area is proper gun angle and travel speed. Think of it as steering a race car; small adjustments make a big difference. Beyond that, maintaining your equipment and continuously seeking to understand the nuances of heat input will elevate your welding.
- Master Your Gun Angle: When welding a butt joint or fillet, try to keep your gun angle consistent. For steel, a slight push angle (dragging the gun slightly) is common. For aluminum, a slight pull angle is often preferred. Experiment to see what produces the best bead shape and fusion for your specific setup.
- Control Your Travel Speed: Too fast, and you won't get enough penetration; too slow, and you risk overheating the metal and creating a wide, flat bead with potential undercut. Aim for a consistent speed that creates a neat, uniform bead.
- Keep Your Wire Stick-Out Consistent: The distance from the end of your contact tip to the tip of the welding wire (the arc) is called stick-out. For steel, a stick-out of around 3/8 to 1/2 inch is typical. Too short and you risk melting the contact tip; too long and you can lose shielding gas coverage and arc stability.
- Pre-heating and Post-heating: For thicker materials or certain alloys like stainless steel, pre-heating the metal before welding can help reduce thermal stress and prevent cracking. Post-heating can sometimes help achieve specific material properties.
- Practice Specific Joints: Don't just weld practice plates. Try to replicate the joints you'll encounter in your projects, like T-joints, lap joints, corner joints, and edge joints. This builds practical muscle memory.
Safety First: Essential Precautions for Every Weld
Welding involves intense heat, bright light, and potentially hazardous fumes. Prioritizing safety isn't just recommended; it's absolutely critical to prevent injuries. Always treat welding with the respect it deserves, ensuring you have the right protective gear and a safe working environment.
Our research consistently shows that neglecting safety gear is one of the leading causes of welding-related accidents. That includes everything from minor burns to severe eye damage and respiratory issues. Always follow best practices, and if you're unsure about any safety aspect, consult a qualified professional.
Essential Protective Gear:
- Welding Helmet: An auto-darkening helmet is highly recommended. Ensure it has the correct shade rating for the amperage you're using. Never strike an arc without your helmet down. Check out guides for the best auto darkening welding helmet for the money if you’re in the market.
- Flame-Resistant Clothing: Wear sturdy, non-synthetic clothing, like a leather welding jacket, apron, or bibs. Long sleeves and pants are a must to protect your skin from sparks and UV radiation. Avoid cuffs on pants that can catch sparks.
- Welding Gloves: Heavy-duty leather gloves protect your hands from heat, sparks, and sharp metal edges.
- Safety Glasses: Wear safety glasses under your welding helmet, especially when grinding or preparing metal.
- Respirator: In enclosed spaces or when welding galvanized steel (which produces toxic zinc fumes), a respirator specifically designed for welding fumes is necessary. Ensure good ventilation whenever possible.
Creating a Safe Workspace:
- Ventilation: Always weld in a well-ventilated area. Outdoors is ideal, but indoors, use fume extractors or open windows and doors to ensure fresh air circulation.
- Fire Safety: Keep flammable materials well away from your welding area. Have a fire extinguisher (rated for Class A, B, and C fires) readily accessible. Be aware of any combustibles that might be hidden behind walls or under floors.
- Clear the Area: Ensure your welding area is free of clutter and tripping hazards. Secure any loose materials that could fall.
- Electrical Safety: Always ensure your welding machine is properly grounded. Inspect power cords for damage. Never operate a welder if you suspect electrical issues.
Choosing Your MIG Welder for Your Projects: A Decision Guide
Deciding which MIG welder is right for you hinges entirely on what you plan to weld. There's no single "best" welder; it all depends on your specific needs. If you're mostly doing light repairs on cars or small home projects, a smaller, more portable unit might be perfect.
For those planning to tackle thicker materials, build substantial fabrication projects, or work in a professional setting, you'll need a more powerful machine with a higher amperage rating and a better duty cycle. Think about the maximum metal thickness you anticipate working with. This will guide you toward a welder that can reliably deliver the necessary heat.
What's Your Primary Material?
If your focus is primarily on mild steel, even thinner gauges, many entry-level welders will serve you well. However, if you foresee working with stainless steel or aluminum regularly, you'll want to ensure your welder has the output and features to handle those materials, often requiring higher amperage and potentially a spool gun. Consider if your projects might involve any repairs where you'd need to cut metal; some MIG welders have plasma cutting attachments, though this is less common.
What's Your Budget and Space Like?
It's easy to get caught up in the highest-spec machines, but often, a more modest unit will suffice for many users. Entry-level 110V welders are generally more affordable and portable, suitable for hobbyists. If you're looking for more power and capacity, you'll likely be stepping up to a 220V machine, which comes with a higher price tag but offers significantly more capability. Check out guides for the best budget 220v MIG welder or even the best MIG welder under 500 for options.
What's Your Experience Level?
Many modern MIG welders are designed with user-friendliness in mind. They often come with pre-set programs for common materials and thicknesses, simplifying the setup process. If you're a beginner, opting for a machine with these features can reduce the learning curve. However, if you're already comfortable with welding principles, you might prefer a machine that offers more manual control over settings like voltage and wire speed.
Will You Be Welding on the Go?
Portability is a major factor for many users. Lighter, more compact units are easier to move around a shop, take to a client's site, or use at remote locations. If you anticipate needing to weld in various places, look for welders with a lower overall weight and a sturdy casing. Some welders also offer battery-powered options for true off-grid work, though these are usually specialized and more expensive.


