Setting up for 16 gauge and not sure where to start with amperage? Getting it wrong by even 10–15 amps on sheet metal this thin means the difference between a clean bead and a hole you didn’t plan for.
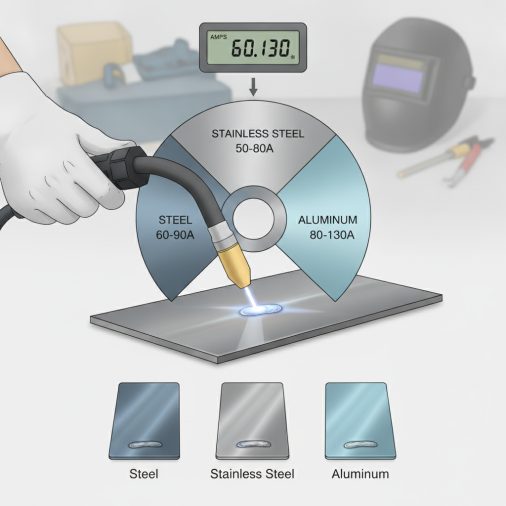
For TIG welding 16 gauge mild steel (0.0598 inches / ~1.5mm), the typical starting amperage is 60–80 amps DCEN. Stainless steel runs slightly cooler at 55–75 amps due to its lower thermal conductivity. Aluminum at 16 gauge generally requires 80–100 amps AC. These are starting points — joint fit-up, travel speed, torch angle, and filler use all affect the final setting.
Why 16 Gauge Demands More Precision Than Thicker Stock
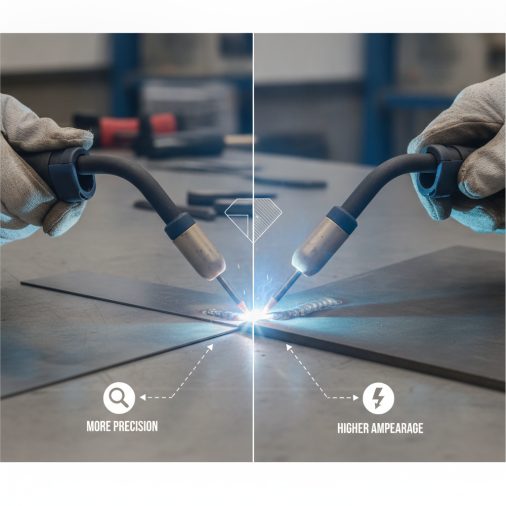
16 gauge sits right in the zone where TIG welding earns its reputation for precision work. It’s thin enough to burn through quickly but thick enough to handle structural applications like exhaust components, brackets, and sheet metal fabrication.
The challenge is that TIG puts heat directly into a small area. Unlike MIG, there’s no burn-off from wire speed to create a buffer. Every amp matters at this thickness, and a half-second of hesitation with a puddle running too hot will punch through.
Amperage Starting Points by Material
Material type is the biggest variable when setting amperage for 16 gauge. Each metal has a different thermal conductivity and melting point, which changes how aggressively the arc moves heat into the base metal.
Material
Thickness (inches)
Starting Amperage
Current Type
Mild Steel
0.0598" (16g)
60–80A
DCEN
Stainless Steel
0.0598" (16g)
55–75A
DCEN
Aluminum
0.0598" (16g)
80–100A
AC
Chromoly (4130)
0.0598" (16g)
60–80A
DCEN
Stainless steel holds heat longer than mild steel, so the puddle stays fluid longer. Running the lower end of the range — around 55–65 amps — and moving slightly faster usually produces cleaner results than trying to push heat aggressively into it.
Aluminum needs AC current, which provides the oxide-cleaning action the material requires. The higher amperage range accounts for aluminum’s high thermal conductivity — heat dissipates fast, but also travels further from the weld zone, which can cause distortion on longer seams.
The 1 Amp Per Thousandth Rule (And When It Breaks Down)
A commonly cited TIG rule of thumb is 1 amp per 0.001 inch of material thickness. At 16 gauge (0.0598 inches), that puts you at roughly 60 amps — which aligns well with mild steel on flat, open joints.
In practice, this rule works reasonably well as a floor, not a ceiling. Start there and adjust up based on:
– Joint type — a T-joint requires more heat than a flat butt joint because the filler needs to flow into both legs
– Filler rod use — feeding filler cools the puddle slightly, which may require a few more amps to maintain proper fusion
– Position — overhead or vertical welding usually means dropping 5–10 amps to prevent the puddle from sagging
– Fit-up gaps — any visible gap at the joint demands lower amperage to avoid burning through before fusion occurs
The rule also assumes DCEN on ferrous metals. Aluminum breaks it entirely because AC and oxide cleaning change how the arc interacts with the surface.
Tungsten Size and Type for 16 Gauge
Amperage settings don’t exist in isolation — they’re connected to tungsten selection. Running the right tungsten for your amperage keeps the arc stable and the tip geometry consistent.
For 60–100 amps on 16 gauge:
– 1/16-inch (1.6mm) tungsten is the standard choice and handles the full range comfortably
– 3/32-inch (2.4mm) tungsten works if you’re toward the upper end or welding aluminum where a balled tip is preferred
For steel and stainless, a sharpened 2% ceriated or 2% lanthanated tungsten like the Diamond Ground Products 2% Lanthanated Tungsten provides a stable arc at lower amperage without the contamination issues pure tungsten can cause on DCEN. For aluminum AC welding, pure tungsten or a zirconiated tungsten is typically preferred to form a clean ball.
Choosing the wrong tungsten is one of the most common reasons a TIG arc starts spitting unexpectedly — an oversized electrode won’t ionize properly at lower amperages, and an undersized one will overheat and contaminate the weld.
Foot Pedal vs. Fixed Amperage on 16 Gauge
This is where TIG welding 16 gauge gets noticeably easier with a foot pedal. Because sheet metal heats up progressively as you travel down a seam, the heat-affected zone grows and the base metal becomes more susceptible to burn-through as you go.
A foot pedal lets you start at full amperage to establish the puddle and then gradually back off — usually down to 50–60% of the starting value by the time you’re 6–8 inches into a longer weld.
TIG welding without a foot pedal on 16 gauge is manageable but requires deliberate technique. Set your machine to the lower end of the range (around 65 amps for mild steel) and compensate by increasing travel speed slightly as the metal heats up. Stitch welding — short passes with cooling intervals — is the other practical option.
Common Mistakes When Setting Amperage for 16 Gauge TIG
Most burn-through and lack of fusion problems on 16 gauge come from a handful of predictable errors.
Running too hot:
– Puddle forms almost immediately before you establish control
– Edges of the joint melt back faster than filler can keep up
– Burn-through appears midway through a seam as metal soaks heat
Running too cold:
– Arc is present but the puddle doesn’t wet out smoothly
– Filler balls up instead of flowing into the joint
– Weld bead sits on top of the metal rather than fusing in
Inconsistent arc length:
– Keeping the torch too far from the work increases effective voltage and spreads heat unpredictably
– On 16 gauge, aim to maintain an arc length roughly equal to the tungsten diameter — about 1/16 inch for most setups
Getting consistent results also depends on understanding how to adjust when metal thickness changes mid-project, which is common in fabrication work involving brackets or gussets welded to sheet panels.
Practical Amperage Adjustments for Joint Position
Welding position shifts how heat builds and where gravity pulls the puddle. A flat butt joint on a welding table and an overhead T-joint on the same 16 gauge material are genuinely different scenarios.
Position
Amperage Adjustment
Flat (1F / 1G)
Use base setting
Horizontal (2F / 2G)
Reduce 5–10%
Vertical (3F / 3G)
Reduce 10–15%
Overhead (4F / 4G)
Reduce 10–20%
These are approximate. The more important variable is puddle behavior — if the puddle is sagging or running ahead of the torch in vertical or overhead work, reduce amperage and travel faster rather than fighting gravity with technique alone.
FAQ
What tungsten diameter should I use for TIG welding 16 gauge at 70 amps?
A 1/16-inch (1.6mm) tungsten is ideal for 70 amps on 16 gauge material. It maintains a stable, focused arc at that amperage range. Using a 3/32-inch tungsten at 70 amps typically results in a wandering arc because the larger diameter needs more current to ionize properly. Stick with 1/16-inch unless you’re working consistently above 90 amps.
Can I TIG weld 16 gauge without burning through on a butt joint with no gap?
Yes, a tight butt joint on 16 gauge is one of the easier setups. Start at 65–70 amps for mild steel, establish the puddle quickly, and maintain a steady travel speed. The key is not pausing at any point along the seam. Any hesitation causes the puddle to grow and the edges to drop away. Using a backing bar (copper or steel) beneath the joint also helps absorb heat.
Why does my 16 gauge stainless steel weld turn black and discolored?
Discoloration on stainless is almost always a heat or shielding issue. At 16 gauge, using more than 75 amps on stainless tends to dump excessive heat into the HAZ (heat-affected zone). Reduce amperage to 55–65 amps, check that post-flow gas is running for at least 5–7 seconds after the arc stops, and make sure your argon coverage is solid. Welding stainless steel at home involves a few extra shielding precautions that are easy to overlook.
Does filler rod diameter affect the amperage I need for 16 gauge TIG?
It has a minor effect. A larger filler rod (3/32-inch) cools the puddle more than a 1/16-inch rod, which may require bumping amperage up 5–8 amps to maintain proper fusion. For 16 gauge, most welders use 1/16-inch filler to match the base metal thickness. Selecting the right TIG welding filler rod for your material also affects penetration and bead appearance.
What’s the minimum amperage that will still achieve fusion on 16 gauge mild steel?
In practice, anything below 50 amps on 16 gauge mild steel starts to become unreliable for full fusion, especially on T-joints or lap joints where heat needs to reach both pieces. You might see an arc and a bead form, but penetration will be shallow. A starting point of 60 amps is the realistic floor for consistent fusion, with adjustments upward based on joint configuration and position.
Can I set a fixed amperage on my TIG welder and not use a pedal for 16 gauge?
Yes, many welders run fixed amperage for short welds, tack passes, and positional work. Set the machine to the lower end of the recommended range — around 65 amps for 16 gauge mild steel — and rely on travel speed and stitch welding to control heat buildup. The right tungsten selection becomes especially important at fixed amperage because you can’t compensate for arc instability with pedal adjustments.
Is 16 gauge the same as 1.5mm in TIG welding settings?
They’re close but not identical. 16 gauge steel is 0.0598 inches, which is approximately 1.52mm. For practical purposes, treat them as equivalent when setting amperage. The difference is small enough that the same 60–80 amp starting range applies to both. Where it matters more is in filler rod matching, where a true 1.5mm rod versus a 1/16-inch (1.587mm) rod creates a minor difference in heat draw from the puddle.
For 16 gauge TIG welding, start in the 60–80 amp range on mild steel, pull back slightly for stainless, and move up to 80–100 amps on aluminum with AC. These numbers are starting points — real control comes from reading the puddle and adjusting travel speed to match how the metal is responding. A welder that runs clean at 70 amps on flat plate may need 60 amps doing the same joint out of position. Trust the puddle more than the dial.