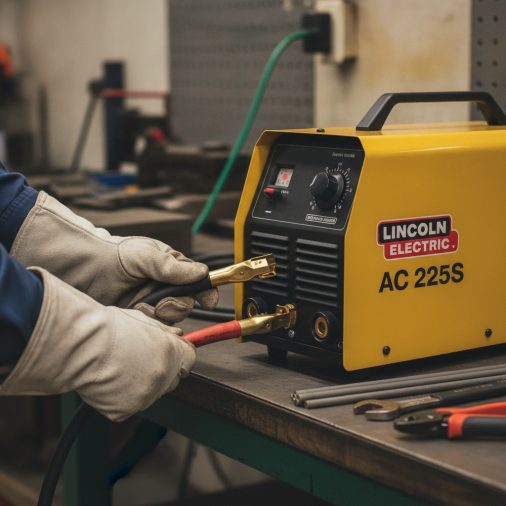
The Lincoln Electric AC 225 is one of the most recognizable stick welders ever built. It’s simple, rugged, and capable — but if you’ve never set one up before, figuring out which lead goes where and how to wire the plug can cause real confusion.
To wire a Lincoln AC 225, connect the electrode holder (stinger) lead to one output terminal and the work clamp (ground) lead to the other. For AC welding, polarity doesn’t matter — either terminal works for either lead. For the power plug, wire the two hot legs (typically black and red) to the two hot terminals on a 240V outlet plug, and the bare copper ground wire to the ground terminal. No neutral wire is required.
What’s Actually in the Box (and What You’ll Need)
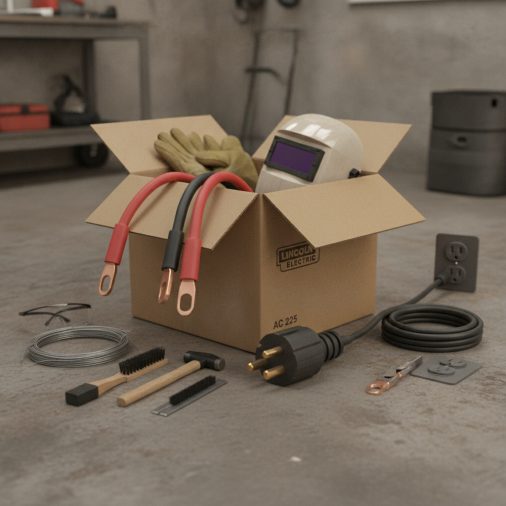
The Lincoln Electric AC 225 comes with two welding leads already attached in most configurations: a stinger lead with an electrode holder and a work lead with a ground clamp. Some older or refurbished units may have bare leads that need to be connected to the machine’s output terminals.
Before touching anything, gather what you need:
– A 50-amp 240V NEMA 6-50 plug (most common for this machine)
– A 6 AWG or 8 AWG three-conductor cable rated for the amperage draw
– A flathead and Phillips screwdriver
– Wire strippers
– A voltmeter to verify your outlet wiring if unsure
The AC 225 draws roughly 50 amps at full output, so the plug and wiring must be sized appropriately. A 6 AWG cable is the safer choice for regular use.
Wiring the Welding Leads to the Output Terminals
If your AC 225 has output terminals exposed (meaning the leads aren’t pre-connected), here’s how to attach them properly.
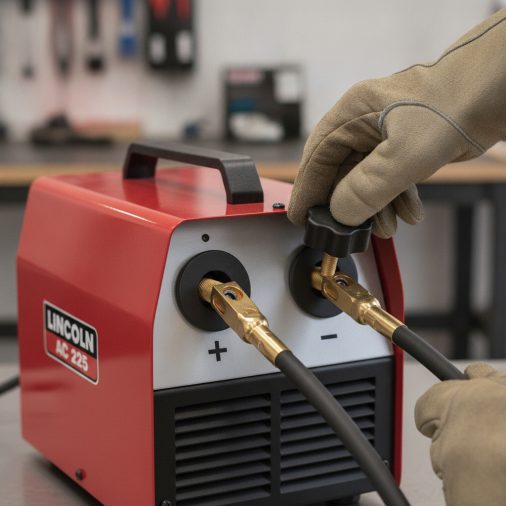
The machine has two output stud terminals on the front or side panel — typically labeled or marked with a “+” and “−” symbol. On an AC machine, these labels are mostly cosmetic for reference purposes. The AC current alternates, so there is no fixed polarity.
Step-by-step:
1. Make sure the welder is completely unplugged from the wall before touching any terminals.
2. Locate the two output terminals on the machine.
3. Connect the electrode holder lead (the one with the stinger/clamp that holds the rod) to one terminal.
4. Connect the work clamp lead to the other terminal.
5. Tighten the terminal nuts or wing bolts securely — a loose connection causes heat buildup and arc problems.
For most mild steel applications, putting the electrode holder on the positive-labeled terminal and the work clamp on the negative terminal is a common starting point, though it won’t functionally change the AC output.
If you’re using DC-capable rods and want specific polarity (when using an external rectifier), that’s a different setup — but with the standard AC 225, you’re always running alternating current regardless of which lead is on which terminal.
Understanding stick welding settings and polarity concepts can help you make better use of different electrode types as you gain experience.
Wiring the 240V Plug Correctly
This is where many first-timers get nervous — and it’s the most important part to get right.
The Lincoln AC 225 runs on 240V single-phase power and does not use a neutral wire. It only needs two hot legs and a ground. This is different from standard 120V wiring, so don’t let it confuse you.
The plug you need: NEMA 6-50P (a 50-amp, 250V, two-hot-plus-ground plug)
Step-by-step plug wiring:
1. Cut the power cable to the length you need and strip about 6 inches of the outer jacket.
2. Strip about ¾ inch of insulation from each individual conductor.
3. Open the plug housing by removing the screws.
4. Connect the black wire to one hot terminal (marked “X” or “Hot 1”).
5. Connect the red wire (or second black wire) to the other hot terminal (marked “Y” or “Hot 2”).
6. Connect the bare copper or green wire to the ground terminal (marked “G” or with a ground symbol).
7. Tighten all screws firmly, close the housing, and re-tighten the strain relief clamp around the cable jacket.
Do not connect a white neutral wire to any terminal. The AC 225 has no neutral connection, and using a neutral as a hot leg is a serious wiring hazard.
If your workshop is wired with a NEMA 14-50 outlet (common in garages that also support EV chargers or dryers), you’ll need a different plug or a pigtail adapter — not a rewired cable.
Checking Your Outlet Wiring First
Before plugging in the welder, take a moment to verify the outlet itself is correctly wired. A miswired 240V outlet is a common issue in older shops and garages.
Use a voltmeter and check:
– Between the two hot slots: Should read approximately 240V
– Between each hot slot and ground: Should read approximately 120V each
– Between ground and neutral (if a neutral is present): Should read 0V
If any of those readings are off, the outlet needs to be inspected by a licensed electrician before you plug in any high-draw equipment.
Output Terminal Lead Configurations at a Glance
Lead
Connection Point
Notes
Electrode holder (stinger)
Either output terminal
Holds the welding rod
Work clamp (ground clamp)
Remaining output terminal
Clamps to the workpiece or welding table
Polarity
Not fixed on AC
Alternates — both terminals are functionally equal
Common Wiring Mistakes to Avoid
A few errors come up repeatedly when people wire this machine for the first time.
Using the wrong plug gauge: Some people grab a lighter-duty 240V plug that’s only rated for 30 amps. At full output, this becomes a fire hazard. Always use a 50-amp plug and 6 AWG cable minimum.
Loose output terminal connections: The wing nuts or stud bolts on the output terminals need to be tight. A loose connection creates resistance, causes the terminal to overheat, and gives you a weak or erratic arc. If your arc is inconsistent right out of the box, check the terminal connections before anything else.
Connecting the neutral wire: If your cable has a white neutral wire, tape it off and leave it disconnected. The AC 225 has a two-hot system. Connecting neutral where it doesn’t belong can create a shock hazard.
Running an undersized extension cord: If you need extra reach, the extension cord must be rated for 240V and 50 amps with 6 AWG conductors. Most consumer extension cords are nowhere near sufficient. Keep runs as short as possible.
If after setup your arc still isn’t starting correctly, this stick welder not arcing troubleshooting guide covers the most common causes and fixes.
Setting the Amperage Dial After Wiring
Once everything is wired and plugged in, the AC 225 is controlled by a single amperage dial. The range is typically 40 to 225 amps.
For general reference:
– 1/16″ rods (6013): 40–70 amps
– 3/32″ rods (6013/6011): 65–90 amps
– 1/8″ rods (6013/6011/7018): 90–130 amps
– 5/32″ rods (7018): 130–180 amps
The dial is a continuous variable control — there are no preset voltage taps like on some other transformer welders. This makes it easy to fine-tune your arc for different material thicknesses. For more detailed amperage guidance by rod type and material, the stick welder settings chart for amps and rods is a practical reference to keep nearby.
If you’re welding thinner material and worried about burn-through, how to weld thin metal with an arc welder explains how to adjust your approach.
FAQ
What plug does the Lincoln AC 225 use?
The Lincoln AC 225 typically uses a NEMA 6-50 plug — a 50-amp, 250V two-hot-plus-ground configuration. Some installations use a NEMA 14-50 outlet, but the correct plug for a standard AC 225 setup is the 6-50P. Always verify your outlet type before buying a plug.
Does polarity matter when connecting leads on the Lincoln AC 225?
No. Because the AC 225 outputs alternating current, polarity is not fixed. The current reverses direction many times per second, so it makes no functional difference which lead is on which output terminal. Both terminals deliver the same AC output during welding.
Can I use the Lincoln AC 225 on 120V power?
No. The AC 225 is designed exclusively for 240V single-phase power. Attempting to run it on 120V will not work and may damage the machine or circuit. You need a properly wired 240V outlet with a 50-amp breaker.
What wire gauge should I use for the power cable on a Lincoln AC 225?
Use 6 AWG (American Wire Gauge) copper conductors for runs up to about 50 feet. For shorter runs, 8 AWG can technically handle the load, but 6 AWG provides a safer margin. Never use aluminum wiring for the plug connection on this machine.
Why does my Lincoln AC 225 arc feel weak after I wired it up?
A weak arc is most often caused by a loose connection at the output terminals, an undersized power cable, a low voltage supply (check your outlet), or a dirty or corroded work clamp connection on the metal. Check all connections before adjusting amperage settings.
Do I need a neutral wire when wiring the plug for the AC 225?
No. The AC 225 uses only two hot legs and a ground. There is no neutral connection on this machine. If your cable has a white wire, it should be taped off and left unused. Connecting it to any terminal creates a wiring hazard.
What amperage breaker does the Lincoln AC 225 require?
A dedicated 50-amp double-pole circuit breaker is standard for this machine. The outlet, wiring, and breaker should all be rated for 50 amps. Running the AC 225 on an undersized breaker will cause nuisance trips during heavy welding.
Getting It Right the First Time
The Lincoln Electric AC 225 is a straightforward machine once you understand its power requirements. Two leads into the output terminals, a three-conductor 240V plug with no neutral, and a 50-amp breaker — that’s the core of the setup. Take the time to verify your outlet readings before plugging in, tighten every terminal connection firmly, and use properly rated cable throughout. A solid setup means a stable arc, consistent welds, and a machine that will run reliably for decades.