
Stick welding, also called Shielded Metal Arc Welding (SMAW), is one of the most widely used welding processes in the world. Getting your settings right makes the difference between strong, clean welds and frustrating problems like porosity, undercutting, or poor penetration. This guide covers everything you need to know — from amperage and polarity to electrode selection and troubleshooting common setting mistakes.
Stick welding settings depend on electrode diameter, base metal thickness, and polarity. As a general rule, set amperage at roughly 1 amp per 0.001 inch of electrode diameter. A 1/8-inch (3.2mm) electrode typically runs between 75–130 amps. Always check the electrode manufacturer’s recommended range and adjust from there.
—
The Three Core Welding Settings for Stick Welding That Control Everything
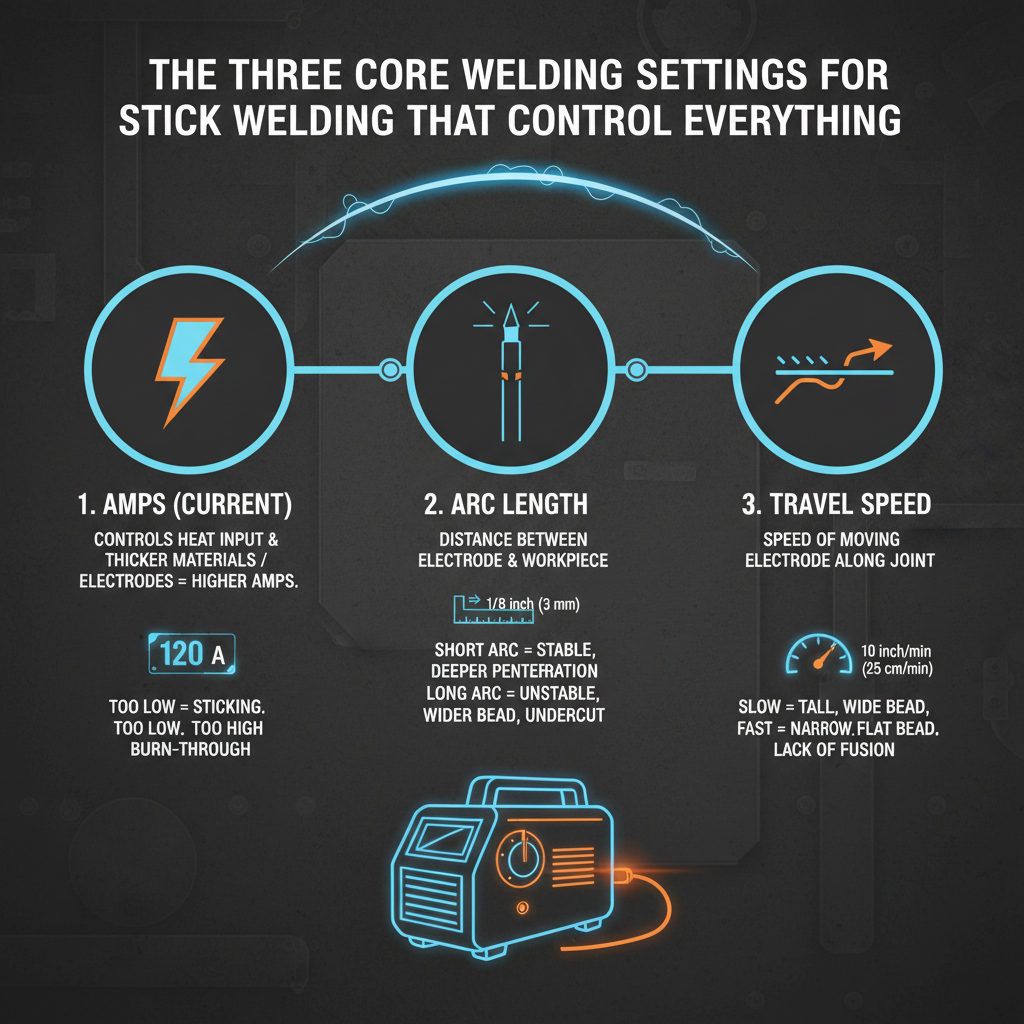
Before diving into specific numbers, it helps to understand the three variables that matter most:
1. Amperage — controls heat input and penetration depth
2. Polarity — affects arc stability, penetration, and deposition rate
3. Electrode selection — determines what amperage range and polarity you need
These three welding settings work together harmoniously. Changing one often means adjusting another. A common beginner mistake is treating amperage as the only setting that matters while ignoring polarity or electrode type.
—
Amperage Settings by Electrode Size
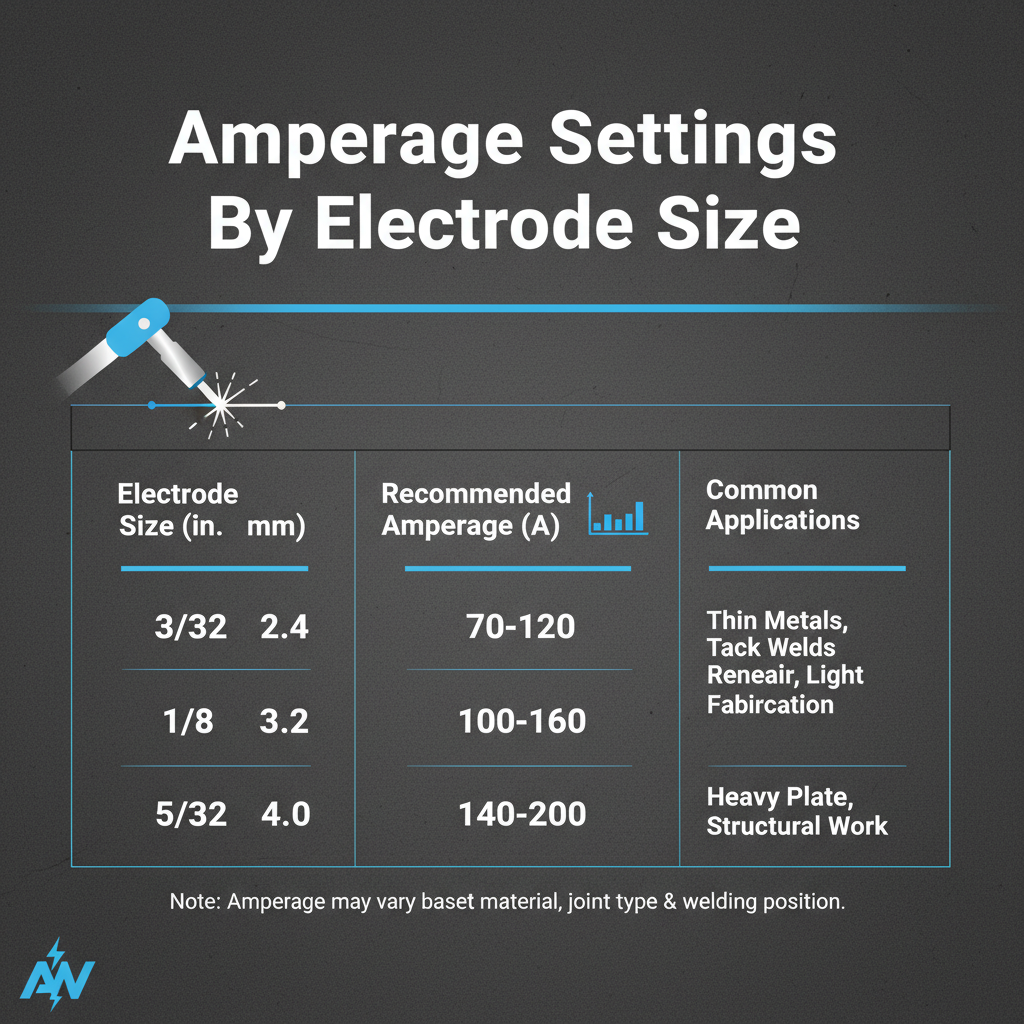
Amperage is the most frequently adjusted setting in stick welding. Too low and the arc sputters, the electrode sticks, and fusion is poor. Too high and you get excessive spatter, undercutting, and burn-through on thinner material.
Here is a practical reference chart for common electrode sizes and typical amperage ranges:
| Electrode Diameter | Amperage Range | Typical Application |
|---|---|---|
| 3/32 inch (2.4mm) | 40–85 amps | Sheet metal, thin sections |
| 1/8 inch (3.2mm) | 75–130 amps | General purpose, most common |
| 5/32 inch (4.0mm) | 110–165 amps | Medium to heavy plate |
| 3/16 inch (4.8mm) | 140–210 amps | Heavy structural work |
| 7/32 inch (5.6mm) | 170–250 amps | Heavy fabrication |
These ranges are starting points. Always check the specific electrode manufacturer’s data sheet, since different coatings and electrode classifications have their own recommended ranges.
—
Polarity Settings Explained
Polarity refers to the direction of electrical current flow through the welding circuit. It significantly affects arc behavior and weld quality.
DCEP (Direct Current Electrode Positive) — also called reverse polarity. The electrode is connected to the positive terminal. This delivers deeper penetration and is the most common setting for most stick electrodes, including E6010, E6011, E7018, and E7016.
DCEN (Direct Current Electrode Negative) — also called straight polarity. The electrode connects to the negative terminal. This produces less penetration and a faster deposition rate. It works well with E6012 and some E6013 electrodes.
AC (Alternating Current) — used with certain electrodes like E6011 and E6013. AC is common on older transformer-style machines and in field applications where DC isn’t available. Arc stability is slightly reduced compared to DC.
A quick rule: when in doubt, check the electrode classification. The manufacturer’s packaging or data sheet will specify whether to use DCEP, DCEN, or AC.
—
Electrode Selection and What the Numbers Mean
The AWS electrode classification system tells you exactly what you’re working with. Take E7018 as an example:
– E — electrode
– 70 — minimum tensile strength of 70,000 psi
– 1 — usable in all positions
– 8 — low-hydrogen coating, DCEP or AC
Understanding this system helps you match the electrode to the job and set polarity correctly without guessing.
Here are the most commonly used electrodes and their typical settings:
| Electrode | Polarity | Penetration | Best Use |
|---|---|---|---|
| E6010 | DCEP | Deep | Pipe welding, root passes, dirty metal |
| E6011 | DCEP or AC | Medium-deep | All-position, field work |
| E6013 | DCEP, DCEN, or AC | Shallow | Sheet metal, beginners, light fabrication |
| E7018 | DCEP or AC | Medium | Structural steel, code work, clean metal |
| E7024 | DCEP or AC | Medium | Flat and horizontal only, high deposition |
E6013 is forgiving and easy to run, which makes it popular for beginners. E7018 is the go-to for structural and code-quality work but requires dry storage to prevent moisture absorption in the coating.
—
How Metal Thickness Affects Your Settings
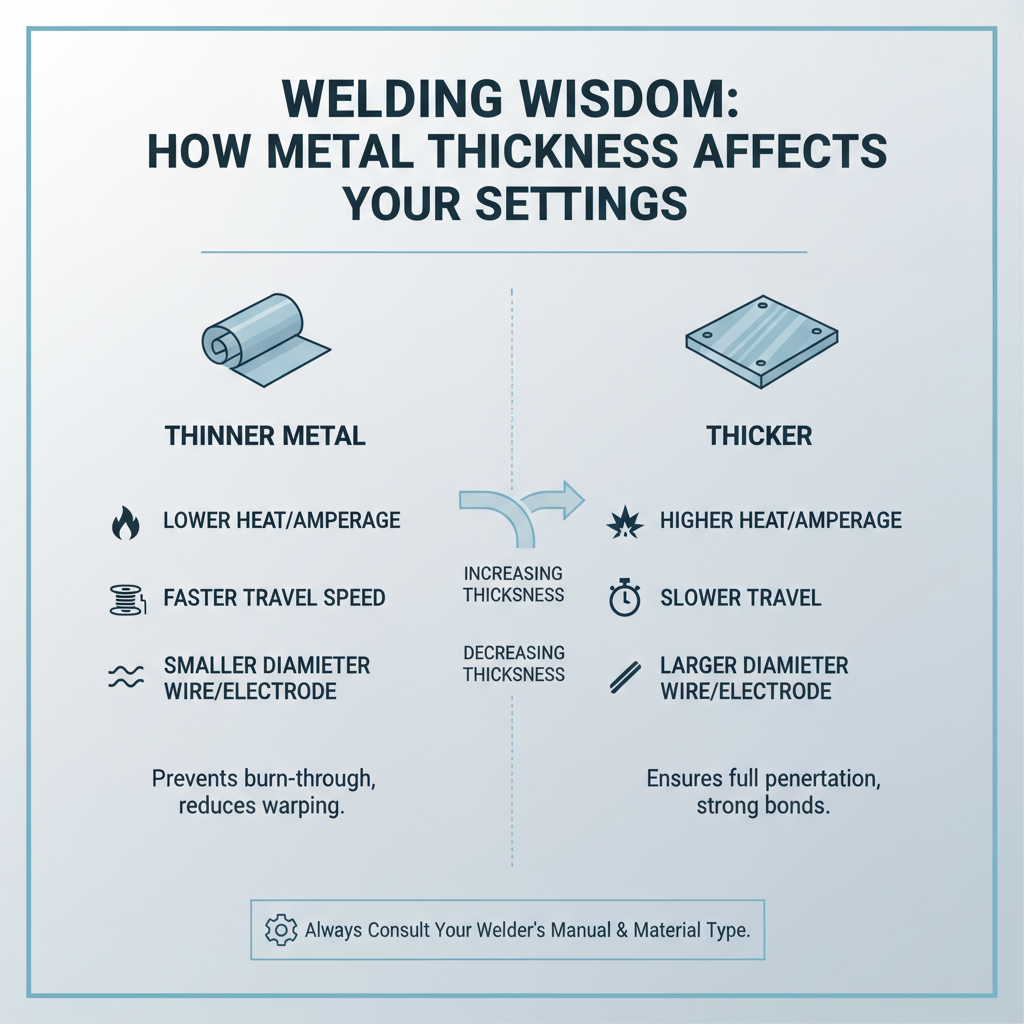
Base metal thickness is one of the most practical guides for setting amperage. Thinner metal needs lower heat to prevent burn-through. Thicker metal needs more heat for proper fusion and penetration.
A useful field guideline:
– Under 3/16 inch — use 3/32 or 1/8 inch electrodes at the lower end of their amperage range
– 3/16 to 1/2 inch — use 1/8 or 5/32 inch electrodes in the mid-range
– Over 1/2 inch — use 5/32 or 3/16 inch electrodes at higher amperages, with preheat on thicker sections
Joint position also matters. Overhead and vertical welding typically require 10–15% less amperage than flat position welding with the same electrode. The reduced amperage helps control the molten puddle against gravity.
—
Reading the Arc: How to Fine-Tune Settings in Real Time
Even with a good starting point, you’ll need to adjust based on what the arc is telling you. Experienced welders read the puddle and arc sound to make fast adjustments.
Signs your amperage is too low:
– Arc is difficult to start or keeps sticking
– Electrode frequently freezes to the base metal
– Weld bead is narrow, ropy, and sits high on the surface
– Poor fusion at the toes of the weld
Signs your amperage is too high:
– Excessive spatter around the weld
– Undercut along the edges of the bead
– Burn-through on thinner material
– Electrode turns red or overheats toward the stub end
The sound test: A smooth, consistent crackling sound — often compared to frying bacon — indicates a good arc. A sputtering, popping sound usually means amperage is too low or arc length is too long.
Arc length also plays a role. Keeping arc length roughly equal to the electrode diameter is a reliable starting point. A longer arc increases voltage and can cause porosity and spatter.
—
Common Setting Mistakes and How to Fix Them
Running the same settings for every job — Different electrodes, positions, and metal thicknesses all require adjustments. What works perfectly on flat 1/4-inch plate will likely cause problems on thin vertical sections.
Ignoring electrode storage — E7018 and other low-hydrogen electrodes absorb moisture from the air. Wet electrodes cause porosity and hydrogen cracking regardless of your amperage settings. Store them in a rod oven at 250–300°F or in a sealed container.
Skipping the manufacturer’s data sheet — The amperage chart on the box is not just a suggestion. It reflects the electrode’s coating chemistry and optimal operating window. Starting outside that range wastes time troubleshooting problems that were avoidable.
Not adjusting for position — Many welders set amperage for flat welding and forget to reduce it when switching to vertical or overhead. This leads to sagging, dripping puddles and poor bead appearance.
—
FAQ
What amperage should I use for 1/8-inch stick welding?
A 1/8-inch (3.2mm) electrode typically runs between 75 and 130 amps depending on the electrode type, position, and base metal thickness. Start around 90–100 amps for general flat welding and adjust from there.
Should I use AC or DC for stick welding?
DC (particularly DCEP) provides better arc stability and is preferred for most applications. AC is useful when DC isn’t available or when welding near magnetic fields that cause arc blow. Some electrodes like E6011 and E6013 run well on both.
Why does my stick electrode keep sticking to the metal?
The most common cause is amperage set too low. Increase amperage in small increments until the arc starts cleanly and holds without sticking. Also check that your ground clamp is making solid contact.
What is the best stick welding electrode for beginners?
E6013 is widely recommended for beginners. It runs on AC or DC, produces a soft arc with low spatter, and is forgiving of minor technique issues. It works well for light to medium fabrication on clean steel.
How do I reduce spatter in stick welding?
Spatter is usually caused by amperage set too high, arc length too long, or incorrect polarity. Try reducing amperage by 5–10 amps, shorten your arc length, and verify polarity matches the electrode specification.
Can I weld thin sheet metal with a stick welder?
Yes, but it requires careful settings. Use a 3/32-inch E6013 electrode at the low end of its amperage range (40–60 amps). Tack frequently, use short stitch welds, and allow cooling between passes to minimize warping and burn-through.
What causes porosity in stick welds?
Porosity is commonly caused by wet or contaminated electrodes, excessive arc length, contaminated base metal, or incorrect shielding. Check electrode storage conditions first, then inspect the base metal for rust, oil, or paint.
—
Final Thoughts
Getting stick welding settings right comes down to matching amperage and polarity to your electrode, then adjusting based on metal thickness and position. The numbers in manufacturer charts are reliable starting points — not guesses. From there, reading the arc sound and puddle behavior lets you dial in precisely. Most weld quality problems trace back to settings that are slightly off, so developing the habit of checking your setup before striking an arc saves significant rework time in the long run.


