
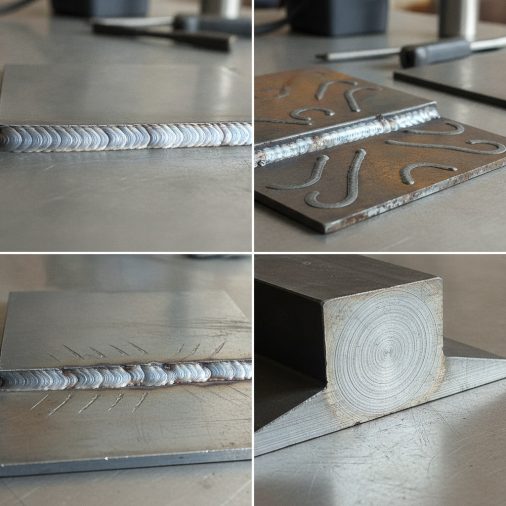
Why Torch Movement Affects Weld Quality
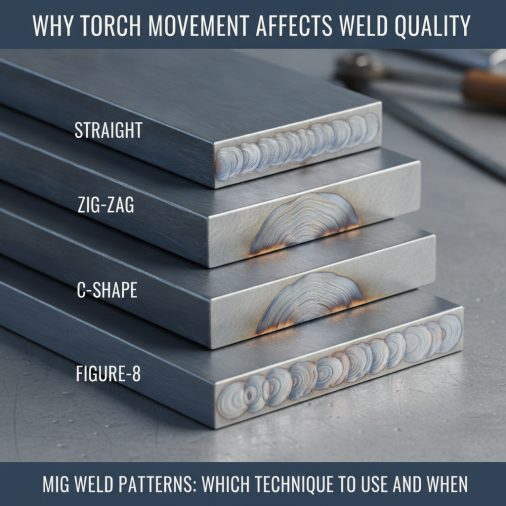
The Main MIG Weld Patterns Explained
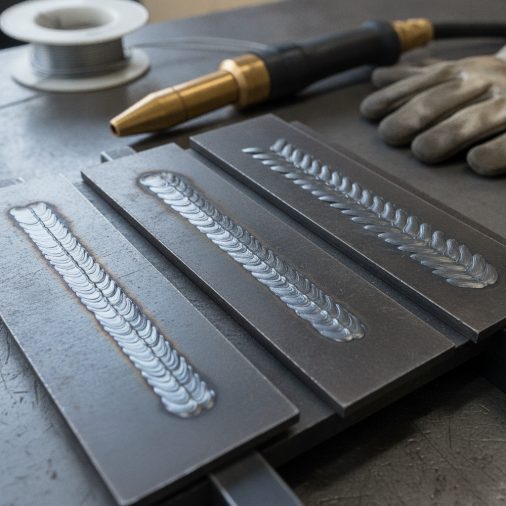
Stringer Bead (Straight Line)
The stringer bead is the most fundamental pattern. You move the torch in a straight line with no side-to-side motion. – Produces narrow, deep penetration – Fastest travel speed – Works best on thin material, butt joints, and root passes – Easiest pattern to control consistently This is the default pattern for most production MIG welding. On thin sheet metal, it’s often the only safe option since weaving adds heat and increases distortion risk.Circular or C-Pattern Weave
The circular weave traces a repeating C or half-moon shape as you travel forward. It’s one of the most common weave patterns used in structural and fabrication work. – Widens the bead without excessive heat buildup – Helps tie in both toes of a fillet weld – Works well on horizontal and flat fillet joints – More forgiving on gap variations Field experience shows the C-pattern is particularly useful when welding fillet joints with a slight gap, since the motion helps fill edge-to-edge without flooding the joint. If you’re learning how to weld vertical MIG, the C-pattern is one of the first weave techniques worth practicing.Z-Weave (Zigzag)
The Z-weave moves the torch in a zigzag across the joint width as you travel forward. – Creates a wide, flat bead – Good for covering large joint gaps – Used on horizontal and flat positions for fill passes – Requires careful speed control to avoid cold lap at the edges The Z-weave is less common in structural work because it can leave cold lap defects if the welder pauses too long at the center rather than the toes.Whip and Pause (Step Pattern)
This pattern involves a short forward motion followed by a brief pause or step back, creating a series of overlapping “coin” shapes. – Controls heat input on thinner material – Produces a distinctive stacked appearance – Common in flux-core and vertical-up welding – Requires consistent rhythm to avoid uneven bead profile The whip and pause is often taught for vertical-up work where controlling the puddle against gravity is the primary challenge.Figure-8 Pattern
The figure-8 traces a continuous figure-8 shape as the torch travels forward. – Wide coverage for large joints – Provides good tie-in at both toes – Best suited to flat and horizontal positions – More difficult to maintain consistency at speed In practice, the figure-8 is used less frequently than the C or Z patterns. It’s harder to execute consistently, especially for less experienced welders.Pattern Selection by Position and Joint Type
The position you’re welding in significantly narrows down which patterns work reliably.| Position | Recommended Patterns | Avoid |
|---|---|---|
| Flat | Stringer, C, Z, Figure-8 | — |
| Horizontal | Stringer, C-pattern | Wide Z-weave |
| Vertical-Up | Whip & Pause, C-pattern | Stringer (heat buildup) |
| Vertical-Down | Stringer | Any wide weave |
| Overhead | Stringer | Wide weaves |
Matching Patterns to Material Thickness
Thin material and thick material behave differently under the same torch movement. Thin sheet (under 3 mm): – Stick with the stringer bead almost exclusively – Even short weaves can cause warping and burn-through – Fast travel speed is more important than bead width If you’re regularly working on light-gauge steel, the tips in this article on MIG welding thin sheet metal cover the setup adjustments that work alongside pattern selection. Medium thickness (3–10 mm): – Stringer and C-pattern both work well – Weave width should stay within 2–3 times the wire diameter – Multiple stringer passes are often better than a single wide weave Heavy plate (10 mm+): – Multi-pass techniques using stringer beads are standard – Wide weaves can be used for cap passes but risk poor fusion if overdone – Always clean between passesCommon Pattern Mistakes and How to Fix Them
Weaving too wide: Wider is not better. A weave wider than 3 times the wire diameter typically causes cold lap at the toes, especially if you’re moving through the center too quickly. Narrowing the motion and pausing briefly at each toe fixes this. Inconsistent rhythm on whip and pause: If the pause intervals are uneven, the bead will have varying width and height. Counting mentally (“one, step, two, step”) helps maintain rhythm until muscle memory takes over. Using weaves on thin material: This is one of the most common beginner errors. On material under 2 mm, even a gentle C-pattern can cause burn-through. The stringer bead is almost always the right call here. Travel speed mismatch: The pattern can be perfect, but if travel speed is inconsistent, the bead will show variable width and penetration. In practice, most weld quality problems blamed on technique are actually caused by inconsistent travel speed. Knowing what a good MIG weld looks like helps you identify whether a problem stems from your pattern, your speed, or your machine settings.Push vs. Pull and How It Interacts With Pattern Choice
The direction you travel — pushing the torch away from the puddle or pulling it toward you — affects how your pattern behaves. Pushing generally produces a flatter, wider bead with less penetration. Pulling produces a narrower, higher bead with deeper penetration. When using weave patterns, most welders pull (drag) because it gives better visibility of the puddle. On a stringer bead for thinner material, pushing can reduce burn-through risk slightly. The push vs. pull MIG welding decision is worth understanding alongside your pattern choice, since they work together to shape the final bead.How Machine Settings Affect Pattern Performance
Your wire feed speed and voltage interact directly with your pattern. A pattern that looks great at one setting can look terrible at another. – Higher voltage with a wide weave = risk of underfill between ripples – Low voltage with a wide weave = cold lap and poor fusion at toes – High wire feed speed with a fast stringer = convex, ropey bead – Low wire feed speed with stringer = flat, inconsistent penetration Before changing your pattern to fix a bead, check whether a machine setting adjustment solves the problem first. Many weave-related defects disappear when voltage and wire speed are properly balanced.FAQ
What is the easiest MIG weld pattern for beginners? The stringer bead is the easiest pattern to start with. It requires no side-to-side motion, so beginners can focus on maintaining a consistent travel speed and work angle. Once the stringer bead produces consistent results, moving on to the C-pattern for fillet joints is a natural progression. Most beginners try weave patterns too early, which introduces unnecessary variables before fundamentals are solid. Is weaving better than a stringer bead in MIG welding? Not necessarily. Stringer beads often produce stronger welds with better fusion because heat is concentrated rather than spread. Weave patterns are useful for wider joints, fill passes, and positions where puddle control matters. In structural welding codes, stringer beads are sometimes preferred or required specifically because they offer more predictable penetration and lower risk of defects at the weld toes. Which MIG weld pattern is best for vertical welding? For vertical-up welding, the whip and pause pattern and the C-pattern are the most reliable. Both help control the puddle against gravity while maintaining adequate fusion. Vertical-down welding uses a stringer bead since the faster travel speed reduces heat input, which prevents the puddle from sagging excessively. Wide weaves in vertical positions are generally avoided due to poor puddle control. Why does my weave pattern look uneven? Uneven weave patterns are almost always caused by inconsistent travel speed or inconsistent pause timing at the toes. Other contributing factors include an incorrect work angle, excessive arc length, or voltage that’s too low for the weave width being used. Practicing the pattern on scrap metal at the same machine settings used for the real joint helps calibrate muscle memory before committing to the workpiece. Can you use weave patterns on MIG welded exhaust pipe? On exhaust pipe, material thickness typically ranges from 1.5 mm to 3 mm, which generally calls for stringer beads to minimize heat input and distortion. Weave patterns add heat and increase the chance of burn-through on thin wall pipe. In situations where a slightly wider bead is needed to bridge a gap, a very gentle C-pattern with fast travel speed can work, but it requires careful heat management. Does the weld pattern matter for stainless steel MIG welding? Yes, and the stakes are slightly higher. Stainless steel is sensitive to heat input because excessive heat causes carbide precipitation, which reduces corrosion resistance. Stringer beads are generally preferred for stainless MIG welding because they limit heat input per pass. If you’re working on stainless, the details in this article on how to weld stainless steel MIG cover the full setup alongside technique. What MIG weld pattern produces the best-looking bead? Aesthetically, a consistent C-pattern or whip and pause produces the stacked-coin appearance most people associate with a “perfect” weld. However, appearance doesn’t always equal strength. A clean stringer bead with good fusion is structurally superior to a beautiful weave with cold lap at the toes. Prioritize fusion and consistency over cosmetic appearance, especially on structural or load-bearing work.Pattern choice is one of those skills that looks simple from the outside but takes real practice to get right. Start with the stringer bead until your travel speed and arc length are rock solid, then add weave patterns gradually as your hand control improves. A Lincoln Electric Magnum Pro 100L gun with a comfortable grip makes it easier to maintain consistent torch angle across longer welds, which matters more than most beginners expect. The pattern is only as good as the steady hand behind it.


