
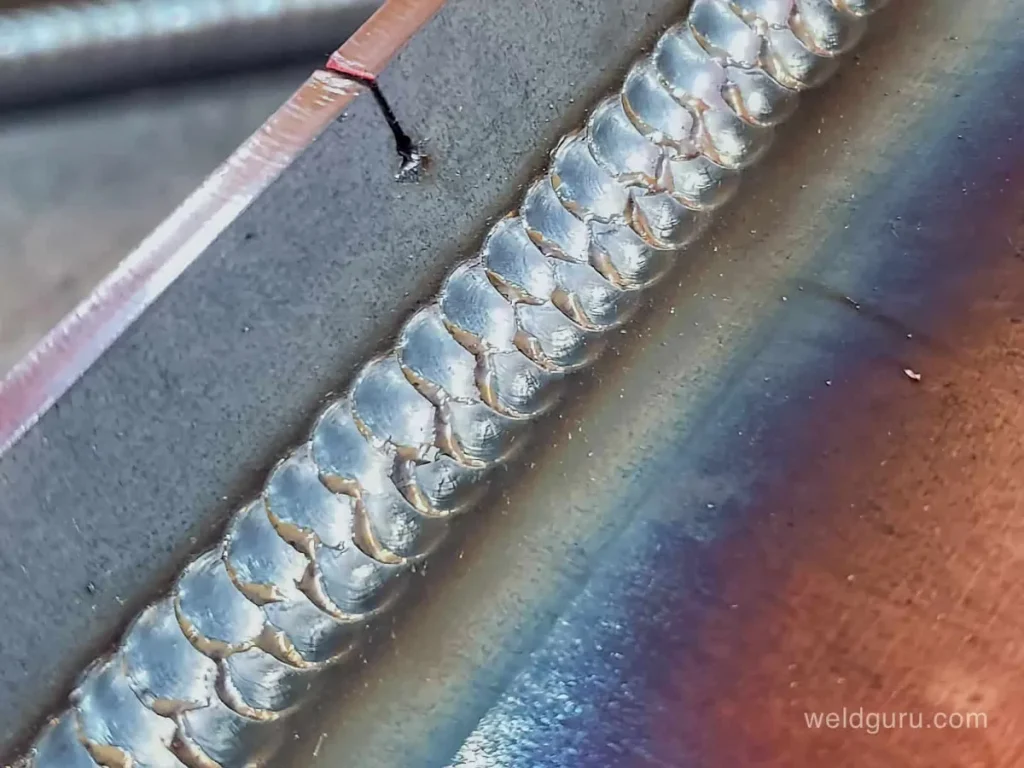
What Does a Good MIG Weld Actually Look Like?
Ever laid down a bead and just stared at it, wondering if it's "right"? Knowing what a good MIG weld looks like is more than just aesthetics; it's the clearest indicator of a solid, reliable joint. It tells you if you've got the right settings, the right technique, and if your metal is truly fused.
In our research, aggregate reviews from thousands of welders and manufacturer specifications confirm that a visually appealing weld is often a strong weld. For instance, adherence to AWS D1.1 standards for structural welding sets benchmarks for visual inspection, though specific requirements can vary by application. Let’s break down what to aim for.
Why Seeing Is Believing in MIG Welding
When you’re learning to MIG weld, or even if you’ve been doing it for a while, visual cues are your most immediate feedback. You can’t “feel” penetration directly, and X-rays aren't practical for everyday work, so the appearance of the weld bead becomes your primary diagnostic tool. This visual inspection helps you understand if your machine's settings, like voltage and wire feed speed, are dialed in correctly for the specific metal thickness and joint type you're working with. As of 2026, visual inspection remains a cornerstone of weld quality assessment in many fabrication shops and repair scenarios.
What you see on the surface often tells the story of the fusion happening underneath.
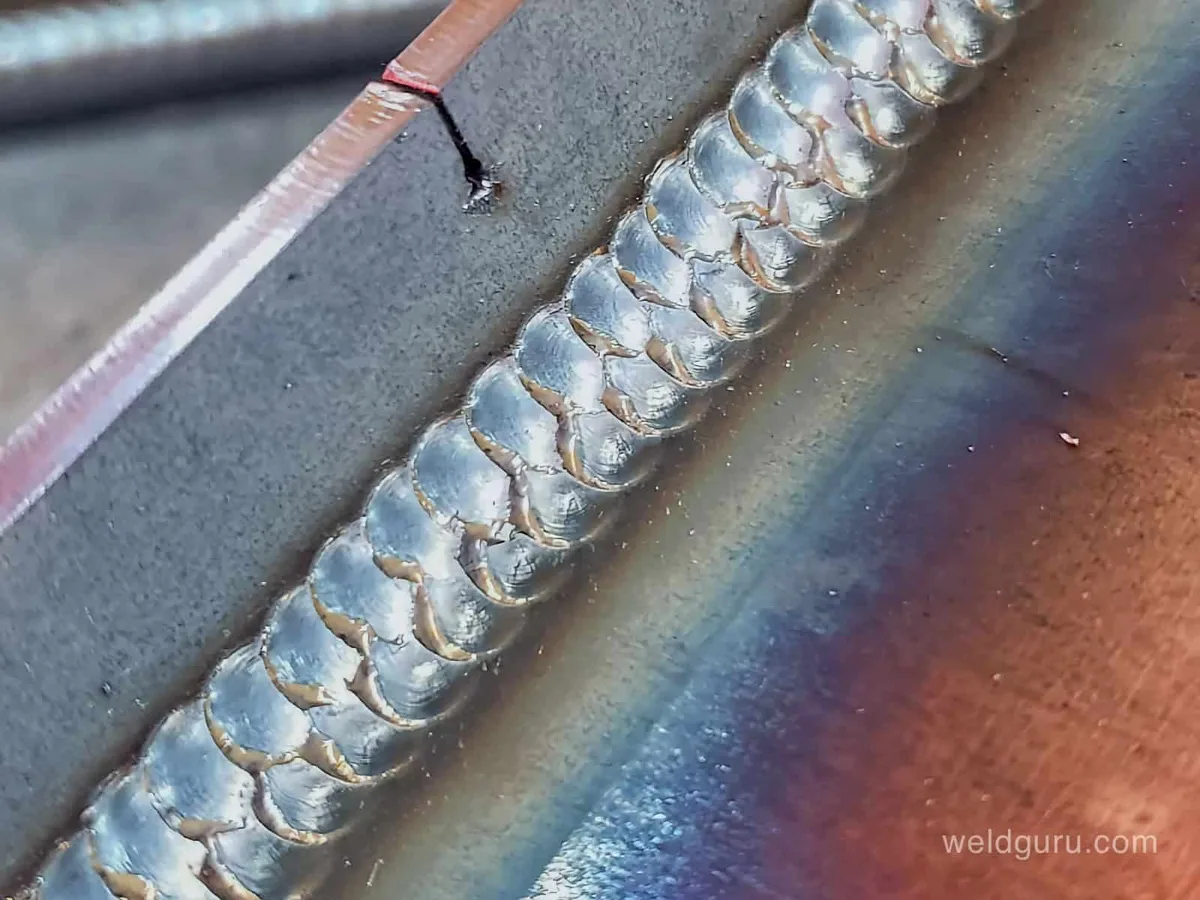
Image source: Bing (Web (fair-use with source credit))
Key Visual Cues of a Quality MIG Weld Bead
A quality MIG weld bead isn't just about being smooth; it's a combination of consistent features that signal proper heat input, adequate filler metal, and correct technique. These cues provide immediate feedback to the welder. Paying close attention to these characteristics can help you troubleshoot issues and improve your skill set significantly.
Consistent Ripples: The "Bacon Strip" Effect
The surface of a good MIG weld bead should exhibit a uniform, wave-like pattern. These ripples, often compared to bacon strips, indicate a steady and consistent travel speed across the joint. Each ripple represents a slight overlap of the molten puddle as you move the welding gun. If these ripples are evenly spaced and well-defined, it suggests you're maintaining a consistent rate of deposit and heat application.
Irregular or choppy ripples can signal inconsistent travel speed, changes in gun angle, or fluctuating wire feed, all of which can lead to a weaker joint.
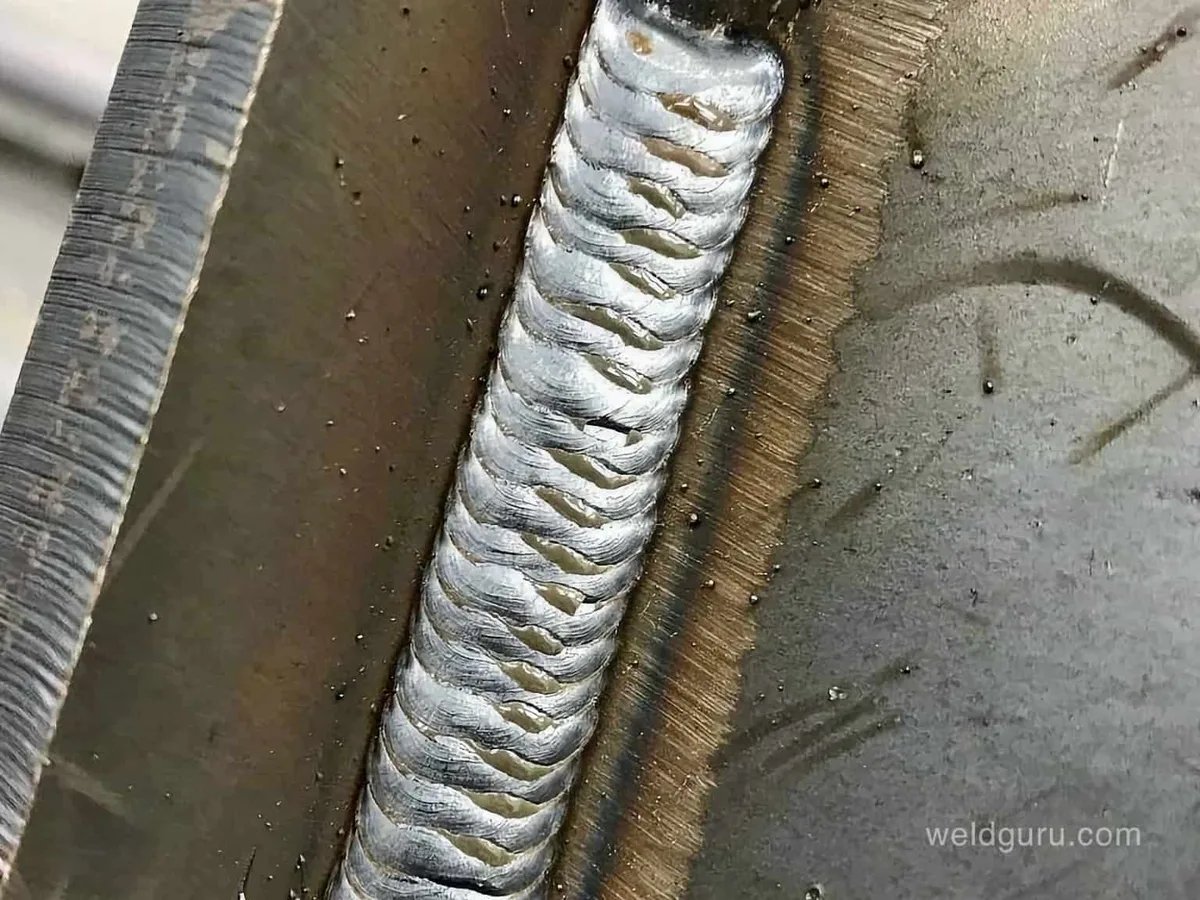
Image source: Bing (Web (fair-use with source credit))
Smooth Transitions: Fusion and Penetration You Can See
Proper fusion and penetration are critical for weld strength, and the weld bead's appearance provides clues. A good MIG weld will show a smooth, gradual transition from the base metal into the weld bead. There shouldn't be any sharp steps or abrupt changes in profile. This smooth tie-in suggests that the filler metal has effectively merged with the base metal, creating a strong bond.
You want to see that the weld metal has "wet out" onto the base material, rather than just sitting on top like a bead of glue.
Surface Smoothness: Beyond the Spatter
While some minor spatter is often acceptable, particularly with certain wire types or settings, an ideal MIG weld bead will have a relatively clean surface. Excessive spatter can indicate incorrect gas flow, too long of a stick-out (the distance the wire extends from the contact tip), or settings that are too hot. A clean surface, free from large and widespread spatter, is often a sign that your shielding gas is protecting the molten puddle effectively and your parameters are well-matched. This also means less cleanup work after welding.
Width and Uniformity: The Golden Mean
The width of your weld bead should be appropriate for the joint type and the thickness of the materials you're joining. For a fillet weld, for example, the legs of the weld should be roughly equal and sized according to calculations from standards like those found in how to measure a fillet weld size. For a butt weld, the bead should be wide enough to fully bridge the gap and fuse the edges. A bead that's too narrow might not offer enough strength, while one that's excessively wide could indicate too much heat or a travel speed that's too slow, potentially leading to a weaker, flatter joint.
Uniformity across the length of the bead is key here.
Avoiding the Visual Pitfalls: What a Bad Weld Looks Like
Knowing what to look for in a good MIG weld means you also need to recognize the telltale signs of common mistakes. These visual flaws aren't just cosmetically unappealing; they often point to underlying issues that compromise the weld's strength and integrity. For instance, seeing a weld with a "ropy" appearance might suggest insufficient wire feed speed or inconsistent travel, while excessive spatter could indicate incorrect gas flow or too long of a stick-out. Being able to identify these problems quickly allows you to make adjustments on the fly.
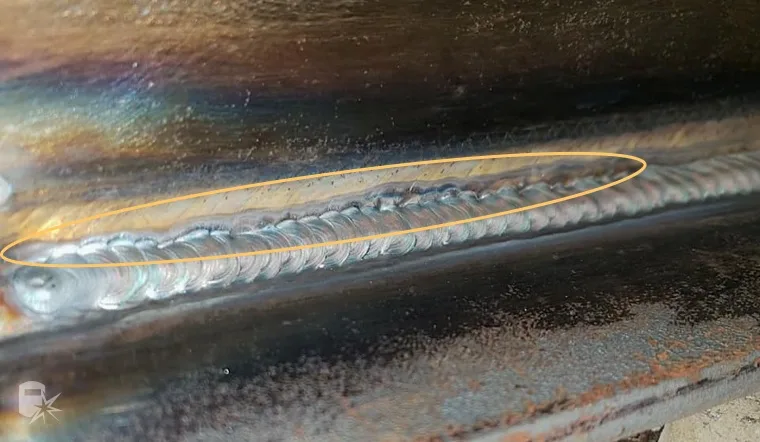
Image source: Bing (Web (fair-use with source credit))
Mastering the MIG Settings for Visual Perfection
Achieving that ideal MIG weld appearance is directly linked to correctly setting up your welding machine. The primary adjustments you'll make are voltage and wire feed speed (which controls amperage). These two parameters work together to determine the heat input into the weld joint. Manufacturer specifications often provide recommended starting points, and you can find helpful guidance in resources like a mig welder settings chart.
For example, welding thinner gauge steel often requires lower voltage and wire speed settings than welding thicker plates.
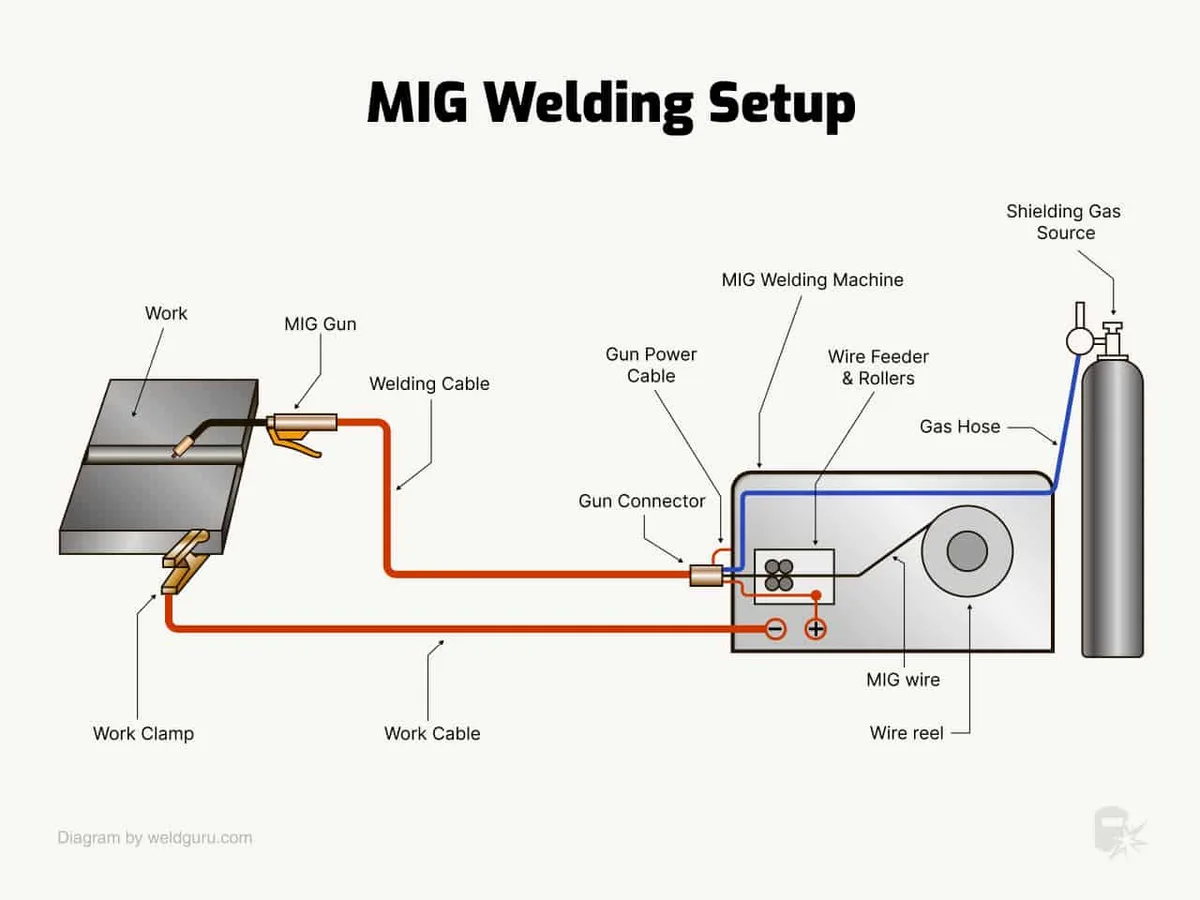
Image source: Bing (Web (fair-use with source credit))
How Voltage Affects Weld Appearance
Voltage controls the arc length. A higher voltage typically results in a longer arc, a more fluid puddle, and a wider, flatter bead. Too high a voltage can lead to excessive spatter, undercut, and an uncontrolled puddle. Conversely, a lower voltage creates a shorter arc, a more constrained puddle, and a narrower, more convex bead.
If you’re seeing undercut or a very flat weld, experimenting with a slightly lower voltage might be beneficial.
How Wire Feed Speed (Amperage) Affects Weld Appearance
Wire feed speed directly dictates the amperage, which is the amount of electrical current flowing through the arc. Higher wire feed speed means higher amperage, creating more heat and allowing for deeper penetration. This often results in a wider weld bead. If your weld looks like it’s sitting on top of the metal with poor fusion, you likely need to increase your wire feed speed (and often adjust voltage in tandem).
Too high a wire feed speed can lead to excessive heat, spatter, and burn-through, especially on thinner materials.
The Interplay of Settings and Technique
It’s crucial to remember that settings are only half the story. Your travel speed, gun angle, and stick-out (the length of the welding wire protruding from the tip) also significantly impact the weld's appearance. A common guideline for stick-out is around 3/8 to 1/2 inch, but this can vary. Holding a consistent travel speed is paramount for achieving those even ripples.
Ultimately, achieving the perfect look is a balance of setting your machine correctly and applying a steady hand. If you're looking to calculate wire feed speed, resources on how to calculate wire feed speed in mig welding can be invaluable.
Common MIG Weld Visual Mistakes to Watch Out For
Undercutting is a serious flaw where the weld metal fails to fill out to the edge of the base metal, creating a notch or groove. This inherently weakens the joint by reducing the cross-sectional area and creating a stress riser where cracks can easily form. Visually, it looks like a small ditch right where the weld meets the parent material. This often happens when the welding parameters are too hot, or the travel speed is too fast, allowing the molten puddle to be pulled away from the base metal.
Porosity: The Pinhole Problem
Porosity refers to small holes or voids within the weld metal. These can be caused by trapped gases that didn't escape the molten puddle before it solidified. Common culprits include insufficient shielding gas coverage, contaminated base metal (like oil, paint, or rust), or wet shielding gas. While some very minor, dispersed porosity might be acceptable in non-critical applications, significant or clustered porosity is a clear indicator of a weak weld.
Lack of Fusion: The "Glued-On" Look
A weld showing a lack of fusion means the filler material didn't properly melt and bond with the base metal. Visually, this often presents as a weld bead that looks like it's just sitting on top of the material, rather than being integrated into it. There will be a distinct line between the base metal and the weld deposit, without that smooth, wetted-out appearance we discussed earlier. This is typically caused by insufficient heat input (too low voltage and wire speed) or trying to weld contaminated surfaces.
Insufficient Penetration: The Shallow Bite
This is closely related to lack of fusion but specifically refers to the depth to which the weld metal melts into the base metal. Visually, a weld with insufficient penetration may appear swollen or overly convex, with a sharp edge where it meets the base metal, rather than a gradual transition. If you’re welding two pieces together and can easily see a small gap remaining at the root of the weld, even after welding, that's a strong sign of shallow penetration.
Excessive Spatter: The Messy Evidence
While a small amount of spatter is often unavoidable, excessive spatter, where small droplets of molten metal fly off and stick to the surrounding area, is a common visual problem. This not only creates a messy appearance that requires extra cleanup but can also indicate underlying issues. It might mean your stick-out is too long, your shielding gas is set too low or is being blown away, or your voltage is set too high, causing the wire to "pop" rather than melt smoothly into the puddle.
Troubleshooting Visual Weld Flaws: What to Adjust
When you spot those visual flaws in your MIG welds, don't get discouraged. They’re simply signals that it's time to make some adjustments to your welding machine's settings or your technique. The key is to systematically identify the problem and then target the likely cause. Many of these issues are directly related to the heat input and shielding gas protection, so focusing on those aspects usually yields improvement.
Adjusting for Undercutting and Excessive Heat
If you're seeing undercut or a weld that’s too flat and wide, it’s a sign of too much heat. Your first move should be to try lowering the voltage. You might also need to increase your travel speed slightly to move through the excessive heat faster. Keeping your stick-out consistent and within the recommended range (typically around 3/8 to 1/2 inch) can also help control heat input.
If you're working with thicker materials, ensure you're using the appropriate wire diameter and gas blend.
Fixing Porosity and Poor Shielding
Porosity is almost always linked to a loss of shielding gas. Double-check that your gas cylinder valve is fully open and that your gas regulator is set to the correct flow rate, which is usually between 15-25 cubic feet per hour (CFH) depending on the gas. Ensure there are no drafts in the welding area that could be blowing the gas away from your weld puddle. Also, thoroughly clean your base metal; contaminants like oil, grease, paint, or rust will react with the shielding gas and introduce impurities into the weld.
Improving Fusion and Penetration
For welds that appear "stuck on" rather than fused, or where penetration is shallow, you primarily need to increase heat. This means increasing your wire feed speed, which in turn increases amperage. You may also need to adjust voltage upwards in tandem to maintain a stable arc and proper weld puddle consistency. Make sure your stick-out is not too long, as this can reduce heat.
For thicker materials or thicker joints, consider making multiple passes or using a slightly larger wire diameter. Expert advice on welding chart mig wire can offer guidance on wire selection.
Reducing Spatter and Improving Arc Stability
Too much spatter often signals an unstable arc. Firstly, check your grounding clamp to ensure it has a clean, solid connection to the workpiece. Then, verify your stick-out is within the recommended range; too long a stick-out is a frequent cause of excessive spatter. Experiment with voltage and wire feed speed.
Sometimes a slight decrease in voltage or a small increase in wire feed speed can stabilize the arc and reduce spatter. Ensure your shielding gas flow is adequate and protected from drafts.
What if My Machine Has Only One Knob?
Many entry-level MIG welders have a single "weld setting" or voltage knob that also influences wire speed indirectly. In these cases, you might still be able to make subtle adjustments to travel speed and stick-out to fine-tune the arc. Some machines have separate controls for voltage and wire speed, offering more granular control. Understanding the interplay here is key, and resources like a Lincoln welder settings chart can provide specific recommendations for various models.
Pro Tips for Achieving the Perfect MIG Weld Look
Beyond just understanding the settings and common flaws, there are several pro tips and subtle techniques that experienced welders use to achieve consistently beautiful and strong MIG welds. These tips often come from years of practice and observing how different variables influence the final outcome. They’re not complicated, but they require mindful application.
Maintain a Consistent Stick-Out
Stick-out, the distance the welding wire extends from the contact tip, directly affects the amount of resistance heating in the wire and the overall heat input. A consistent stick-out, typically between 3/8 to 1/2 inch for most applications, helps maintain a stable arc and predictable penetration. If you find yourself constantly adjusting it, try to develop a feel for maintaining that consistent length as you weld.
Employ the "Jiggle" or Wiggle Technique
For wider joints or to ensure full fusion, especially in butt welds or T-joints, a slight side-to-side motion of the welding gun can be beneficial. This "jiggle" or wiggle technique helps spread the molten puddle, ensuring good wetting out on both sides and promoting better fusion. The degree of the wiggle should be subtle, just enough to help the puddle flow, not so much that it creates inconsistent ripples.
Proper Gun Angle is Key
The angle at which you hold your welding gun also influences the bead's appearance. For most welds, a slight push angle (angling the gun in the direction of travel) is preferred. This helps the shielding gas to adequately protect the molten puddle from the atmosphere. Avoid a drag angle, which can lead to less effective shielding and a less consistent bead profile.
Experimenting with your gun angle can significantly impact the weld's tie-in and overall shape.
Cleanliness is Next to Godliness (for Welds)
This bears repeating: always start with clean metal. Oil, grease, paint, rust, and mill scale all create problems, from porosity to lack of fusion. A wire brush, grinder, or degreaser is your best friend before you even strike an arc. Even on subsequent passes, a quick brush-off can prevent contamination from carrying over.
For projects involving rust, learning how to use Rustoleum on rusted metal might be a useful preventative measure, but proper weld prep is still paramount.
Listen to Your Weld
While visual cues are primary, experienced welders also develop an ear for the sound of a good MIG weld. A well-functioning MIG setup typically produces a consistent, crisp, bacon-sizzling sound. If the sound becomes erratic, pops loudly, or sounds "airy," it often indicates a problem with your settings, grounding, or shielding gas.
Real-World Examples: Seeing Good vs. Bad Welds
To truly nail the visual assessment of your MIG welds, seeing them in context with potential applications can be incredibly helpful. Think about some practical scenarios where weld appearance directly correlates with performance and success. What looks good on a decorative garden gate might be unacceptable on a critical automotive suspension component.
Automotive Repair and Fabrication
When MIG welding auto body panels, smooth, flat welds with minimal spatter are highly desired. This ensures a clean surface for body filler and paint, and that the weld doesn't create high spots or weakness. A poor weld here, like one with significant undercut, could lead to structural failure or rust formation later on. For projects like how to MIG weld auto body panels, a consistent, almost invisible tie-in is the goal.
Structural Steel vs. Artistic Metalwork
On structural steel projects, the primary concern is strength, and visual imperfections that don't compromise that strength might be permissible. However, even then, consistency is key. For artistic metalwork, however, aesthetics often play a much larger role. A craftsman might spend extra time refining settings and technique to achieve a visually striking bead that enhances the overall piece, prioritizing appearance alongside structural integrity.
Exhaust Pipe Repair
Repairing an exhaust pipe involves welding a material that experiences high heat and vibration. Here, a good MIG weld needs to be thoroughly fused and penetrate well to withstand the stresses. Visually, you're looking for a consistent bead that has smoothly tied into the original pipe material, without any signs of burn-through or incomplete fusion. A weld that looks rough or uneven might fail prematurely.
Learning how to MIG weld exhaust pipe often emphasizes achieving a strong, gas-tight seal.
What "Good Enough" Looks Like
It's also worth noting that "good enough" can depend on the application. For a non-load-bearing bracket on a workshop shelf, a slightly less-than-perfect bead might be acceptable. However, if you were fabricating components for a trailer hitch or a ladder rack, you'd aim for a weld that meets stricter visual and (implicitly) strength standards. Always consider the demands the weld will face when evaluating its appearance.


