
So, do you push or pull a MIG welder? That's a question that trips up a lot of folks when they're getting started, and honestly, there's no single answer that works for every weld. The best technique really depends on what you're welding and what kind of result you're after. It’s all about understanding the nuances of MIG transfer modes.
Manufacturer specifications for common MIG welders often don't explicitly detail push vs. pull, but they do provide settings that influence the spray and short-circuit transfer modes, which are key to this decision. Knowing which is appropriate for your material and desired outcome is crucial for strong, clean welds. Let’s break down when to use each.
The "Push" Technique: When to Let Go
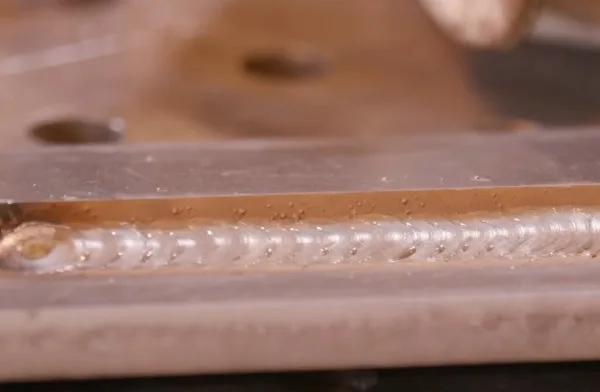
Image source: Bing (Web (fair-use with source credit))
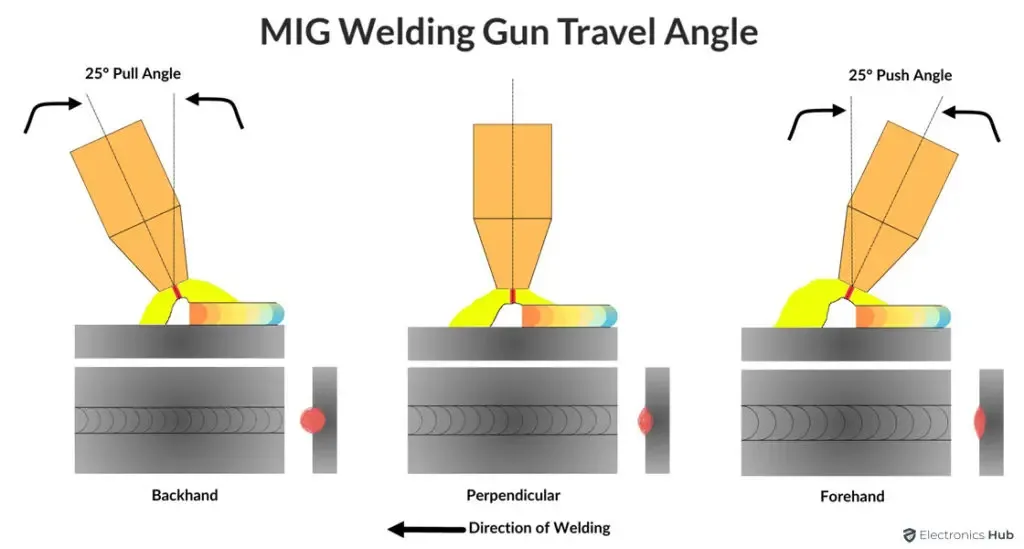
When you're pushing the MIG gun, you're moving the welding torch away from the molten weld puddle you're creating. Think of it like steering a boat down a river, moving downstream from where you started. This method typically results in a wider, flatter weld bead with a smoother appearance.
When to Lean Towards Pushing
Pushing is often the preferred method when you're working with thinner materials or aiming for a specific type of finished bead.
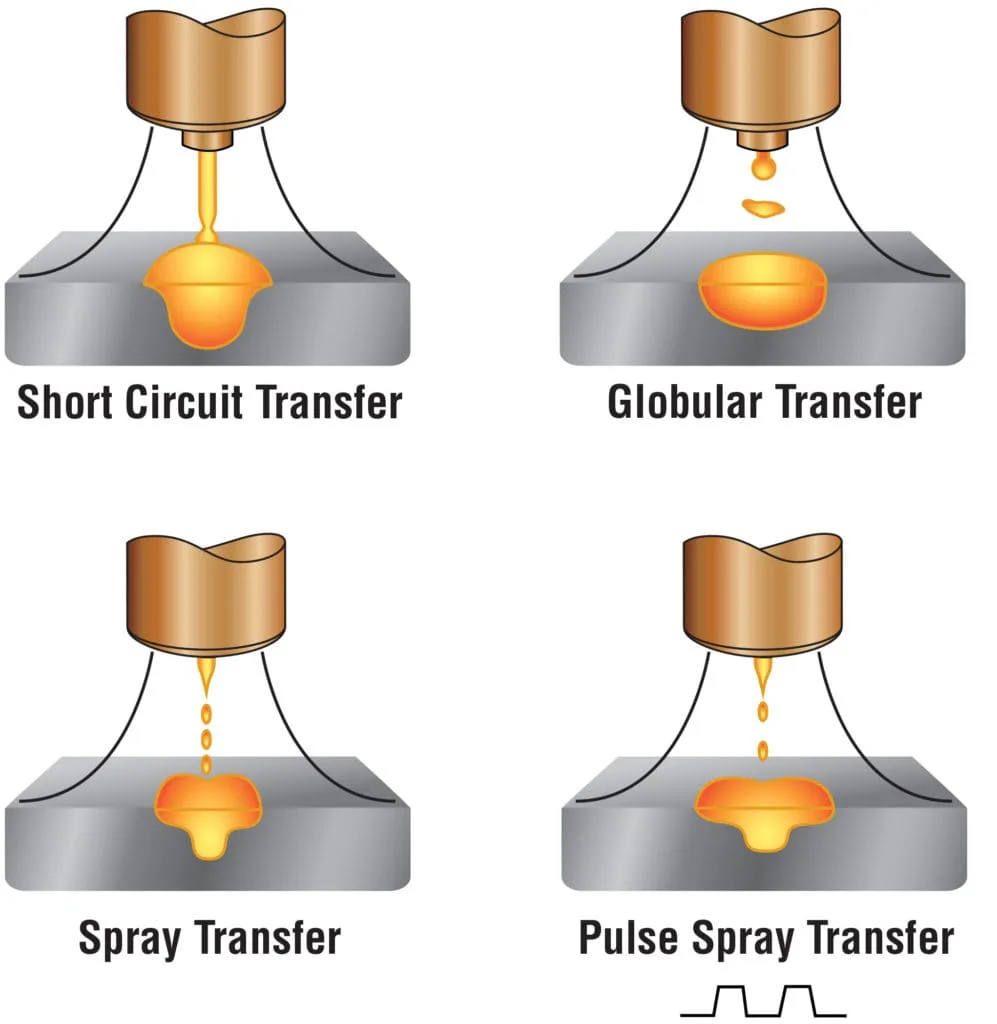
- Spray Transfer Mode: This is where pushing truly shines. In spray transfer, the molten metal melts off the electrode in a fine spray that arcs across the joint. Pushing helps control this spray pattern, laying down a smooth, fluid bead. You'll commonly see this used on materials roughly 1/4 inch thick and thinner.
- Thin Materials: Because the heat from a push technique distributes more broadly across the surface, it's excellent for preventing burn-through on thinner metals like sheet metal or auto body panels. This wider bead helps dissipate heat efficiently.
- Smooth Appearance: If your project demands a cosmetically appealing weld, pushing generally produces a flatter, more uniform bead that requires less cleanup or grinding later on. It looks refined right off the gun.
The "Pull" Technique: Getting a Grip on Penetration
Pulling the MIG gun means you're moving the torch towards the molten weld puddle. This action essentially drags the molten metal behind your arc, encouraging the weld to dig deeper into the base materials. It’s like pulling a sled behind you; you’re guiding what’s already in motion.
When to Lean Towards Pulling
Pulling is your go-to when strength and deep fusion are the primary goals.
- Short-Circuit Transfer Mode: This is perhaps the most common transfer mode for general fabrication and repairs. In short-circuit, the wire touches the workpiece, creating a brief electrical short that melts the wire and transfers it to the puddle. Pulling in this mode helps force that molten metal to fuse deeply with the base material.
- Thicker Materials: For welding thicker steel, such as on a trailer frame, structural components, or heavy equipment, you need robust penetration to ensure a strong joint. Pulling helps achieve this critical depth. Aggregates of user reviews often highlight the superior penetration achieved with this technique on thicker sections.
- Better Root Pass: When laying down the initial weld pass in a joint (the root pass) on thicker materials, pulling can help ensure you get adequate fusion right at the base of the joint, which is vital for overall weld integrity.
How to Decide: Your Push vs. Pull Decision Guide
Deciding whether to push or pull isn't an arbitrary choice. It’s a dynamic decision based on several factors directly related to your welding setup and the materials you're working with. Think of it as a mini-decision tree for each weld.
Key Variables for Your Choice
Several elements influence whether pushing or pulling is the better approach for a given situation. Understanding these will significantly improve your weld quality.
- Material Thickness: This is often the biggest driver. Thinner materials (under 1/4 inch) generally benefit from pushing to avoid burn-through, while thicker materials (over 1/4 inch) require pulling for adequate penetration. Aggregates of user reviews indicate this is particularly true for structural welds.
- Transfer Mode: As discussed, spray transfer works best with a push, and short-circuit transfer typically benefits from a pull. Your MIG welder settings determine the transfer mode. You can find general guidelines for these settings on resources like a mig welder settings chart.
- Joint Type: The angle and preparation of the joint can also play a role. For instance, welding into a tight corner might necessitate a slightly different approach than filling an open-ended groove.
- Desired Weld Appearance: If a smooth, aesthetically pleasing bead is paramount, pushing is often favored. If sheer strength and deep fusion are the priority, pulling is usually the better bet.
What the Weld Puddle Tells You
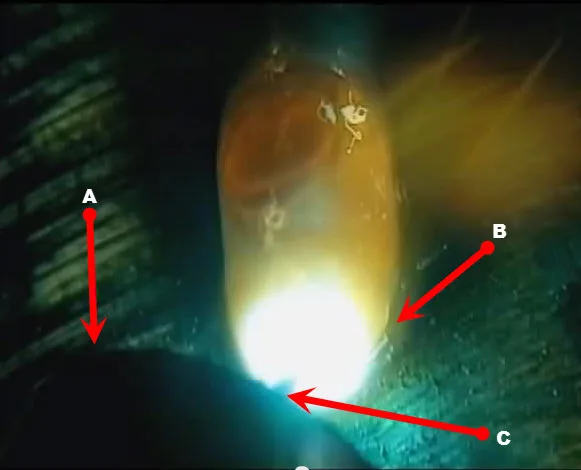
Your best guide in the moment is always the weld puddle itself. It’s a living indicator of what's working and what isn't. Developing the skill to read the puddle is as important as selecting the right technique.
- Too Flat and Wide (Pushing Issue): If you're pushing and the puddle is spreading out excessively or looks shallow, you might need to adjust your technique slightly, perhaps by increasing wire feed speed or voltage to encourage more buildup, or reconsider if pulling might be better for penetration.
- Too Narrow and Deep (Pulling Issue): If you're pulling and the puddle is very narrow, with a distinct "drag" mark behind it that doesn't seem to be filling in, you might be getting too much heat concentrated in one spot, or your speed is too fast. This can lead to a narrow, tall bead that isn't as strong as a well-formed one.
Common Mistakes to Avoid with Push and Pull
Even with the right technique in mind, it's easy to fall into habits that compromise weld quality. Understanding these potential pitfalls can help you catch them before they become problems.
Pushing Problems
- Insufficient Penetration: The biggest mistake with pushing is not getting enough depth, especially on materials that are borderline or slightly thicker. This can result in a weld that looks good but lacks the structural integrity needed.
- Porosity: If you're pushing and notice excessive spatter or small holes in your finished weld, it could be due to poor shielding gas coverage combined with the spray transfer. Ensure your gas flow is correct, typically between 15-25 CFH for most MIG applications.
Pulling Pitfalls
- Undercut: When pulling, especially on thicker materials, you can accidentally "wash" molten metal away from the edge of the base metal, creating a groove or undercut. This weakens the joint significantly. This happens when your arc is too hot or your travel speed is too slow, allowing the puddle to erode the edge.
- Lack of Fusion: If you're pulling and not getting enough heat or your angle is off, the molten metal might not properly fuse with the sidewall of the joint. This leaves a weak interface that can fail under stress. Verifying fusion sometimes requires destructive testing, but visual cues like a consistent bead width are good indicators.
Pro Tips for Mastering Push and Pull
Beyond the basic techniques, a few expert insights can really elevate your MIG welding game, ensuring your welds are strong, clean, and reliable. These are the kinds of things you learn after many hours at the welding bench.
- Consistency is Key: Whichever technique you choose, maintain a consistent travel speed and gun angle. Erratic movements will lead to inconsistent bead width and penetration. Manufacturers' recommended settings are a great starting point, often found in a welding chart mig wire guide or directly on the machine's manual.
- Angle Matters: For pushing, aim for a slight forward angle of about 5-15 degrees. For pulling, a slight backward drag angle, typically 10-20 degrees, is common. The exact angle can depend on the specific joint and material, so observe the puddle.
- Control Your Wire Stickout: The distance between the tip of your MIG gun and the workpiece, known as stickout, impacts heat and penetration. Generally, a shorter stickout (around 1/4 to 1/2 inch) is used, but this can vary. Always refer to your machine's specific instructions or a reliable lincoln welder settings chart for guidance.
- Listen to Your Machine: Pay attention to the sound of your MIG arc. A smooth, bacon-sizzling sound often indicates a good arc. A harsh, crackling sound might signal incorrect settings or technique. As of 2026, many modern machines offer advanced features to help you achieve this sound consistently.
Practice Makes Perfect: Your Next Steps
The best way to truly master the push and pull techniques is through dedicated practice. Don't expect to nail it on your first try, especially if you're new to welding or the specific material.
- Scrap Metal is Your Friend: Grab some pieces of scrap metal similar to what you'll be welding. Practice pushing on one piece, focusing on a consistent bead and desired width. Then, do the same with pulling on another piece, concentrating on achieving good penetration.
- Document Your Settings: Keep notes on the wire feed speed, voltage, and gas flow you used for each successful weld. This data can be invaluable when you need to replicate those results later or when consulting a how to calculate wire feed speed in mig welding guide.
- Seek Feedback: If possible, have an experienced welder take a look at your practice welds. They can often spot subtle issues you might miss and offer constructive criticism. Looking at an aws welding chart can also help you understand the visual indicators of good versus bad welds.


