
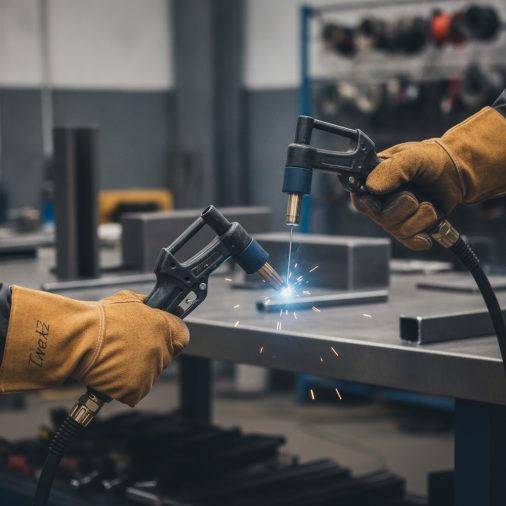
MIG Push or Pull: Which Direction Actually Matters?
Choosing the wrong torch angle in MIG welding can quietly ruin a weld — poor penetration, excessive spatter, and inconsistent bead profiles are all common results. Whether you’re running solid wire on mild steel or flux-core on a structural joint, the push vs. pull debate directly affects weld quality. This article breaks down exactly what each technique does, when to use each one, and how to avoid the mistakes that trip up welders at every experience level.
Quick Answer
Push the torch (angling away from the weld pool) for MIG welding with solid wire and shielding gas — it produces a flatter, wider bead with better gas coverage. Pull (dragging the torch toward you) for flux-core wire — it improves penetration and lets slag flow away from the arc. The wire type, not personal preference, should drive the decision.
What “Push” and “Pull” Actually Mean

In MIG welding, push and pull refer to the angle of the welding torch relative to the direction of travel.
Push technique (also called forehand welding): The torch points forward, ahead of the weld pool, in the direction you’re moving. You’re essentially pushing the arc into fresh base metal.
Pull technique (also called backhand or drag welding): The torch points back toward the completed weld bead, trailing behind the pool. You’re dragging the arc across the joint.
The torch angle is typically 5–15 degrees off vertical in either direction. Going beyond 20 degrees in either direction starts to cause shielding gas disruption and inconsistent arc behavior.
How Each Technique Affects the Weld
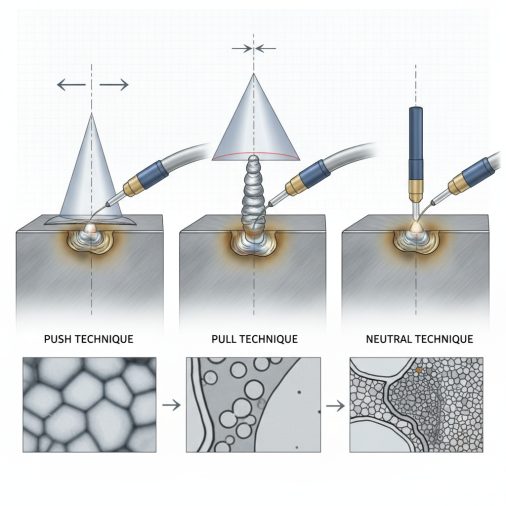
The direction you angle the torch changes several things simultaneously — heat distribution, shielding gas coverage, penetration depth, and bead profile.
Push Technique Effects
– Bead profile: Wider, flatter bead with a smoother surface appearance – Penetration: Shallower — the arc preheats the base metal ahead of the pool – Shielding gas coverage: Better, because the nozzle leads the pool and gas blankets the molten metal effectively – Spatter: Generally less spatter with solid wire – Visibility: Better sightline to the joint ahead of the arc
Pull Technique Effects
– Bead profile: Narrower, taller, with a more convex crown – Penetration: Deeper — the arc concentrates heat directly into the pool – Slag management: Pulls slag away from the arc, which is critical with flux-core wire – Spatter: Can be slightly higher with some wire types – Visibility: You’re watching the completed bead, which makes tracking harder on complex joints
The Wire Type Rule — Why It Overrides Everything Else
This is where most beginners go wrong: they pick a technique based on habit or what looks comfortable, ignoring the wire type they’re running.
Solid wire (GMAW) → Push
Solid wire relies entirely on external shielding gas (typically 75% Argon / 25% CO₂ for steel, or pure Argon for aluminum). Pushing keeps the nozzle ahead of the pool, maximizing gas coverage over the molten metal. Pulling with solid wire risks drawing air into the shielding envelope, causing porosity.
Flux-core wire (FCAW) → Pull
Flux-core wire generates its own shielding from the flux inside the wire. Pulling the torch allows slag to flow behind the arc rather than getting trapped under the bead. If you push with flux-core, slag inclusions become a real risk — and they’re not always visible on the surface.
| Wire Type | Recommended Technique | Primary Reason |
|---|---|---|
| Solid wire (ER70S-6, etc.) | Push | Better shielding gas coverage |
| Self-shielded flux-core (E71T-11) | Pull | Slag flows away from arc |
| Gas-shielded flux-core (E71T-1) | Pull | Penetration + slag control |
| Aluminum (ER4043, ER5356) | Push | Oxide layer management, gas coverage |
| Stainless solid wire | Push | Gas coverage critical for oxidation prevention |
When the Rules Bend: Exceptions Worth Knowing

In practice, welding conditions don’t always allow a textbook setup. Here’s where experienced welders adapt.
Overhead welding: Gravity pulls the weld pool downward regardless of technique. Many welders use a more neutral angle (nearly perpendicular) overhead to maintain control, accepting a slight compromise on penetration or bead profile.
Tight access joints: When you physically can’t achieve the ideal angle, a neutral torch position (straight up, no push or pull) is a reasonable compromise. You lose some of the technique’s benefits, but you maintain arc stability.
Thin material: On sheet metal under 3mm, a slight push angle helps reduce burn-through risk by spreading heat more broadly across the surface.
High-deposition flux-core passes: On structural work with large-diameter flux-core wire, an aggressive pull angle (up to 15–20 degrees) can improve penetration on thick root passes.
Travel Speed and Its Relationship to Torch Angle
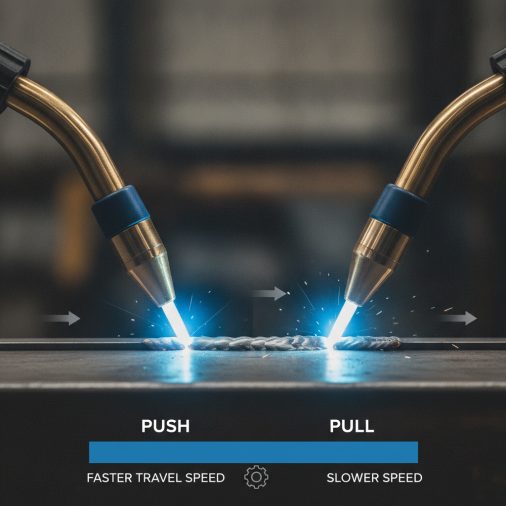
Torch angle and travel speed are linked. If you change one without adjusting the other, the weld suffers.
Pulling the torch slows effective travel speed slightly because you’re watching the pool rather than the joint ahead. This can cause the bead to pile up if you’re not deliberate about maintaining consistent movement.
Pushing lets you see the joint clearly, which naturally helps maintain even travel speed — one reason push welds often look cleaner to beginners even if penetration is lower.
A practical check: if your bead is consistently too wide and flat, you may be moving too slowly. If it’s narrow and ropy, speed up or reduce wire feed slightly.
Common Mistakes That Kill Weld Quality

1. Using pull technique with solid wire This is the most common error. The result is porosity — tiny gas pockets trapped in the weld — because shielding gas coverage breaks down. The weld may look acceptable on the surface but fail under load or X-ray inspection.
2. Excessive torch angle Angles beyond 20 degrees in either direction disrupt the shielding gas envelope and create turbulence in the weld pool. Keep it within 5–15 degrees.
3. Inconsistent angle during a pass Changing the torch angle mid-pass changes penetration and bead width unpredictably. Weld joints end up with inconsistent fusion that’s hard to detect visually.
4. Ignoring the effect on stick-out Contact tip to work distance (CTWD) — typically 10–19mm for most MIG applications — changes slightly as torch angle changes. A steep pull angle can inadvertently increase stick-out, raising voltage and reducing current.
5. Assuming push always looks better Push welds look flatter and cleaner, which can be misleading. On thicker material requiring deeper penetration, a pull technique with flux-core wire produces structurally stronger results even if the bead profile looks less polished.
A Quick Field Reference

For anyone who needs a fast reminder at the machine:
– Solid wire + shielding gas = Push (forehand) – Flux-core wire = Pull (backhand/drag) – Torch angle = 5–15 degrees off vertical – Travel speed = consistent; adjust if bead width changes – Neutral angle = acceptable fallback for tight access
FAQ

Does push or pull affect penetration that much? Yes, measurably. Pull technique typically increases penetration depth by 10–20% compared to push at the same settings. For structural welds on thicker material, this matters. For thin sheet metal where burn-through is a concern, the shallower penetration of push technique is actually an advantage.
Can I use push technique with flux-core wire? Technically you can, but it’s not recommended. Pushing with flux-core — especially self-shielded wire — risks trapping slag under the bead, causing slag inclusions. These are internal defects that weaken the weld and aren’t always visible on the surface. Stick with pull for all flux-core applications.
What torch angle should I use for MIG welding aluminum? Use push technique with aluminum, angled 5–10 degrees forward. Aluminum forms an oxide layer rapidly, and pushing the arc into clean base metal ahead of the pool helps manage this. Pure Argon shielding gas is standard for aluminum, and maintaining good gas coverage through push technique is critical.
Why does my MIG weld have porosity even though I’m using the right technique? Porosity has several causes beyond torch angle — contaminated base metal, insufficient gas flow (typically 15–25 CFH for most applications), gas leaks in the hose or fittings, drafts in the work area, or a clogged nozzle. Check gas flow rate first, then inspect the nozzle and liner for blockages or spatter buildup.
Is there a difference between push/pull for MIG vs. TIG welding? Yes. TIG welding almost always uses a push (forehand) technique because the tungsten electrode must lead the pool to maintain arc stability and shielding gas coverage. The push vs. pull debate is primarily a MIG/FCAW consideration driven by wire type and shielding method.
What happens if I weld with a perfectly perpendicular torch — no push or pull? A neutral (90-degree) angle produces a weld that falls between push and pull characteristics — moderate penetration, moderate bead width. It’s not ideal for either solid wire or flux-core applications, but it’s a practical compromise when access is restricted. Most experienced welders use it situationally rather than as a default.
Does wire diameter change which technique I should use? Wire diameter affects amperage range and deposition rate, but it doesn’t change the push/pull recommendation. The wire type (solid vs. flux-core) remains the deciding factor. Larger diameter wire (1.2mm vs. 0.9mm) may require slightly adjusted travel speed, but the same directional technique applies.
Final Thoughts

The push vs. pull decision comes down to one thing: what your wire needs to perform correctly. Solid wire needs gas coverage — push. Flux-core needs slag control — pull. Get that right, keep your angle between 5 and 15 degrees, and maintain consistent travel speed. Those three habits alone will put most weld quality problems behind you before they start.
Meta Description: Confused about MIG push or pull technique? Learn which direction to weld based on wire type, how each affects penetration, and the mistakes that cause porosity and slag inclusions.


