
Getting that perfect weld on thin sheet metal with a MIG welder can feel like coaxing a scared cat, it requires a delicate touch and understanding its every little twitch. If you've ever ended up with more holes than a donut, you know the frustration. Learning how to Mig weld sheet metal effectively is all about controlling heat, speed, and observing the molten puddle.
Our research, drawing from manufacturer specifications and aggregate welding community feedback, highlights that successful sheet metal welding hinges on precise technique rather than brute force. For instance, welding 18-gauge steel effectively often requires settings in the lower end of a MIG welder's capability, typically between 30-50 amps, with a specific wire feed speed to match. Let's break down what you need to know.
Why Seeing Is Believing When Welding Sheet Metal
When you're Mig welding sheet metal, your eyes and ears are your most important tools. Unlike thicker metals that can forgive small mistakes, thin material demands constant attention. You need to watch the metal’s reaction and listen to the arc to fine-tune your approach in real-time.
The Puddle is Your Best Friend
This molten pool of metal is your primary indicator of what's happening at the joint. A good puddle tells you your heat input and travel speed are just right. If it's too big and runny, you're likely to burn through. If it's too small and hesitant, you might not be getting proper fusion.
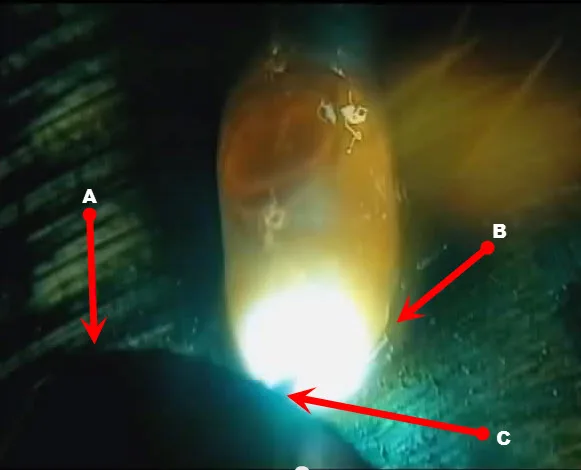
Image source: Bing (Web (fair-use with source credit))
What the Arc Sounds Like
Beyond what you see, the sound of the MIG arc offers crucial feedback. A stable arc, ideal for sheet metal, sounds like consistent, light frying bacon, a gentle, steady crackle. A harsh, spattery sound often means your settings, gas flow, or ground connection aren't quite dialed in, which can lead to weld defects on thin material.
Your Sheet Metal Mig Welding Toolkit
Having the right gear makes all the difference when tackling thin metals. It’s not just about the welder; it's about the supporting cast of consumables and safety equipment.
The Welder Itself
Not all MIG welders are created equal for delicate work. For sheet metal, you want a machine that can reliably deliver low amperage output. Look for a welder capable of stepping down to lower settings, ideally in the 30-50 amp range, to minimize heat input and prevent burn-through. Many budget-friendly machines can handle this, but always check the specs.
If you're considering a new machine, check out guides on best budget 220v mig welder or best mig welder under 500 for options.
Wire: The Right Size Matters
The diameter of your welding wire is critical for heat control on thin materials. For most sheet metal applications on steel, the go-to wire size is .023-inch or .025-inch. Thicker wire simply dumps too much heat too quickly, almost guaranteeing a hole. Using a finer wire allows for a more controlled and concentrated arc.
These finer wires often require specific drive rolls and nozzle sizes on your MIG welder to feed smoothly. For a deeper dive into wire specifics, explore resources on welding chart mig wire.
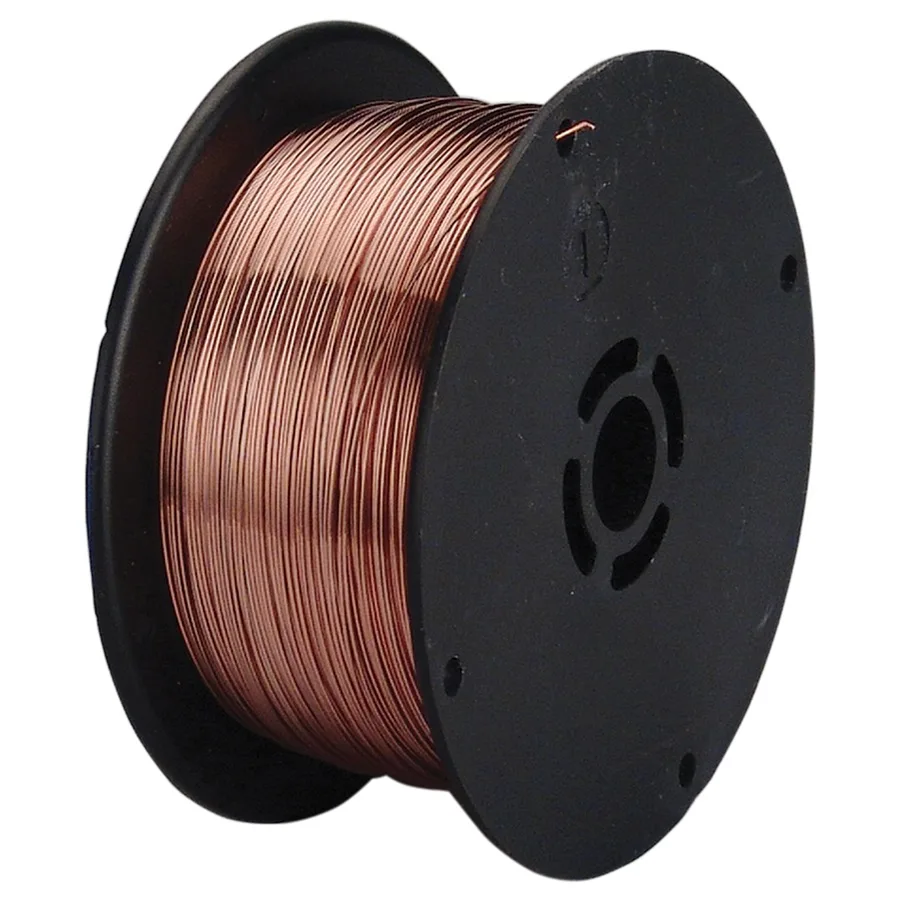
Image source: Bing (Web (fair-use with source credit))
Shielding Gas: Your Arc's Best Buddy
If you're using solid wire MIG welding (which is standard for steel), shielding gas is crucial. It protects the molten weld puddle from atmospheric contaminants, ensuring a clean and strong bond. For steel sheet metal, a common and effective choice is a 75% Argon / 25% CO2 gas mix, often labeled as C25. This mixture provides a nice, stable arc that’s less prone to spatter than pure CO2, yet offers good penetration.
Getting the gas flow correct is key; too much can agitate the puddle, and too little won't provide adequate protection. A good starting point for gas flow is typically between 15 to 25 CFH (cubic feet per hour) when using a gas regulator like those found on a best gas regulator for home setup.
Essential Safety Gear: Non-Negotiable
Safety in welding isn't optional; it’s a fundamental requirement. For Mig welding sheet metal, you absolutely need a good auto-darkening welding helmet to protect your eyes from harmful UV and IR radiation. Make sure it has a shade setting appropriate for the amperages you'll be running, usually around Shade 10-11 for typical MIG work. Sturdy leather gloves are a must to protect your hands from heat and sparks, and a welding jacket or leather apron will shield your arms and torso.
Always wear closed-toe shoes and consider flame-resistant clothing. A good helmet is a critical piece of safety equipment; review options for the best auto darkening welding helmet for the money.
Getting Started: Setting Up for Success
Before you even think about pulling the trigger, getting your setup right is half the battle. This stage lays the groundwork for everything from burn-through prevention to weld quality.
Cleaning Your Metal: The First Crucial Step
Rust, paint, oil, or just plain dirt can wreak havoc on your welds, especially on thin metal. Contaminants create porosity, weak spots, and really unpredictable arc behavior. Always clean your sheet metal thoroughly. A wire wheel on an angle grinder is your best friend here.
Aggressively cleaning the area where you'll be welding down to bare, shiny metal is essential for a good bond. If you're working with metal that has surface rust, there are methods to address it, but for welding, new rust or existing paint must be removed entirely.
Finding Your Starting Settings: Manuals and Baselines
Every welder and wire combination is slightly different. Manufacturer specifications are your best starting point. Most MIG welder manuals include charts based on wire diameter and metal thickness. As of 2026, these charts remain invaluable.
For instance, welding 18-gauge steel with .023-inch wire might suggest a wire speed of around 70-100 and a voltage around 15-17 volts. Always consult your welder's manual for recommended settings; they are usually a reliable baseline. You can find more general guidance on mig welder settings or specific model charts like lincoln welder settings chart or lincoln mig welder settings chart.
Holding the Gun: The Right Angle
Your torch angle directly impacts how the molten metal flows and fuses. For Mig welding sheet metal, you generally want to hold the MIG gun at a slight push angle, about 5 to 10 degrees forward into the direction of travel. This helps you see the puddle forming just ahead of the arc and allows the heat to gently push into the joint. A drastic angle or pulling the gun backward can lead to poor fusion and a less stable arc, issues you really want to avoid on thin stock.
The "See and Feel" Welding Process for Thin Metal
This is where the real magic happens, and where visual feedback becomes paramount. Forget rigid charts for a moment; your primary focus shifts to observing and responding to the weld pool as it forms.
Observing the Molten Puddle: Your Real-Time Indicator
The puddle is your live telemetry. As you squeeze the trigger and the arc starts, watch the metal begin to melt at the joint. You're looking for a small, fluid pool, roughly the size of a dime, that stays somewhat contained. This visual cue tells you that you’re applying just enough heat and moving at a speed that allows the molten metal to properly wet out onto the base material.
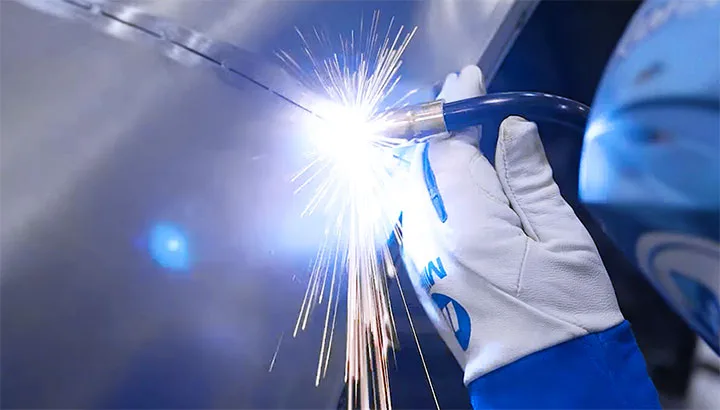
Image source: Bing (Web (fair-use with source credit))
If you're finding it challenging to see the puddle clearly due to spatter or arc glare, ensure your auto-darkening helmet is functioning correctly and at the appropriate shade setting.
Travel Speed: Keeping It Smooth and Consistent
Once you see that dime-sized puddle forming, that's your cue to start moving. The key here is consistent travel speed. You need to move just fast enough to fill the puddle without bogging down and overheating the metal, but not so fast that the arc is just skimming the surface and failing to fuse the metals. Think of it as gently coaxing the puddle along, filling it as you go.
If you move too slowly, the heat builds up, leading to burn-through. If you move too quickly, you'll end up with a bead that sits on top of the metal like a slug, with no real fusion.
Building the Bead: From Start to Finish
When starting a weld, it’s often best to tack your pieces together first. This holds them in place and helps manage heat. Once tacked, you can begin to create your bead. Aim to lay down a bead that fills the gap between the two pieces of metal and has a consistent width.
Each pass should slightly overlap the previous one to ensure continuity. If you need to stop mid-weld, try to do so at the end of a bead. When restarting, ensure you overlap the new puddle slightly with the cooled end of the previous bead to avoid creating a weak point or crater. For the most basic and common welds, understanding how to measure a fillet weld size is a useful related skill.
Mastering the Puddle: Visual Cues and What They Mean
Understanding the appearance of your weld puddle is probably the single most important factor in Mig welding sheet metal successfully. It communicates the state of your heat input, travel speed, and overall technique.
The Ideal Puddle: Size and Fluidity
When things are going well, your weld puddle will be about the size of a dime or slightly smaller. It will look fluid and somewhat rounded, but it won't be excessively runny or spread out. You should be able to see the edges of the puddle wetting out onto the base metal. This indicates adequate heat is being applied to fuse the metals, and your travel speed is appropriate for the material thickness.
The arc should have a steady, crackling sound, and spatter should be minimal.
Too Small? What It Tells You
If the puddle appears very small, hesitant, or doesn't seem to spread out much, you're likely dealing with insufficient heat input or travel speed that's too fast. This means the arc isn't melting enough of the base metal, and you won't achieve good fusion. The weld bead might look like it's just sitting on top of the surface. To fix this, you'll likely need to slightly increase your voltage and/or wire speed, or slow down your travel speed to allow more heat to transfer into the joint.
Too Big or Runny? Signs of Trouble
Conversely, if the puddle is excessively large, spread out, and seems to want to run away from the arc, you're applying too much heat or traveling too slowly. This is a direct path to burning through your sheet metal. The metal can become too thin and sag, or a hole will simply appear. When you see this, immediately stop and adjust.
You'll likely need to decrease your voltage, and possibly your wire speed, or pick up your travel speed. If you’re dealing with holes, sometimes filling them without welding is a better option if you don't have the precise control needed. Check out how to fill holes in metal without welding for alternative solutions.
Common Sheet Metal Mig Welding Headaches and How to Fix Them
Even with the best intentions, you'll likely encounter a few common issues when Mig welding sheet metal. Knowing what causes them and how to address them is key to improving your skills.
Stopping Burn-Through: Precision Over Power
Burn-through is the most dreaded problem with sheet metal. It happens when the heat from your arc completely melts through the thin material. Manufacturer specifications and experienced welders agree that minimizing heat input and maintaining a consistent, slightly faster travel speed are your primary defenses.
- Lower Voltage: Reducing the voltage on your welder can dial back the heat.
- Adjust Wire Speed: Sometimes, a slightly higher wire speed can add more metal to the puddle, helping to bridge small gaps and prevent melt-through. How to calculate wire feed speed in Mig welding can be helpful here.
- Faster Travel: Moving the torch a bit more quickly helps to reduce the time the arc is focused on any one spot.
- Stitch Welding: Instead of a continuous bead, use short, overlapping stitch welds. Weld for a second or two, move, weld again, allowing some cooling in between.
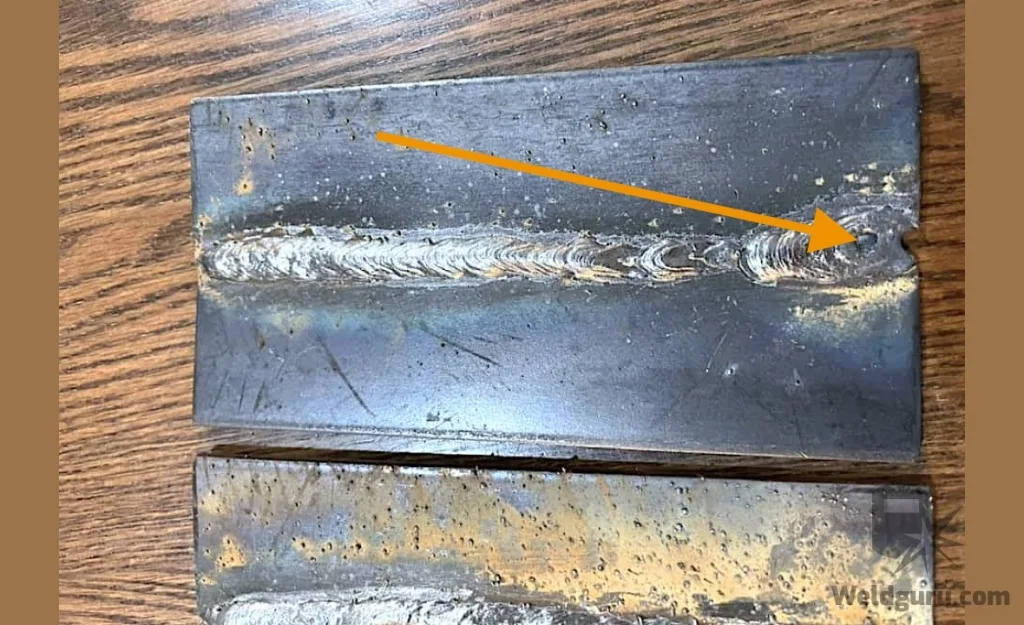
Image source: Bing (Web (fair-use with source credit))
Achieving Fusion: Avoiding Cold Laps
A "cold lap" or lack of fusion occurs when the weld metal doesn't properly bond with the base metal. It looks like the bead is just sitting on top, and it's inherently weak. This usually happens due to insufficient heat or travel speed being too fast.
- Increase Voltage/Wire Speed: Gently increase your voltage and/or wire speed to ensure the arc is hot enough to melt the base metal and fuse with it.
- Slow Down: Ensure your travel speed isn't so fast that the molten metal doesn't have time to wet out onto the parent material.
- Clean Metal: Re-emphasize cleaning. Any contaminants can prevent proper fusion.
Taming the Spatter: A Cleaner Weld Awaits
Excessive spatter, those little molten metal droplets flying off, not only makes a mess but can also indicate underlying welding issues. It can be caused by incorrect settings, faulty grounds, or gas flow problems.
- Check Ground Clamp: Ensure your ground clamp is securely attached to clean metal. A poor ground is a common spatter culprit.
- Gas Flow: Verify your shielding gas is flowing correctly (15-25 CFH is a rough guide). Too little gas won't shield, and too much can create turbulence.
- Settings Adjustment: Sometimes, adjusting the voltage and wire speed balance can reduce spatter. Many welders find a slightly lower voltage with a higher wire speed offers a smoother arc and less spatter.
Joining Methods for Sheet Metal: Welds That Hold
How you prepare and join your sheet metal pieces before welding significantly influences the outcome. Trying to butt two thin edges together without proper fixturing or prep is a recipe for disaster. Understanding the basic joint types and their challenges for sheet metal is fundamental.
Tack Welding: Building Blocks for Strength
Tack welding is your best friend when working with thin materials like sheet metal. These are small, intermittent welds made to hold pieces in place before a continuous weld is applied. They help prevent warping and distortion caused by heat. For sheet metal, tack welds should be small, just enough to hold the pieces firmly, and spaced out to allow cooling.
Too large a tack weld can act like a continuous weld and still cause excessive heat buildup.
Lap Joints: Easier Wins on Thin Metal
Lap joints, where one piece of metal overlaps another, are generally much more forgiving for MIG welding sheet metal. The overlap provides a small amount of material that helps bridge the gap and absorb heat. When welding a lap joint, aim to direct your arc at the edge of the top piece, allowing the heat to draw the bottom piece up to it. This method helps ensure good fusion without burning through as easily as a butt joint.
Butt Joints: The Trickiest Territory
Butt joints, where the edges of two pieces of metal meet end-to-end, are the most challenging on sheet metal. Without proper preparation, like beveling edges or using a backing strip, they are extremely prone to burn-through. If a true butt joint is required, consider fitting the edges with a small, consistent gap and using very short, controlled stitch welds. Sometimes, adding a small piece of copper or steel backing behind the joint can provide the necessary support and heat sink.
If you're struggling with filling gaps, exploring resources on how to fill holes in metal without welding can offer alternative solutions for certain repairs.
Practice Makes Perfect: Becoming a Sheet Metal Mig Master
There's no substitute for hands-on experience when it comes to Mig welding thin metal. The nuances of puddle control, arc manipulation, and heat management are best learned by doing. Even experienced welders spend time practicing on scrap.
Scrap Metal: Your Training Ground
Before you start on a critical project, grab some discarded pieces of sheet metal. Practice making short beads, running them at different speeds, and adjusting your voltage and wire feed speed. Try making lap joints and tee joints on scrap pieces. This allows you to make mistakes without consequence and learn how your welder responds to different settings on various thicknesses.
Consistent practice with your Mig welder settings will build confidence.
Developing Your Welding Intuition
As you practice, you'll start to develop an intuition for what a good weld looks and sounds like. You'll learn to anticipate how the metal will react. This sensory feedback is crucial for adapting your technique on the fly, especially when dealing with variations in metal thickness or surface condition. It’s this gained intuition that separates a beginner from someone who can confidently tackle sheet metal projects.
Key Safety Precautions for Mig Welding
Welding, even at lower amperages on sheet metal, involves significant hazards. Adhering to strict safety protocols is paramount to prevent injury and ensure a productive work session.
Gear Up for Protection
Always wear appropriate personal protective equipment (PPE). This includes an auto-darkening welding helmet with the correct shade rating for your welding current, flame-resistant welding gloves, a welding jacket or apron made of leather or other fire-retardant material, and sturdy closed-toe shoes. Never wear synthetic materials that can melt and stick to your skin. Ensure any exposed skin is covered to prevent UV burns, similar to severe sunburn.
Working Environment Essentials
Ensure your welding area is well-ventilated to avoid inhaling welding fumes, which can be harmful. Remove any flammable materials from the vicinity of your work area, including rags, solvents, or wood. Have a fire extinguisher rated for Class C (electrical) fires readily accessible. A clean, organized workspace not only improves safety but also makes your welding process much more efficient and enjoyable.


