Routing cables cleanly inside a vehicle, enclosure, or fabricated structure is one of those small problems that creates big headaches. Standard zip tie mounts work fine until heat or vibration pulls them loose — and that’s exactly where the Quiklinx cable mount MIG weld version earns its place.
The Quiklinx cable mount MIG weld version is a steel cable management clip designed to be permanently attached to a metal surface using a MIG welder. Unlike adhesive or screw-in cable mounts, the weld-on version fuses directly to the base material, creating a durable, vibration-resistant anchor point for routing wires, hoses, or cables in demanding environments.
What Makes the Weld-On Version Different From Other Quiklinx Mounts
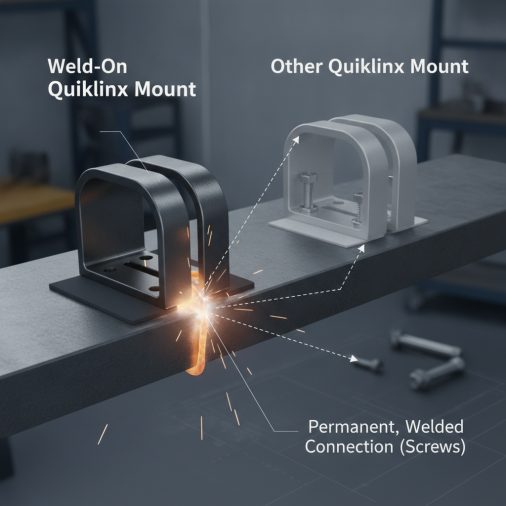
Quiklinx cable mounts come in several attachment styles — peel-and-stick adhesive, screw-on, and the MIG weld version. Each suits different applications, but the weld-on variant is the strongest of the three.
The weld version is typically stamped from mild steel and includes a flat base tab or weld foot that sits flush against the mounting surface. Once tack welded in place, the mount becomes a permanent part of the structure. There’s no fastener to back out, no adhesive to delaminate from heat, and no slot to elongate under load.
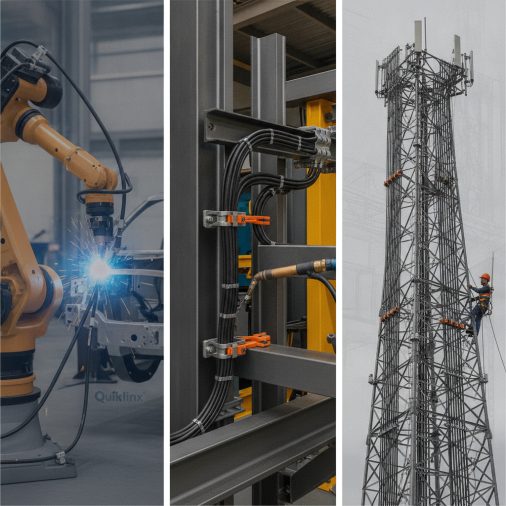
In automotive, marine, motorsports, and industrial fabrication environments, the weld-on mount is the go-to choice when cable routing needs to survive long-term exposure to vibration, temperature swings, or mechanical stress.
Typical Applications
The weld-on Quiklinx mount appears most often in environments where permanent, reliable cable management is critical:
– Custom vehicle builds — routing wiring looms along chassis rails, firewalls, and floor pans
– Roll cages and tube chassis — securing cables to structural tubing without drilling
– Engine bays — anchoring fuel injection harnesses, sensor wires, and vacuum hose runs
– Marine fabrication — attaching cable runs to aluminum or steel hulls where moisture rules out adhesive
– Industrial enclosures and equipment frames — permanent cable dressing in fabricated steel housings
One practical advantage is the ability to weld the mount in position during fabrication, before cables are even installed. This lets builders plan clean routing paths without committing to specific wire bundles until later in the build.
How to Install the Quiklinx Cable Mount MIG Weld Version
Installation is straightforward for anyone comfortable with basic MIG welding. The process typically takes under a minute per mount once you’re set up.
What you’ll need:
– MIG welder (set appropriately for the base metal thickness)
– Wire brush or angle grinder for surface prep
– Clamp or magnet to hold the mount during welding
– Protective gloves, helmet, and PPE
Installation steps:
1. Prepare the surface — Grind or wire brush the mounting area to bare metal. Paint, rust, or coating will cause porosity and poor fusion.
2. Position the mount — Hold or clamp the Quiklinx clip flat against the surface with the cable channel facing the desired routing direction.
3. Tack weld the base tab — Apply a small tack weld on one corner of the weld foot to fix the position.
4. Check alignment — Confirm the cable direction is correct before committing to a full weld.
5. Complete the weld — Run a short fillet weld around the base tab perimeter, or apply two solid tack welds at opposing corners for adequate retention.
6. Allow to cool — Let the weld cool before inserting cables or snapping zip ties through the clip.
7. Touch up if needed — For painted builds, apply weld-through primer or touch-up paint over the weld area after cooling.
For thin sheet metal applications, a quick tack weld on each side of the base tab is typically sufficient. Heavier chassis or structural tubing can handle a full fillet bead for maximum strength. If you’re working on thinner gauge material, refer to proper MIG welding technique for sheet metal to avoid burn-through.
Welding Settings for Common Base Materials
Getting your welder dialed in correctly is critical. The Quiklinx mount’s base tab is thin — usually 1.5–2mm mild steel — so matching settings to both the mount and the base material prevents burning through the clip or getting poor fusion on heavier substrate.
Base Material
Wire Diameter
Voltage (Approx.)
Wire Feed Speed
Gas
16–18 gauge sheet steel
0.023 in / 0.6mm
14–16V
Low–Medium
75/25 Ar/CO₂
11–14 gauge structural steel
0.030 in / 0.8mm
17–19V
Medium
75/25 Ar/CO₂
3/16 in + chassis rail / frame
0.035 in / 0.9mm
18–21V
Medium–High
75/25 Ar/CO₂
Mild steel tube (roll cage)
0.030 in / 0.8mm
16–19V
Medium
75/25 Ar/CO₂
These are approximate starting points. Always fine-tune based on your specific machine, wire brand, and material condition. Understanding how much heat a MIG weld generates helps when dialing in settings for thinner mount tabs against heavier base materials.
Common Mistakes to Avoid
Even a simple weld-on clip installation can go wrong with small oversights.
Skipping surface prep is the most common issue. Welding through paint or mill scale produces porous, weak welds that look fine at first but crack under vibration over time.
Over-welding the mount is another frequent mistake. The base tab on a Quiklinx-style clip doesn’t need a heavy bead. Excessive heat warps the clip, distorts the cable channel, and can damage the surrounding surface on thinner material.
Wrong orientation before tacking is easy to overlook. Once you run the full weld, repositioning becomes much harder. Always dry-fit the cable path first and confirm orientation before triggering the gun.
Welding near existing wiring without protection risks burning through insulation. Shield surrounding cables with a welding blanket if existing wiring runs close to the work area.
Material Compatibility and Finish Considerations
The standard Quiklinx MIG weld version is made from mild steel, which makes it directly compatible with mild steel and structural steel surfaces. For stainless steel builds, some fabricators source stainless-compatible versions or use appropriate filler wire to avoid galvanic corrosion at the weld joint.
Aluminum is generally not suitable for the standard mild steel weld mount. The dissimilar metals create corrosion risk, and the welding process requires entirely different filler wire and technique.
For builds that will be powder coated or painted, weld the mounts before coating. For post-paint work, a Dremel or die grinder can quickly clean the weld spot before reinstallation.
Quiklinx Weld Mount vs. Adhesive and Screw Mounts
Feature
Weld Version
Adhesive Version
Screw-On Version
Bond strength
Permanent / highest
Moderate (temp-limited)
Good (fastener-dependent)
Heat resistance
Excellent
Poor to moderate
Good
Vibration resistance
Excellent
Moderate
Good
Reversible
No
Yes (with effort)
Yes
Best for
Permanent fabrication
Interior, low-heat areas
Panels, plastics, quick install
Requires welder
Yes
No
No
Surface prep required
Yes (bare metal)
Yes (clean, dry)
No
The weld version is simply the most durable option. The trade-off is permanence — removal requires cutting or grinding the weld. For most fabrication builds, that’s not a drawback; it’s the point.
FAQ
What material is the Quiklinx cable mount MIG weld version made from?
The weld-on version is typically stamped from mild steel, making it suitable for direct MIG welding to steel surfaces. The mild steel construction is compatible with standard ER70S-6 MIG wire and 75/25 argon/CO₂ shielding gas. Some specialty versions may be available in stainless steel for specific fabrication needs.
Can you weld Quiklinx cable mounts to aluminum?
Standard mild steel Quiklinx weld mounts are not recommended for welding to aluminum. The dissimilar metals create corrosion issues and require incompatible welding processes. For aluminum applications, the adhesive or rivet-style versions are more practical choices unless a stainless or aluminum-specific mount is sourced.
How many tack welds does the Quiklinx weld mount need?
In most cases, two tack welds at opposing corners of the base tab are sufficient for light cable management duties. For vibration-heavy environments — such as chassis rails on off-road vehicles — a full perimeter fillet weld on the base tab provides the most reliable retention and resists pull-out or peel-off forces more effectively.
Do Quiklinx cable mounts work with cable ties and zip ties?
Yes. The Quiklinx weld mount is designed to work with standard cable ties and zip ties threaded through the mount’s clip channel. The mount creates a fixed anchor point on the metal surface, and the zip tie wraps around the cable bundle or hose to secure it in place. Most versions accept ties up to a specific width, typically 4–8mm.
What’s the difference between a Quiklinx cable mount and a P-clip weld tab?
A P-clip weld tab is a round loop that wraps around a cable or hose and welds to the surface, making it cable-specific once installed. The Quiklinx weld mount uses a slot-style channel that accepts cable ties, making it more flexible — you can adjust bundle size or replace ties without removing the mount. P-clips are often preferred for single large hoses; Quiklinx-style mounts suit multi-wire routing and lighter cable harnesses.
Can Quiklinx weld mounts be painted after installation?
Yes. After welding and grinding any spatter, the mild steel mount accepts primer, paint, or powder coat the same as any other steel surface. For best adhesion, apply a weld-through primer or self-etching primer before top coating. This also protects the weld zone from rust in environments with moisture exposure.
Are weld-on cable mounts better than drilling for cable routing?
Drilling creates a hole that can allow moisture intrusion, weaken the structure in critical areas, and requires sealing in corrosive environments. Weld-on mounts preserve the base material’s integrity and create a stronger attachment. In chassis and structural fabrication, weld mounts are generally preferred — especially along frame rails, firewalls, and roll cage tubes where drilling is undesirable.
When the goal is permanent, professional cable management on a steel fabrication project, the Quiklinx cable mount MIG weld version delivers a clean and durable solution. Proper surface prep, correct welder settings, and confirming orientation before committing to the weld are the three details that separate a solid install from a frustrating redo. For builds that need to last — whether that’s a race car, a work truck, or a custom fabricated frame — the weld version is the right tool for the job.