Picking up a MIG torch for the first time can feel overwhelming. There are cables, liners, contact tips, nozzles, and trigger mechanisms — all packed into one handheld tool. Understanding what each part does makes you a faster, cleaner, and more consistent welder.
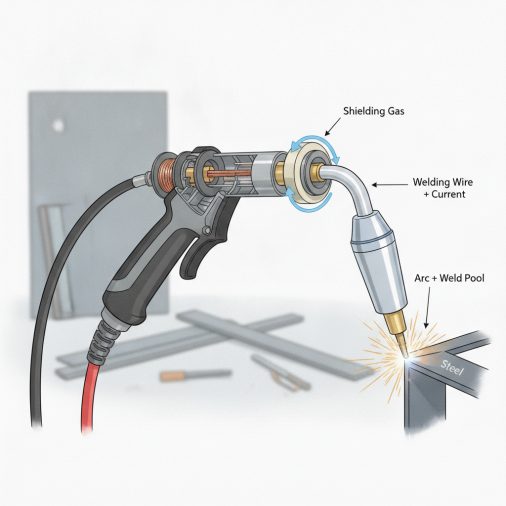
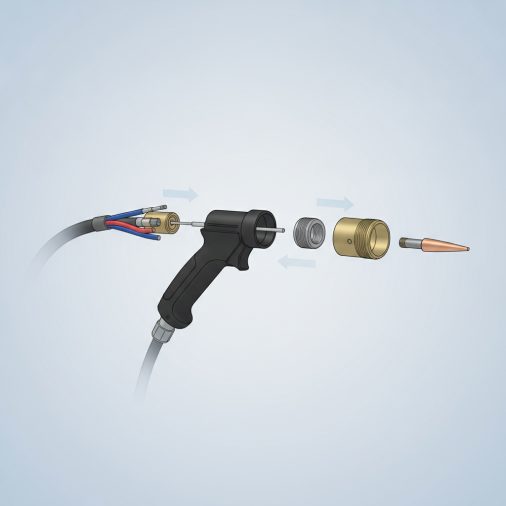
A MIG weld torch is the handheld component of a MIG welding system that delivers welding wire, shielding gas, and electrical current to the weld pool simultaneously. It consists of a handle, trigger, cable assembly, swan neck or gun neck, contact tip, gas nozzle, and wire liner. Choosing the right torch and maintaining it properly directly affects weld quality, arc stability, and operator comfort.
How a MIG Torch Actually Works
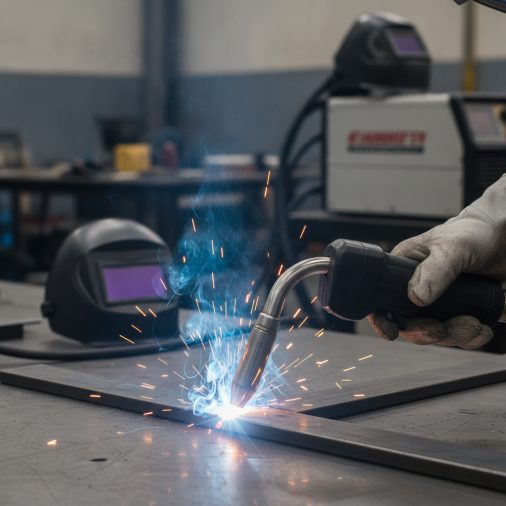
When you pull the trigger, three things happen at once: the wire feed motor pushes electrode wire through the liner and out the contact tip, shielding gas flows through the nozzle to protect the molten pool, and electrical current passes through the contact tip to create the arc.
The contact tip is where the current transfers to the wire. It’s a small but critical piece — if the tip is worn, undersized, or the wrong diameter, you’ll get erratic arc behavior, wire burnback, or poor penetration.
The gas nozzle surrounds the contact tip and directs shielding gas around the arc zone. Spatter builds up inside it quickly, and a clogged nozzle starves the weld of gas coverage.
Main Components of a MIG Torch
Each part has a specific role, and knowing them helps you diagnose problems faster.
Component
Function
Handle / Body
Ergonomic grip; houses trigger switch
Trigger
Activates wire feed, gas flow, and current
Swan Neck / Gun Neck
Angled neck connecting handle to nozzle; affects access angle
Wire Liner
Guides wire from cable through to contact tip
Contact Tip
Transfers current to the wire; sized to match wire diameter
Gas Diffuser
Distributes shielding gas evenly around the tip
Nozzle
Directs gas flow; protects the tip area
Cable Assembly
Carries wire, gas, and power from the machine to the torch
The liner is one of the most overlooked parts. A kinked, dirty, or wrong-diameter liner causes feeding problems that are often mistakenly blamed on the wire feed motor.
Air-Cooled vs. Water-Cooled Torches
This is the most significant torch choice you’ll make, especially as amperage requirements increase.
Air-cooled torches rely on ambient airflow and the mass of the handle to dissipate heat. They’re simpler, lighter, and don’t require a separate cooling unit. Most hobbyist and light industrial torches fall into this category, typically rated between 150A and 300A at a given duty cycle.
Water-cooled torches circulate coolant through the cable and torch body. They handle sustained high-amperage welding more effectively and stay cooler during long continuous runs. The tradeoff is added system complexity, weight from the coolant hose, and the cost of a water cooling unit.
For most fabrication shops, auto body work, and general structural welding, air-cooled torches are the practical choice. Water-cooled torches become worthwhile when you’re running 400A or more for extended periods.
Torch Duty Cycle and Amperage Ratings
Every MIG torch has an amperage rating tied to a duty cycle percentage. A torch rated at 200A at 60% duty cycle can operate at 200A for six minutes out of every ten before it needs to cool.
Exceeding the duty cycle damages the torch insulation, degrades the liner, and can cause the handle to become uncomfortably hot or even melt. Always match your torch rating to your welding machine’s output and your typical welding patterns.
A common mistake is pairing a light-duty torch with a machine capable of higher output and then wondering why the torch overheats during longer runs.
Contact Tip Sizing and Why It Matters
Contact tips are sized to match your wire diameter. Common sizes include 0.023″, 0.030″, 0.035″, and 0.045″. Using a tip that’s too large for the wire creates an inconsistent electrical contact point, leading to arc wander and inconsistent wire feed. Using one that’s too tight causes the wire to stick and burn back into the tip.
Tips wear over time and develop an oval bore from the wire passing through. Check them regularly and replace them before weld quality deteriorates. Keeping a small stock of spares on hand is standard practice in any shop.
Torch Angle and Its Effect on Weld Quality
How you hold the torch relative to the workpiece matters as much as your settings. Most MIG welding uses a slight push or drag angle — typically 5° to 15° from vertical depending on the joint.
If you’re curious about whether to push or pull when MIG welding, the general rule is that pushing produces a flatter, wider bead with better gas coverage, while pulling creates a narrower bead with slightly deeper penetration.
Torch angle also affects spatter. A torch held too steeply or at an extreme drag angle increases spatter significantly, which means more cleanup and faster nozzle fouling.
Swan Neck and Torch Neck Options
The swan neck — the curved metal neck between the handle and the nozzle — comes in different bend angles, typically ranging from 30° to 60°. A more aggressive curve helps you access tight joints and overhead positions. A straighter neck gives better visibility on flat and horizontal welds.
Some torches offer interchangeable necks, which is genuinely useful if you’re working across different joint configurations regularly. The Lincoln Electric Magnum PRO 250L is a well-regarded example of a torch with a flexible neck design that accommodates tight access work without requiring a full torch swap.
Wire Liner Types and Maintenance
Liners are available in steel, nylon, and Teflon-coated variants. Steel liners handle harder wires like solid steel and stainless well. Nylon or Teflon liners are better suited for softer aluminum wire because they reduce friction and minimize the risk of shavings that cause feeding blockages.
Liners should be the correct length for your torch cable. A liner that’s too short leaves a gap at the contact tip end, causing wire to bunch and bird-nest. Cutting the liner to the precise manufacturer-specified length when replacing it prevents most feeding problems.
For anyone working with aluminum, the liner choice is especially important — and it’s covered in detail when you look at how a MIG welder handles aluminum setup and gas tips.
Common MIG Torch Problems and Fixes
Problem
Likely Cause
Fix
Wire burns back into tip
Contact tip worn or too large
Replace contact tip; match diameter precisely
Erratic arc
Dirty or worn liner
Replace liner; check for kinks in cable
Poor gas coverage
Clogged nozzle
Clean or replace nozzle; check gas flow rate
Wire birdnesting
Liner too short or kinked
Recut liner to correct length
Torch overheating
Exceeding duty cycle
Allow cool-down time; check torch amperage rating
Spatter buildup accelerating
Wrong torch angle or voltage too high
Adjust torch angle; check machine settings
One often-overlooked issue is the gas diffuser. If the diffuser ports become blocked with spatter, gas distribution becomes uneven, causing porosity even when your gas flow rate appears correct.
Weld appearance is a reliable indicator of torch health. Knowing what a good MIG weld looks like gives you a visual reference to spot when something in your setup — including the torch — is off.
Torch Maintenance Routine
A basic torch maintenance routine prevents most problems before they affect weld quality:
1. After each session — Remove spatter from inside the nozzle using a nozzle cleaning tool or wire brush. Apply anti-spatter spray to the inside of the nozzle.
2. Weekly or every few hours of use — Inspect the contact tip for oval wear; replace if needed. Check the nozzle for cracks or heavy spatter buildup.
3. Monthly or every 10–15 hours of welding — Pull the liner and inspect it for kinks, wear, or contamination. Check the cable for sharp bends or damage.
4. As needed — Replace the gas diffuser if ports are blocked. Inspect the trigger mechanism for stiffness or intermittent response.
The Hobart Handler 190 comes with a built-in 10-foot MIG gun that’s straightforward to maintain, and its consumables are widely available — which makes routine tip and liner replacements easy to keep up with.
FAQ
What is the difference between a MIG gun and a MIG torch?
The terms are used interchangeably in most contexts. In North America, “MIG gun” is more common in shop environments. In Europe and Australia, “MIG torch” is the standard term. Both refer to the same handheld device that delivers wire, gas, and current to the weld. There’s no functional difference implied by the naming.
How do I know what size contact tip to use?
Contact tip size must match your wire diameter exactly. If you’re running 0.030″ wire, use a 0.030″ contact tip. Using the wrong size causes poor current transfer, inconsistent arc, and feeding problems. The tip size is usually stamped on the side. Always verify before welding.
Why does my MIG torch keep burning back into the contact tip?
Burnback happens when the wire stops feeding but the arc is still active. Common causes include a worn or oversized contact tip, wire feed speed set too low, a kinked liner causing inconsistent feed, or holding the torch too close to the workpiece. Address the liner and tip first, then check your wire speed setting.
Can I use any MIG torch with any MIG welder?
Not universally. Torches connect to machines via standardized connectors — Euro-style and Tweco-style being the most common. A Euro connector torch won’t fit a machine with a proprietary or Tweco connection without an adapter. Always check connector compatibility before purchasing a replacement torch.
What torch angle should I use for vertical MIG welding?
For vertical-up welding, a slight drag angle of about 5°–10° pointing upward works well to control the puddle against gravity. Welding vertical MIG requires slower travel speed and more attention to heat management compared to flat position work.
How often should I replace a MIG torch liner?
Liner replacement frequency depends on usage and wire type. In a production environment, liners may need replacing every few months. For hobbyist use, annually or when feeding problems appear is typical. Signs that a liner needs replacement include inconsistent wire feed, increased birdnesting, and visible kinking or dark contamination inside the liner.
What causes excessive spatter from a MIG torch?
Excessive spatter usually comes from voltage being too high relative to wire feed speed, incorrect gas mixture, a dirty or worn contact tip, or incorrect torch angle. Check your settings against a wire/voltage chart for your specific wire and material thickness. Nozzle contamination can also cause gas turbulence that worsens spatter.
The MIG torch is the direct connection between your machine settings and the actual weld. Keeping the contact tip, liner, and nozzle in good condition — and understanding how torch angle and neck configuration affect your access — will solve the majority of weld quality problems that aren’t directly related to machine settings. Most torch issues are simple consumable problems that take less than five minutes to fix once you know what to look for.