
Why Uphill Welding Is Different From Flat or Horizontal
Machine Settings for Uphill MIG Welding
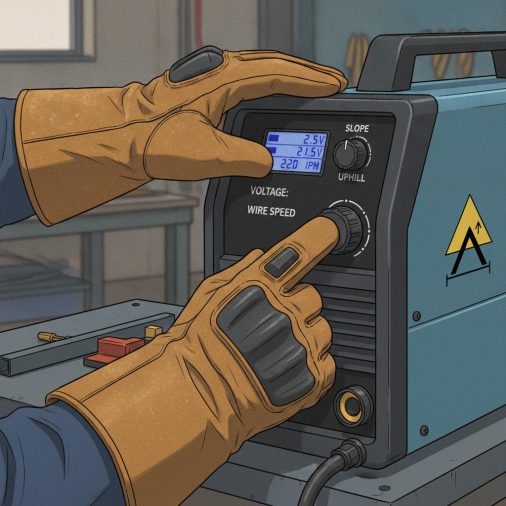
| Material Thickness | Wire Size | Voltage (approx.) | Wire Feed Speed |
|---|---|---|---|
| 3/16 in (4.8 mm) | 0.030 in | 17–18 V | 180–220 IPM |
| 1/4 in (6.4 mm) | 0.035 in | 18–20 V | 200–240 IPM |
| 3/8 in (9.5 mm) | 0.035 in | 19–21 V | 220–260 IPM |
Gun Angle and Body Position
Before you strike an arc, get your body position right. Awkward positioning is responsible for more failed uphill welds than wrong settings. Gun angle: – Point the gun upward at a 5–15 degree work angle (toward the direction of travel) – Maintain a 90-degree perpendicular angle side-to-side to avoid undercutting one edge – Keep contact-tip-to-work distance tight — roughly 1/2 inch or slightly less Body position: – Brace your forearm or elbow against something stable if possible – Position yourself so you’re pushing the gun upward naturally, not reaching or twisting – Keep your gun hand relaxed; gripping too hard increases fatigue and causes inconsistent motion Many welders find it easier to brace the back of their wrist against the workpiece and walk their hand upward as they progress. The Lincoln Electric Power MIG 210 MP and similar multi-process machines have responsive wire feed controls that make real-time adjustments easier when you’re learning uphill technique.The Weaving Motion: How to Control the Puddle
The most important skill in uphill MIG welding is mastering puddle control through torch motion. There are two main approaches:1. Triangular (Christmas Tree) Motion
This is the most commonly taught technique for uphill structural welds. Move the gun in a triangular pattern: – Push up the center briefly – Pause at each side of the joint to fill the edges – Return to the center and advance upward slightly – Repeat The pauses at each side are critical. They allow the puddle to fuse into the base metal at the toes of the weld rather than just piling up in the middle. Rushing through the sides causes undercut — one of the most common defects in uphill welding.2. C or Crescent Motion
An alternative where you move the gun in small upward C-shaped curves. This works well on thinner plate and gives a smoother, more even appearance. It requires better puddle awareness because you’re constantly moving without discrete pause points.3. Straight Stringer Bead
On thinner material or narrow joints, a simple straight upward stringer bead with no weaving often works best. Keep a consistent travel speed and let the heat do the work. Stringer beads on uphill joints tend to have less risk of cold lap or incomplete fusion on thin material.Step-by-Step: Making Your First Uphill MIG Weld
1. Set up your machine — Dial in voltage and wire feed speed based on your material thickness. Start slightly cooler than you would flat. 2. Clean the base metal — Remove mill scale, rust, paint, or oil from the joint area. Contamination causes porosity and instability in any position, but it’s harder to manage uphill. 3. Position your work — The joint should be truly vertical. Even a slight lean toward flat changes how the puddle behaves. 4. Strike the arc at the bottom — Begin at the lowest point of the joint and travel upward. 5. Establish the puddle first — Let the arc establish a solid puddle before you begin weaving or traveling. A cold start produces a weak fusion zone at the root. 6. Begin your weave or stringer — Keep motion smooth and rhythmic. Watch the edges of the puddle, not the wire. 7. Maintain consistent CTD — Stick-out length affects arc stability and penetration. Don’t let the gun creep too far from the surface. 8. Pause at the toes — Whether using triangular or C-motion, pause briefly each time you reach the edge of the joint to prevent undercut. 9. End the bead cleanly — Back-step slightly at the finish or pause briefly to fill the crater and avoid a crater crack.Common Problems and How to Fix Them
Puddle Sagging or Running Down
Cause: Too much heat or too slow travel speed. Fix: Increase travel speed slightly, reduce wire feed speed, or reduce voltage by 0.5–1 V. Speed up your weave slightly.Undercut at the Toes
Cause: Moving too fast through the edges of the joint, or gun angle too steep. Fix: Slow down and add a deliberate pause at each side. Check that your gun is truly perpendicular side-to-side.Cold Lap or Lack of Fusion
Cause: Traveling too fast upward, or heat too low. Fix: Slow your upward travel, and make sure you’re pausing long enough at the sides to melt into the base metal properly.Porosity
Cause: Contaminated base metal, insufficient gas coverage, or gas flow rate too low. Fix: Clean the base metal thoroughly. Check gas flow — typically 20–25 CFH is appropriate for vertical work where drafts can disrupt shielding.Convex, Piled-Up Bead
Cause: Not enough heat for the travel speed, or excessive wire feed. Fix: The bead should be slightly convex but not dramatically so. If it looks like a caterpillar sitting on top of the surface, increase voltage slightly or reduce wire feed speed. Knowing what a good MIG weld looks like helps you self-evaluate uphill passes accurately before moving on.Push vs. Pull on Vertical Uphill
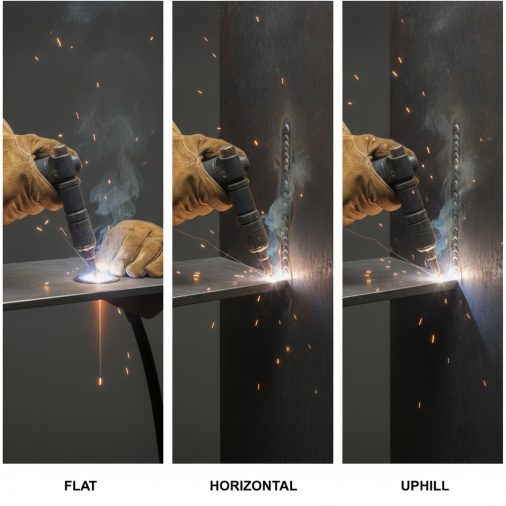
On flat welds, pushing vs. pulling affects penetration and bead profile noticeably. the difference between pushing and pulling a MIG welder is worth understanding before you go vertical. For uphill welding, the standard technique is to push the gun upward — meaning the gun is angled slightly upward in the direction of travel. This is technically a “forehand” or push position on vertical. It gives you better visibility of the leading edge of the puddle, which is where you need to watch most carefully when fighting gravity. Pulling uphill (dragging) tends to produce a narrower, more convex bead on vertical joints and isn’t typically recommended for structural uphill work.Uphill Welding on Different Materials
Most uphill MIG technique discussion centers on mild steel, but the principles translate across materials with adjustments. Stainless steel: Heat management becomes even more important because stainless retains heat longer. Run lower heat settings than you think you need. The technique for MIG welding stainless steel emphasizes keeping heat input controlled, which applies directly to uphill passes. Aluminum: Uphill MIG welding aluminum is challenging because aluminum’s thermal conductivity changes rapidly as it heats up. The puddle can go from sluggish to fluid very quickly. Most fabricators avoid uphill aluminum MIG welds on thicker sections without significant experience. Sheet metal: Vertical uphill on thin sheet metal is difficult and often unnecessary. For panels under 3/16 inch, vertical downhill or tacking in sequence often makes more practical sense. If you do weld uphill on sheet, use stringer beads, lowest practical heat, and fast travel. For more on managing thin material, the techniques around MIG welding sheet metal apply here.FAQ
Why is my uphill MIG weld sagging and dripping? The puddle is too fluid, which usually means too much heat. Reduce your voltage by 0.5–1 V and slightly increase travel speed. Also check that you’re not dwelling too long in any one spot during your weave. If the dripping continues, reduce wire feed speed incrementally and retest on scrap. Should I weld uphill or downhill for structural welds? Uphill is almost always required for structural welds on material over 3/16 inch. Uphill technique produces deeper penetration and better fusion at the root of the joint. Most welding codes and standards, including AWS D1.1, specify vertical uphill for structural fillet and groove welds on thicker material. What wire size is best for uphill MIG welding? For most uphill work on mild steel, 0.030 in wire is preferred on material up to 3/16 inch, and 0.035 in works well from 3/16 inch through 3/8 inch. Larger wire like 0.045 in is typically reserved for heavy plate work where higher deposition rates are needed. How do I stop undercut when MIG welding uphill? Undercut is caused by moving too quickly across the edges of the joint without giving the puddle time to fill in. Slow down at the toes of your weld on each side of the joint. Also verify your gun is perpendicular to the plate — angling too far to one side concentrates arc force unevenly. Can I use flux-core wire for uphill MIG welding? Yes, and gas-shielded flux-core wire (FCAW-G) is commonly used for uphill structural welds because it produces a slag that helps support the puddle against gravity. Self-shielded flux-core can also be used uphill but requires practice to control slag inclusions. Standard solid wire with gas shielding is perfectly capable for most shop and field uphill MIG work. What travel speed should I use going uphill? There’s no single correct number because travel speed depends on material thickness, heat settings, and joint configuration. In practice, uphill travel is noticeably slower than flat — roughly 20–40% slower. Watch the puddle rather than trying to maintain a specific inches-per-minute rate. If the bead is convex and narrow, slow down. If it’s sagging, speed up. Does polarity change for uphill MIG welding? No. Standard solid wire MIG welding uses DCEP (direct current electrode positive) regardless of position. Polarity doesn’t need to change when moving from flat to vertical. If you switch to self-shielded flux-core, some wires specify DCEN (electrode negative), but that’s a wire-specific requirement, not a position-based one.Uphill MIG welding clicks once you stop fighting the puddle and start working with it. Use slightly less heat than you’d expect, keep your motion consistent and rhythmic, and always pause at the toes of the joint. Most problems — sagging, undercut, cold lap — trace back to either too much heat or rushing through the edges. Get those two things right, and the rest of the technique falls into place with practice.


