MIG welding is one of the most accessible welding processes available, and for good reason. It’s fast, relatively forgiving, and produces clean welds once you understand a few key principles. Whether you’re fixing a trailer hitch or building a steel frame, the fundamentals stay the same.
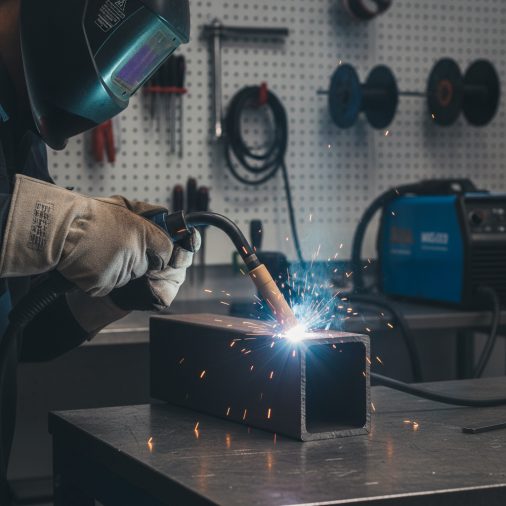
MIG welding works by feeding a continuous wire electrode through a welding gun while shielding gas protects the molten weld pool from atmospheric contamination. To weld with a MIG welder: set your voltage and wire speed for your material thickness, hold the gun at a 10–15° angle, maintain a 3/8–1/2 inch contact tip distance, and move steadily along the joint using a push or slight drag technique.
What You Need Before You Start
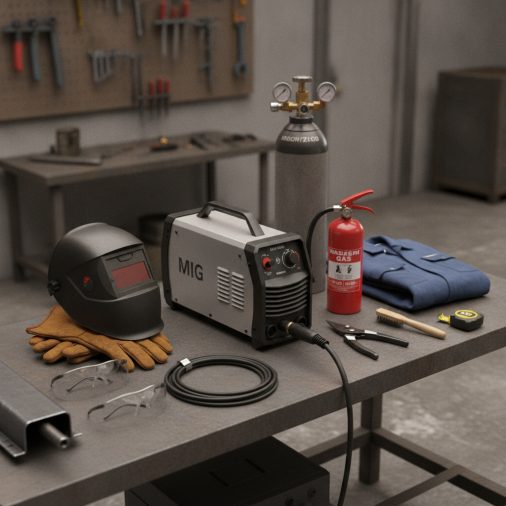
Getting the right gear together before striking your first arc saves a lot of frustration later.
Essential equipment:
– MIG welder (a machine like the Lincoln Electric Weld-Pak 140 works well for home and light fabrication use)
– Shielding gas — typically 75% Argon / 25% CO2 (C25) for mild steel
– Solid wire, typically ER70S-6 in 0.030″ for general work under 1/4″
– Auto-darkening welding helmet (shade 9–13)
– Welding gloves, long-sleeve jacket or welding coat
– Safety glasses worn under the helmet
– Wire brush and angle grinder for prep
Materials you’ll commonly weld:
– Mild steel (most common for beginners)
– Stainless steel (requires different wire and gas)
– Thin sheet metal
If you’re curious about exactly what materials a MIG welder can handle, the answer is broader than most beginners expect — though each material has its own wire and gas requirements.
Setting Up the Machine Correctly
Setup is where most beginners struggle. Wrong settings produce weak, porous, or spattery welds.
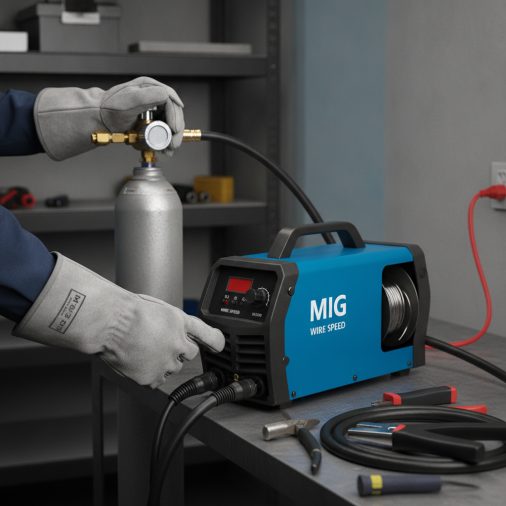
Voltage and Wire Feed Speed
These two controls determine heat input and how fast the wire deposits. They work together — too much voltage with too little wire speed burns the wire back; too much wire speed with too little voltage creates a bird’s nest.
A general starting point for mild steel:
Material Thickness
Voltage (V)
Wire Speed (IPM)
Wire Diameter
24 gauge (0.024")
15–16
150–180
0.023"
18 gauge (0.048")
17–18
180–220
0.030"
1/8"
19–21
240–280
0.030"
1/4"
22–24
300–350
0.035"
These are starting points. Always run a test bead on scrap metal first and adjust from there. For a more complete breakdown, this MIG welder settings practical guide covers voltage, amperage, and wire speed in greater depth.
Gas Flow Rate
Set your shielding gas regulator to 15–25 CFH (cubic feet per hour). Lower than 15 CFH risks contamination; higher than 25 CFH creates turbulence that also lets air in. In drafty environments, lean toward the higher end or use a wind break.
If you’re unclear whether you actually need gas for your setup, it’s worth understanding when shielding gas is required for MIG welding — flux-core wire is an alternative in some situations, but solid wire always needs gas.
Preparing the Metal
Clean metal is non-negotiable. Mill scale, rust, paint, and oil all cause porosity and weak welds.
Prep steps:
1. Remove paint or coatings with an angle grinder or wire wheel
2. Wipe away oil and grease with acetone or a degreaser
3. Grind off heavy rust until you see clean, shiny metal
4. Remove any galvanized coating — welding galvanized steel releases toxic zinc fumes without proper ventilation
For thicker material (over 1/8″), bevel the joint edges to create a V-groove. This lets the weld penetrate deeper rather than sitting on top of the surface.
Fit-up matters too. Tight, consistent joint gaps produce more predictable welds. Large gaps require multiple passes or filler rod to bridge, which is harder to control as a beginner.
How to Hold and Move the Welding Gun
Gun angle and travel technique directly affect bead shape and penetration.
Gun Angle
– Work angle: Hold the gun at 90° to the joint (perpendicular to the work surface), then tilt 10–15° in the direction of travel
– Travel angle: This tilt forward or backward controls how the arc pushes or pulls the weld pool
Push vs. Pull
– Pushing (gun angled away from the weld, moving forward): shallower penetration, wider and flatter bead, better visibility — generally preferred for MIG
– Pulling/dragging (gun angled toward the weld): slightly deeper penetration, narrower bead
Most experienced welders use a slight push technique for MIG welding on mild steel. The debate is more nuanced than it first appears — for a full explanation of when to push or pull a MIG welder, the technique matters more on certain joints than others.
Contact Tip to Work Distance (CTWD)
Keep approximately 3/8″ to 1/2″ (10–12mm) between the contact tip and the base metal. Too close and you risk burning back into the tip. Too far and the arc becomes unstable and shielding gas coverage drops.
Step-by-Step: Laying Your First Weld Bead
1. Clamp your ground as close to the weld area as possible on clean, bare metal
2. Position yourself comfortably — brace your elbow or wrist to maintain consistent movement
3. Lower your helmet before striking the arc
4. Squeeze the trigger to start the wire feed and gas flow simultaneously
5. Hold the arc at your starting point for 1–2 seconds to establish a weld pool
6. Move steadily along the joint at a consistent pace — listen for a smooth, steady crackling sound (like frying bacon)
7. Stop at the end of the joint and release the trigger; hold the gun in place briefly while the gas post-flow protects the cooling weld
8. Let it cool before touching — the weld area stays extremely hot for several minutes
The sound tells you a lot. A harsh popping or stuttering arc usually means wire speed is too high or voltage is too low. A hollow, sputtery sound often means too much gas or a contaminated surface.
Common Beginner Mistakes and How to Fix Them
Porosity (small holes or pits in the bead)
– Cause: contaminated metal, insufficient gas flow, or gas nozzle clogged with spatter
– Fix: clean metal thoroughly, increase gas flow to 20 CFH, clean nozzle with anti-spatter spray
Burn-through on thin metal
– Cause: too much heat, moving too slowly
– Fix: lower voltage by one step, increase travel speed, or use a stitch/tack pattern instead of a continuous bead
Learning how to MIG weld sheet metal without burning through is its own skill — thin gauge steel punishes incorrect settings quickly.
Weld bead piling up (convex, ropy bead)
– Cause: wire speed too high relative to voltage
– Fix: increase voltage slightly or reduce wire speed
Cold laps (bead sitting on top without fusing)
– Cause: voltage too low, travel speed too fast
– Fix: slow down and increase voltage; ensure proper joint contact
Wire bird’s nesting at the drive rolls
– Cause: wire tension too tight, blocked liner, or contact tip clogged
– Fix: check drive roll tension, replace the liner if kinked, clear or replace the contact tip
If the wire stops feeding mid-weld, the wire feed motor troubleshooting steps can help identify whether it’s mechanical or electrical.
Welding Different Joint Types
MIG welding is used across several joint configurations. Each behaves slightly differently.
– Butt joint: Two pieces edge to edge. Keep a small gap (1/16″) for thicker material to allow penetration
– Lap joint: One piece overlapping another. Angle the gun 45° to fuse both surfaces equally
– T-joint (fillet weld): One piece perpendicular to another. Most common joint in fabrication; aim the arc at the root where the pieces meet
– Corner joint: Two pieces meeting at a corner. Watch for burn-through on the outer edges
For each joint, maintaining consistent travel speed and gun angle matters more than any single setting. Inconsistency — speeding up or slowing down mid-bead — shows up immediately in the bead profile.
Safety You Can’t Skip
MIG welding produces UV radiation, metal fumes, and extreme heat.
– Never weld without eye protection. The arc produces UV and IR radiation that causes arc eye — a painful condition similar to a sunburn on your corneas
– Ventilate your workspace. Metal fumes, especially from coated or painted steel, are hazardous. Use local exhaust ventilation or weld outdoors
– Keep flammables away. Sparks travel further than most beginners expect
– Wear natural fiber clothing. Synthetic fabrics melt when struck by spatter; wool or cotton welding jackets are standard
– Fire watch. Stay near the work area for 30 minutes after welding — hidden smoldering fires are a real risk in cluttered shops
FAQ
What wire size should a beginner use for MIG welding?
For most beginner projects involving mild steel between 18 gauge and 1/4″, 0.030″ ER70S-6 solid wire is the most versatile starting point. It handles a wide range of thicknesses and is widely available. If you’re working primarily with sheet metal thinner than 18 gauge, stepping down to 0.023″ gives better control over heat input and reduces burn-through risk.
How do I know if my MIG welder settings are correct?
The easiest indicator is sound. A correct setting produces a steady, smooth crackling — often compared to frying bacon. Popping, sputtering, or intermittent arcing suggests an imbalance between voltage and wire speed. Visually, a correct bead should be flat to slightly convex, uniform in width, and show consistent ripple patterns without excessive spatter.
Can I MIG weld without shielding gas?
You can use flux-core wire (FCAW) without shielding gas, but solid MIG wire always requires gas protection. Running solid wire without gas produces a porous, contaminated weld that will fail under load. Flux-core welding works well outdoors or in windy environments where gas coverage is unreliable.
Why does my MIG weld keep burning through the metal?
Burn-through happens when heat input exceeds what the material can absorb. Lower your voltage one step, increase your travel speed, or try a stitch weld — short tack welds spaced apart to let the metal cool between passes. On thin gauge material, the Lincoln Electric Weld-Pak 140 and similar machines have fine-tuned low-amperage settings that help dial in heat more precisely.
How far should the wire stick out from the MIG gun tip?
The wire should extend approximately 3/8″ to 1/2″ beyond the contact tip before striking the arc. This is your contact tip to work distance (CTWD). Longer stick-out reduces penetration and increases resistance; shorter stick-out risks damaging the contact tip and creates an erratic arc.
What causes excessive spatter in MIG welding?
Spatter typically means voltage is too low relative to wire speed, or the base metal is contaminated. It can also result from incorrect polarity — solid MIG wire requires DCEP (electrode positive). Check polarity first, then clean the metal, then adjust voltage upward in small increments until the arc stabilizes and spatter reduces.
Is MIG welding strong enough for structural work?
Properly executed MIG welds on appropriate base metal with correct filler wire meet or exceed the base metal strength in most applications. ER70S-6 wire has a tensile strength of approximately 70,000 PSI, which matches or exceeds common mild steel. The key word is properly executed — a poor MIG weld is no stronger than any other poorly made weld regardless of process.
Getting Better Comes Down to Repetition
The technical settings matter, but muscle memory carries you through. Run practice beads on scrap steel until consistent travel speed and gun angle become natural. Most welders find the first 10 to 20 hours of practice produces the sharpest improvement. Focus on listening to the arc and watching the weld pool — not the wire tip. The pool tells you everything about whether your settings and technique are working.