Vertical welding on 1/4 inch steel is one of those situations where having the wrong settings creates a fast, frustrating mess. The puddle sags, spatter flies everywhere, and penetration suffers before you even get halfway up the joint.
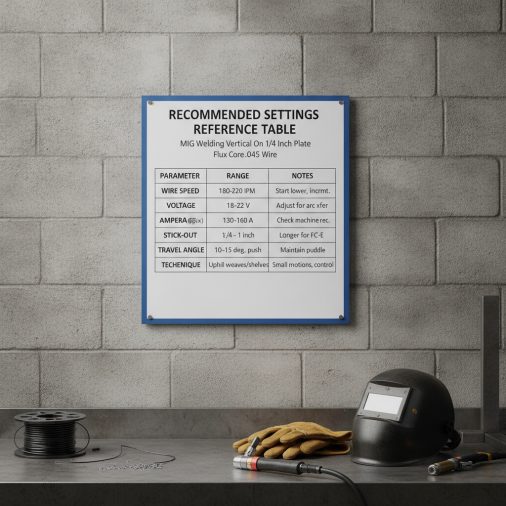
For flux core .045 wire welding vertical on 1/4 inch plate, use 19–22 volts and a wire feed speed of 180–220 inches per minute (IPM). Run DCEN (electrode negative) polarity. Travel angle should be 5–15 degrees pointing into the joint, with a slight upward drag. Use a weave or upside-down V motion to control the puddle. Reduce heat by 10–15% compared to flat position settings to prevent sagging.
Why Vertical Welding Demands Different Settings Than Flat
Gravity is constantly pulling the molten puddle downward when you weld vertically. On flat plate, that same gravity keeps the puddle stable and controlled. Going vertical removes that advantage entirely.
With .045 flux core wire on 1/4 inch plate, you have enough heat to melt material quickly. That’s useful for penetration, but it becomes a problem when the puddle gets too fluid and starts rolling down the joint before it solidifies.
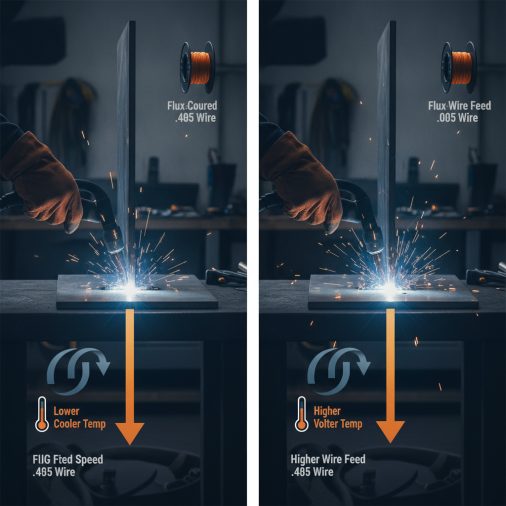
Reducing voltage and wire feed speed slightly compared to flat position settings controls puddle fluidity. The goal is a puddle that melts cleanly but stays manageable — thick enough to hold its shape while you move.
Recommended Settings Reference Table
Parameter
Setting Range
Wire Diameter
.045 flux core
Voltage
19–22 V
Wire Feed Speed
180–220 IPM
Polarity
DCEN (electrode negative)
Shielding Gas
Self-shielded (no gas required)
Travel Angle
5–15° (work angle perpendicular to plate)
Travel Direction
Vertical up recommended for 1/4" plate
Stick-Out
3/4" to 1"
These settings are starting points. Always run a test bead on scrap 1/4 inch plate before welding your actual joint.
Vertical Up vs. Vertical Down for 1/4 Inch Plate
This is one of the most practical decisions to make before you strike an arc.
Vertical up (welding from bottom to top) is the correct approach for 1/4 inch structural plate. It produces deeper penetration, a stronger fusion profile, and better structural integrity. The puddle has support underneath as you move upward, which helps control sag.
Vertical down works on thinner material — typically under 3/16 inch — where speed and shallow penetration are acceptable. On 1/4 inch plate, vertical down often leaves inadequate penetration at the root and produces a convex, weak bead profile.
For any structural application on 1/4 inch stock, always weld vertical up.
Polarity and Wire Type: Getting This Right First
Self-shielded flux core wire — the kind used without a shielding gas tank — runs on DCEN (Direct Current Electrode Negative). Many welders coming from solid wire MIG mistakenly leave the machine set to DCEP and wonder why penetration looks poor and spatter is excessive.
Flip your polarity to DCEN before running .045 self-shielded flux core. This is non-negotiable.
If you are running dual-shielded flux core .045 wire (which uses external shielding gas), that wire typically runs on DCEP. Check your wire manufacturer’s data sheet to confirm — the polarity requirement is printed there. Understanding what polarity MIG welding uses for each wire type prevents a lot of wasted test beads and confusing results.
Stick-Out, Travel Angle, and Gun Position
Stick-out — the distance from the contact tip to the work — directly affects heat input and arc stability with flux core wire.
For .045 flux core, maintain 3/4 to 1 inch of stick-out. Going shorter increases heat and can cause erratic arcing. Going longer with self-shielded wire reduces shielding effectiveness and produces a hotter, less controlled arc.
Travel angle for vertical up should be slight — point the gun 5 to 15 degrees upward into the direction of travel. Keep the work angle perpendicular to the plate face, approximately 90 degrees between the two base metal surfaces on a T-joint, or centered on a butt joint.
Avoid pushing the gun straight up with no travel angle. A slight drag angle (gun angled back toward the deposited weld) keeps the arc more focused and helps control penetration.
Weave Patterns and Puddle Control
Running a straight stringer bead vertically on 1/4 inch plate with .045 flux core often creates a too-narrow, high-crowned bead. A controlled weave works better for this thickness.
Common vertical weave techniques:
– Upside-down V (triangle weave): Move upward at the center, pause briefly at each side wall, then return to center. The pauses at the toes allow fusion and prevent undercut.
– Z-weave: Side-to-side motion with a slight upward progression. Covers width quickly but requires consistent timing.
– Crescent or C-weave: Smooth curved motion. Works well once you develop puddle awareness.
The pause at each side wall is critical. Without it, the toes of the bead undercut rather than fuse cleanly. Hesitate for half a second at each wall — enough to let the puddle wash in — then move back to center and upward.
Keep your weave width moderate. Excessive weaving on .045 wire at vertical settings introduces too much heat into the joint and makes the puddle impossible to control.
Common Problems and How to Fix Them
Problem: Puddle sagging or dripping downward
Cause: Voltage too high, wire speed too fast, or weave too slow.
Fix: Drop voltage by 0.5–1 V, reduce WFS by 10–15 IPM, and increase travel speed slightly. The puddle should look slightly convex and firm, not fluid and shiny.
Problem: Excessive spatter
Cause: Wrong polarity, voltage too low, or stick-out too long.
Fix: Verify DCEN polarity. Increase voltage slightly. Trim stick-out to 3/4 inch.
Problem: Undercut at toes
Cause: Moving too fast at the side walls, not pausing long enough.
Fix: Slow your weave and add a deliberate pause at each toe. The puddle needs time to fill the groove edge.
Problem: Porosity in the finished bead
Cause: Excessive stick-out reducing shielding from the flux core, or contaminated base metal.
Fix: Clean the plate with a grinder or wire brush. Trim stick-out back to 3/4 inch. Inspect wire for moisture damage.
Problem: Lack of fusion at the root
Cause: Too little heat, or wire not directed into the root.
Fix: Increase WFS slightly and ensure the gun is aimed directly at the root of the joint, not riding on top of the previous pass.
For a broader look at how settings interact across different material thicknesses, the flux core MIG welding settings chart gives a useful cross-reference starting point.
Multi-Pass Technique for Full-Penetration Welds
On 1/4 inch plate with a square butt or beveled joint, a single pass may not be sufficient for a full-penetration weld depending on joint design.
For a beveled joint, the typical sequence is:
1. Root pass: Lowest heat setting in the range. Focus on complete root fusion. Use a stringer bead — no weave — to avoid burning through the root opening.
2. Fill pass(es): Slightly higher WFS and voltage. Weave to fill the bevel evenly. Watch the toes.
3. Cap pass: Match settings to fill pass. Use a wider, slower weave to produce a smooth cap that ties in the toes cleanly.
Clean each pass with a wire brush before laying the next. Slag from flux core wire must be removed completely to prevent inclusions between passes.
Technique Tips That Make a Real Difference
A few practical field notes that don’t always appear in written settings guides:
– Let the machine warm up. Cold welders — especially inverter-based units — can perform inconsistently on the first few inches of a bead.
– Watch the leading edge of the puddle, not the arc. The arc is too bright to give you useful information. The puddle edge tells you if you’re ahead of or behind the correct travel speed.
– Tack often before welding. On 1/4 inch plate, heat distortion can open or close a joint gap as you weld. Adequate tacking holds the joint geometry consistent.
– Keep your helmet auto-dark shade at 10 or 11 for .045 flux core at these settings. Shade 9 is too light and will strain your eyes; shade 12 makes it difficult to see puddle edges clearly.
The Lincoln Electric Innershield NR-211-MP is a widely used .045 self-shielded flux core wire that performs consistently for vertical applications at these settings. It’s a practical reference point if you’re unsure which wire to test with.
If you’re still getting comfortable with the vertical position overall, reviewing how to weld vertical MIG covers gun positioning and body mechanics that directly affect consistency.
FAQ
What voltage should I use for .045 flux core on 1/4 inch vertical?
Start at 19–20 volts and test. If the bead is cold and stacking rather than fusing, increase to 21–22 volts. Vertical welding generally needs slightly lower voltage than flat position to keep the puddle from becoming too fluid and sagging. Always dial in on scrap before welding a structural joint.
Should I weld vertical up or vertical down with flux core .045 on 1/4 inch plate?
Vertical up is the correct choice for 1/4 inch plate. Vertical down doesn’t produce adequate penetration on material this thick and can leave a cold, poorly fused root. Reserve vertical down for thinner material where excessive heat and burn-through are the primary concern.
What wire feed speed works best for vertical flux core on 1/4 inch?
A wire feed speed of 180–220 IPM is a practical starting range for .045 flux core on 1/4 inch vertical plate. Start at 190 IPM and adjust based on bead appearance. If the wire is stubbing or the arc sounds irregular, increase speed. If the puddle is too hot and running, reduce it.
Why is my flux core bead cracking or showing porosity on vertical plate?
Porosity is usually caused by contamination on the base metal, excessive stick-out reducing shielding effectiveness, or moisture in the flux core wire. Clean the plate thoroughly, maintain 3/4 to 1 inch stick-out, and store wire in a dry environment. Cracking on 1/4 inch plate vertical welds often indicates too much heat and a lack of preheat on cold steel in low temperatures.
Do I need shielding gas for .045 flux core welding vertical?
Self-shielded .045 flux core wire — such as Lincoln Electric Innershield NR-211-MP — does not require external shielding gas. The flux chemistry inside the wire produces its own shielding during combustion. Dual-shielded flux core wire does require gas, typically 75/25 argon-CO2, but is less commonly used for jobsite vertical work where portability matters. You can read more about how gasless MIG welding works if you’re unfamiliar with the process.
How do I prevent undercut when weaving on vertical plate?
Undercut is caused by moving too quickly across the toe of the weld without allowing the puddle to fill the groove edge. The fix is a deliberate pause — roughly half a second — at each side wall of the weave before moving back to center. Slowing your overall travel speed and reducing voltage slightly also help. Undercut on structural welds is a defect that requires grinding and repair.
Can I use the same settings for a T-joint and a butt joint on vertical 1/4 inch?
The voltage and WFS starting points are similar, but T-joints often need the arc aimed directly into the root corner at a 45-degree work angle to achieve full fusion. Butt joints require the gun centered on the gap. A beveled butt joint on 1/4 inch plate will also require multiple passes, while a T-joint fillet may be completed in one or two passes depending on required leg size.
Getting the Weld Right the First Time
The settings listed here — 19–22 volts, 180–220 IPM, DCEN, 3/4 to 1 inch stick-out — put you in the right range for vertical up flux core welding on 1/4 inch plate. From there, technique controls the outcome more than any single setting adjustment.
Control the puddle with deliberate pauses, keep your stick-out consistent, and clean between passes. A dialed-in setting with poor gun movement still produces a bad weld. The settings just give you the conditions to succeed.