
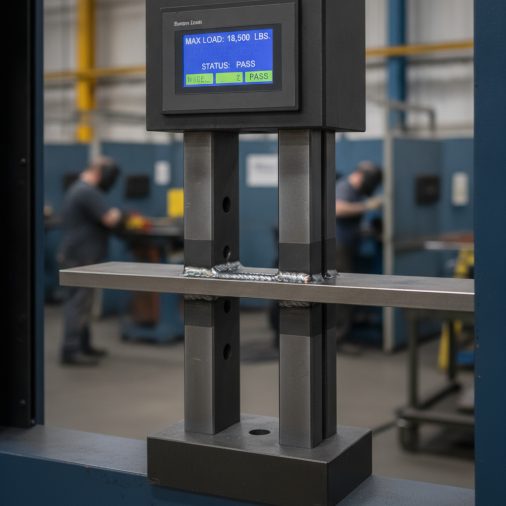
A typical MIG weld test for a manufacturing company requires the applicant to weld one or more test coupons in specified positions — usually flat, horizontal, or vertical — using the company’s equipment and materials. Evaluators assess bead appearance, penetration, consistency, and structural integrity. Tests may include visual inspection, bend testing, or destructive testing depending on the role and industry.
What the Test Is Actually Designed to Measure
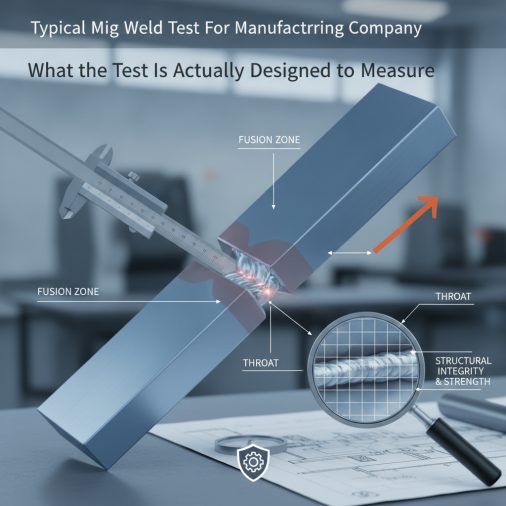
Manufacturing companies aren’t just checking whether you can strike an arc. The weld test is designed to evaluate practical skill under real shop conditions — using unfamiliar equipment, working within time constraints, and producing welds that meet repeatable quality standards.
Most evaluators are looking at three core things:
– Process control — Can you set up and adjust the machine correctly?
– Technique — Are your travel speed, gun angle, and work angle consistent?
– Output quality — Does the finished weld meet visual and structural standards?
The test simulates what you’ll actually do on the job, so companies often use the same wire, shielding gas, and base material you’d work with in production.
Standard Test Setup: Materials, Equipment, and Positions
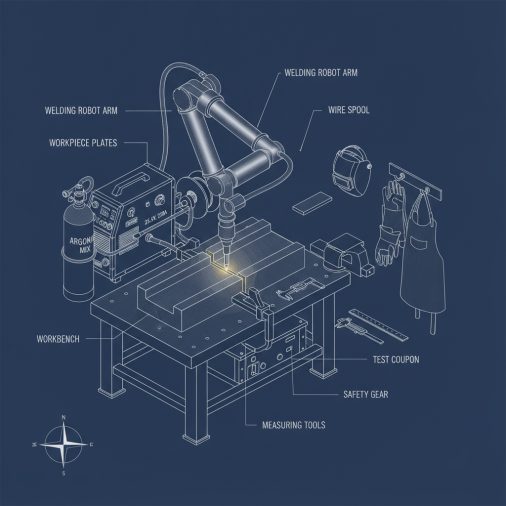
Base Metal and Consumables
Most manufacturing MIG weld tests use mild steel (A36 or similar) in plate form, typically ranging from 3/16 inch to 3/8 inch thickness. Thicker plate tests are common for structural or heavy fabrication roles. Thinner material may be used for sheet metal or light manufacturing positions.
Standard consumables typically include:
– Wire: ER70S-6, .030″ or .035″ diameter (most common in general manufacturing)
– Shielding gas: 75% Argon / 25% CO₂ (C25) for most applications; 100% CO₂ in some production environments
– Base metal: Clean, mill-scale or lightly ground mild steel coupons
Some companies will pre-cut and prep the coupons for you. Others expect you to tack your own joint together, which itself is part of the evaluation.
Joint Types Commonly Used
| Joint Type | Typical Use Case | Difficulty Level |
|---|---|---|
| Butt joint (square groove) | General fabrication | Moderate |
| V-groove butt joint | Structural / code work | Higher |
| T-joint (fillet weld) | Most manufacturing roles | Moderate |
| Lap joint | Sheet metal, light fab | Lower–Moderate |
| Corner joint | Enclosures, frames | Moderate |
The T-joint fillet weld is the single most common test joint across general manufacturing. If you’re preparing for a test without knowing the exact format, practicing fillet welds in multiple positions is your best use of time.
Welding Positions
Most entry-level and mid-level manufacturing tests require welding in at least two positions:
– 1F / 1G (flat) — The easiest position; gravity works in your favor
– 2F / 2G (horizontal) — Common on structural and fabrication tests
– 3F / 3G (vertical) — Harder to control; tests real technique
– 4F / 4G (overhead) — Less common in general manufacturing, more common in structural roles
A standard manufacturing test for a general welder often includes flat and horizontal positions. Vertical may be added for higher-skill roles or structural applications. Overhead is typically reserved for certified positions or specialized environments.
How Evaluators Grade the Weld
Visual Inspection Criteria
Before any destructive or mechanical testing, every weld goes through visual inspection. This is where most candidates either pass or get eliminated.
Evaluators check for:
– Consistent bead width and height — Irregular bead profile signals inconsistent travel speed or technique
– Proper fusion at toes — The weld must tie in cleanly at both edges without undercut or overlap
– Absence of porosity — Surface porosity (visible holes or pitting) indicates contamination or shielding gas issues
– Spatter level — Excessive spatter suggests incorrect voltage or wire feed speed settings
– Starts and stops — Craters at the end of a weld and poor restarts are common failure points
– Straightness — The bead should follow the joint consistently without wandering
A weld that looks clean and controlled tells an experienced evaluator a lot about your habits before they even cut it open.
Destructive Testing: The Bend Test
For many manufacturing roles — particularly those involving structural parts, pressure-related assemblies, or safety-critical components — visual inspection alone isn’t enough. The bend test is the most common destructive method used in shop-floor weld qualification.
How it works:
1. The test coupon is cut into strips (typically 1.5″ wide)
2. Strips are bent over a mandrel using a guided bend fixture
3. The weld is bent to a specified angle — usually 180° for a face bend or root bend
4. The bent sample is inspected for cracks, incomplete fusion, or open defects
Acceptance criteria typically follow AWS D1.1 (Structural Welding Code) or the company’s internal quality standard. A weld that cracks along the fusion line or shows porosity larger than 1/8″ usually fails.
Destructive Testing: The Nick-Break Test
Less common but still used in some manufacturing environments, the nick-break test involves breaking the weld apart and inspecting the fracture surface for:
– Incomplete fusion
– Internal porosity
– Slag inclusions
– Cold lap
This gives a direct view of the internal weld quality without requiring X-ray or ultrasonic equipment.
Machine Setup: What You’re Expected to Know
One area where candidates frequently stumble is the machine setup phase. Many companies hand you the machine and expect you to dial it in yourself. Knowing your parameters matters.
Typical MIG settings for 3/16" mild steel (ER70S-6, .035" wire, C25 gas):
| Parameter | Typical Range |
|---|---|
| Wire feed speed | 250–350 IPM |
| Voltage | 18–22V |
| Gas flow rate | 20–25 CFH |
| Contact tip-to-work distance (CTWD) | 5/8″ – 3/4″ |
| Travel speed | 12–18 IPM (approximate) |
These are starting points. In practice, you’ll adjust based on the machine’s behavior, the material condition, and the joint fit-up. Evaluators notice when a candidate makes confident, purposeful adjustments versus randomly turning knobs.
Common Reasons Candidates Fail the Test
Field experience shows that most failures come from a predictable set of mistakes:
– Rushing the weld — Moving too fast produces a narrow, convex bead with poor fusion at the toes
– Inconsistent gun angle — Changing your work angle mid-pass creates uneven penetration and bead profile
– Skipping the tack-weld check — Poor fit-up before welding leads to gaps, burn-through, or distortion
– Ignoring the crater — Not filling the crater at the end of a weld leaves a stress concentration point that often cracks during bend testing
– Wrong shielding gas flow — Too low causes porosity; too high creates turbulence that pulls in atmospheric contamination
– Not cleaning the base metal — Mill scale, oil, or moisture on the surface causes porosity and poor fusion
Most of these aren’t skill problems — they’re habit problems. Slowing down and being deliberate fixes the majority of them.
How to Prepare for a Manufacturing MIG Weld Test
If you have advance notice of the test, use it strategically:
1. Practice the specific joint and position — If you know it’s a T-joint in the horizontal position, run that exact setup repeatedly until your bead is consistent
2. Practice on similar material thickness — The feel of 3/8″ plate is very different from 1/4″
3. Work on your restarts — Practice stopping and restarting mid-bead cleanly, since evaluators often look at these closely
4. Time yourself — Some tests have time limits; knowing your pace prevents rushing
5. Review your machine setup knowledge — Be able to explain why you’re setting the parameters you choose
If you don’t know the test format in advance, ask. Most companies will tell you the joint type, position, and material thickness. There’s nothing wrong with asking — it shows professionalism.
FAQ
What certifications do I need before taking a manufacturing MIG weld test?
Most manufacturing companies don’t require prior certification to take the weld test — the test itself is the qualification. However, holding an AWS SENSE certification or a previous D1.1 qualification can strengthen your application and may exempt you from parts of the test at some employers.
How long does a typical MIG weld test take?
Most shop-floor MIG weld tests take between 30 minutes and 2 hours from setup to completion, including visual inspection. Destructive testing results may take longer if the coupons need to be cut and processed in a lab or by a quality technician.
What happens if I fail the MIG weld test?
Most companies allow at least one retest, sometimes after a waiting period of a few days to two weeks. Some employers offer feedback on why you failed, which is worth asking for. Repeated failures may disqualify you from that position, but don’t necessarily affect your ability to apply elsewhere.
Can I bring my own equipment or wire to the test?
Generally, no. Manufacturing companies expect you to use their equipment, wire, and gas because the test is meant to evaluate how you perform in their actual production environment. Familiarity with a variety of machines is itself part of what’s being assessed.
What’s the difference between a weld test and a weld certification?
A weld test is an employer-administered practical evaluation used for hiring decisions. A weld certification — such as those issued under AWS D1.1 or ASME Section IX — is a formally documented qualification that follows a specific code procedure and is recorded by a certified welding inspector (CWI). Some manufacturing roles require both.
How strict are the visual inspection standards in manufacturing weld tests?
It depends on the industry and the role. Automotive and aerospace manufacturing tend to have tighter visual standards than general fabrication shops. In most cases, evaluators are looking for consistent, controlled welds rather than perfection — but obvious defects like porosity, undercut, or overlap will typically result in a fail.
Does travel direction matter in a MIG weld test — push or pull?
Yes, and it’s worth knowing the preference before you test. In most manufacturing environments using solid wire MIG, the push (forehand) technique is standard because it produces a flatter bead and better visibility of the weld pool. Some evaluators will specifically ask which technique you’re using and why.
Final Thoughts
A MIG weld test for a manufacturing company is straightforward when you know what’s being evaluated. Clean technique, proper machine setup, and consistent bead quality are the three pillars. The candidates who fail usually aren’t lacking raw skill — they’re rushing, ignoring fit-up, or letting nerves affect their gun control. Treat the test like a production weld, not a performance. Slow down, set your machine deliberately, and let your technique do the talking.


