Dialing in the wrong settings on a stick welder can ruin a weld before you even strike the arc. Whether the rod keeps sticking, the bead piles up, or you’re burning through thin plate, the problem almost always traces back to amperage, polarity, or rod selection.
Welding rod settings depend on three main variables: rod diameter, rod type, and base metal thickness. A 1/8-inch 6013 rod typically runs at 80–130 amps on DCEP. A 3/32-inch 7018 runs at 70–110 amps. As a general rule, use approximately 1 amp per 0.001 inch of metal thickness, then adjust based on rod type, position, and joint fit-up.
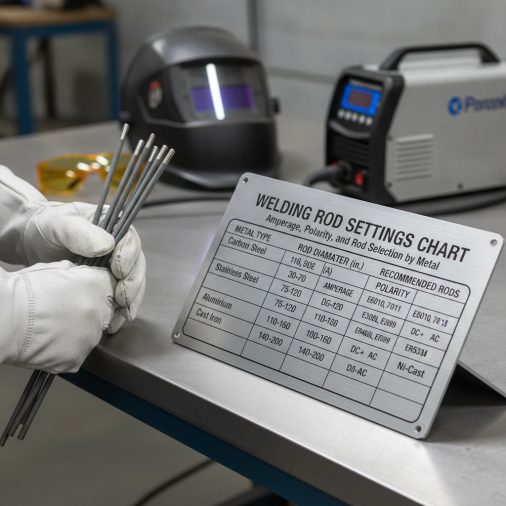
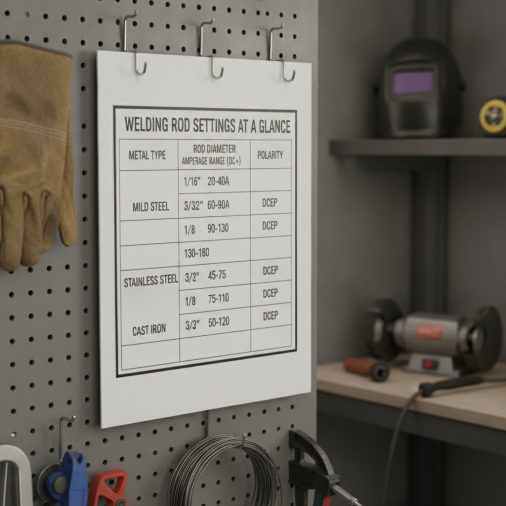
Welding Rod Settings Chart at a Glance
This quick-reference chart covers the most common stick welding rods used in shop and field work.
Rod Type
Diameter
Amperage Range
Polarity
Best Use
6010
3/32"
60–90 A
DCEP
Root passes, pipe, dirty metal
6010
1/8"
75–125 A
DCEP
Deep penetration, all positions
6011
3/32"
40–80 A
AC / DCEP
Rusty or painted steel, AC machines
6011
1/8"
75–125 A
AC / DCEP
General repair, AC machines
6013
3/32"
40–90 A
AC / DCEP / DCEN
Sheet metal, beginners
6013
1/8"
80–130 A
AC / DCEP / DCEN
Light to medium steel
7018
3/32"
70–110 A
DCEP
Structural, clean steel
7018
1/8"
100–165 A
DCEP
Heavy plate, structural fabrication
7018
5/32"
130–200 A
DCEP
Thick plate, multi-pass welds
7024
1/8"
120–175 A
AC / DCEP
High-speed flat and horizontal welds
6010
5/32"
110–165 A
DCEP
Heavy structural, pipeline root
These ranges reflect typical manufacturer recommendations. In practice, you’ll often find your sweet spot 10–15 amps inside the upper or lower limit rather than at the extreme ends.
How to Read a Welding Rod Classification Number
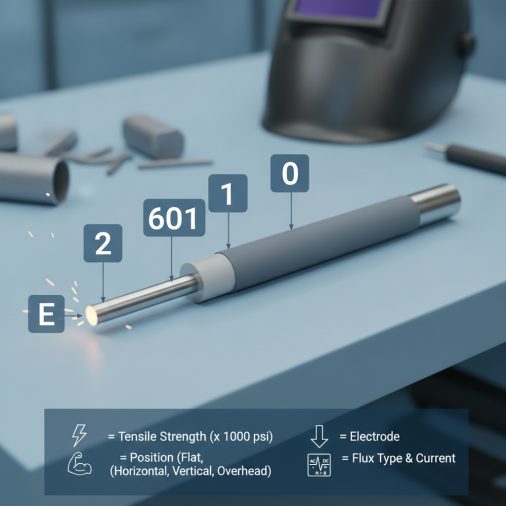
The four-digit code stamped on every welding rod carries specific information.
– First two digits — Minimum tensile strength in thousands of PSI (60 = 60,000 PSI, 70 = 70,000 PSI)
– Third digit — Welding positions (1 = all positions, 2 = flat and horizontal only)
– Fourth digit — Coating type, flux composition, and compatible polarity
So a 7018 rod means: 70,000 PSI tensile strength, all-position capable, low-hydrogen iron powder coating, runs on DCEP or AC.
The different types of welding rods each have a unique flux chemistry that affects arc stability, spatter, and bead appearance — which is why you can’t just swap one rod for another without adjusting your settings.
Amperage Settings by Metal Thickness
Rod diameter and amperage need to match the base metal thickness. Using a 1/8-inch rod on 14-gauge sheet is a reliable way to blow holes in it.
Metal Thickness
Recommended Rod Diameter
Approximate Amperage
1/16" (1.6mm)
1/16"
20–45 A
3/32" (2.4mm)
3/32"
40–80 A
1/8" (3.2mm)
3/32" to 1/8"
80–125 A
3/16" (4.8mm)
1/8"
100–145 A
1/4" (6.4mm)
1/8" to 5/32"
120–175 A
3/8" (9.5mm)
5/32" to 3/16"
150–225 A
1/2" (12.7mm)+
3/16" to 1/4"
200–300 A
For a more detailed breakdown of how metal thickness affects settings, the stick welding amps to metal thickness chart covers this with additional position variables included.
Polarity Settings by Rod Type
Polarity determines where heat concentrates in the arc — at the rod or at the base metal.
DCEP (Direct Current Electrode Positive) — also called reverse polarity. Heat concentrates at the rod tip, producing deeper penetration. Most low-hydrogen rods like 7018 require DCEP.
DCEN (Direct Current Electrode Negative) — also called straight polarity. Heat shifts to the base metal, which can reduce burn-through risk on thin material. Some 6013 rods run acceptably on DCEN.
AC (Alternating Current) — polarity alternates continuously. Useful when DC causes arc blow, or when you only have an AC stick machine. Rods like 6011 and 6013 are designed to handle AC effectively.
Polarity
Heat Concentration
Penetration
Compatible Rods
DCEP
At the rod
Deep
6010, 6011, 7018, 7024
DCEN
At the base metal
Shallow
6013 (some), 7014
AC
Alternating
Medium
6011, 6013, 7024, 7018 AC
Rod-by-Rod Settings Breakdown
6010 Rod Settings
The 6010 is a fast-freeze rod known for deep penetration and a tight arc. It runs exclusively on DCEP and does not perform on AC machines.
– Amperage: 60–90 A (3/32″), 75–125 A (1/8″), 110–165 A (5/32″)
– Polarity: DCEP only
– Arc length: Short — roughly equal to the rod diameter
– Best for: Root passes on pipe, structural steel with mill scale or light rust, field repair
The 6010 demands some technique. Keep the arc tight and move at a steady pace. A long arc causes porosity and an erratic, spattery bead.
6011 Rod Settings
The 6011 is essentially the AC-compatible version of the 6010. It runs on AC, DCEP, and sometimes DCEN, making it useful when you’re working with an older transformer-style machine.
– Amperage: 40–80 A (3/32″), 75–125 A (1/8″)
– Polarity: AC or DCEP
– Best for: Rusty, painted, or galvanized steel, outdoor repair, AC-only machines
Penetration is slightly softer than 6010, but the 6011 handles dirty base metal better than most rods. The complete stick welder settings chart breaks down both rods against joint types if you need additional context.
6013 Rod Settings
The 6013 is arguably the most beginner-friendly stick welding rod. It has a soft arc, minimal spatter, and produces a flat, smooth bead — but penetration is shallow, which limits its use on thick sections.
– Amperage: 40–90 A (3/32″), 80–130 A (1/8″)
– Polarity: AC, DCEP, or DCEN
– Best for: Sheet metal, light fabrication, practice welds, clean mild steel
In practice, setting a 6013 too hot causes undercut and excessive spatter. Too cold and the arc extinguishes easily. Start in the middle of the range and adjust from there.
7018 Rod Settings
The 7018 is a low-hydrogen rod used across structural fabrication, pressure vessel work, and heavy plate. It needs DCEP, and it absolutely requires dry storage. Even a few hours of moisture exposure can introduce hydrogen into the weld and cause cracking.
– Amperage: 70–110 A (3/32″), 100–165 A (1/8″), 130–200 A (5/32″)
– Polarity: DCEP (some versions rated for AC)
– Best for: Clean structural steel, code-quality welds, multi-pass applications
For a focused reference, the 7018 1/8 welding rod amperage chart covers the full range for that diameter with position and pass-type adjustments included.
Adjusting Amperage for Welding Position
Flat position allows the highest amperage because gravity helps the puddle flow and fuse. As position changes, you typically need to reduce amperage to maintain puddle control.
– Flat (1G/1F): Use the upper end of the recommended range
– Horizontal (2G/2F): Reduce 5–10% from flat
– Vertical up (3G/3F): Reduce 10–15% from flat
– Overhead (4G/4F): Reduce 10–20% from flat
A 7018 1/8-inch rod running comfortably at 130 amps flat might need to drop to 110–115 amps for vertical-up passes. If the puddle starts sagging or undercutting the sidewalls, reduce amperage rather than trying to fight it with travel speed alone.
Common Setting Mistakes and How to Fix Them
Rod sticking to the base metal
Usually caused by too-low amperage or an arc that’s too short at startup. Increase amperage 10 amps at a time and make sure you’re striking with a scratching motion rather than tapping.
Excessive spatter
Often caused by amperage that’s too high, arc length that’s too long, or incorrect polarity. For 7018, excessive spatter on DCEN is a sign to switch to DCEP.
Bead piles on top without fusing
The arc is too cold or the travel speed is too slow. Increase amperage slightly and check that your rod angle is correct — 5–15 degrees drag angle for most flat and horizontal welds.
Porosity in the weld bead
Could be contaminated base metal, a wet rod (especially 7018), a drafty environment (for 6010/6011), or an arc that’s too long. For low-hydrogen rods like 7018, store them in a rod oven at 250–300°F if they’ve been open for more than a few hours.
Burn-through on thin material
Rod diameter is too large for the metal thickness, or amperage is too high. Drop down to a 3/32-inch rod and reduce amperage significantly. The 6013 is a better choice for thin sections than 6010 or 7018. Welders using the Lincoln Electric Weld-Pak 140 HD often run into this issue when first switching from wire welding to stick on thin plate.
TIG Filler Rod Settings vs. Stick Welding Rods
Stick welding electrodes are not the same as TIG filler rods, and the settings don’t transfer directly. TIG rods are uncoated, consumable wire fed by hand into the arc — they don’t carry current the way a stick electrode does. Amperage in TIG is set based on metal thickness, material type, and tungsten size rather than rod diameter.
If you’re working with TIG, the TIG welding filler rod selection chart covers filler selection by base metal type and application.
FAQ
What amperage should I use for a 1/8-inch 7018 rod?
For flat and horizontal welding, a 1/8-inch 7018 rod typically runs between 100 and 165 amps on DCEP. Most welders find their sweet spot around 120–135 amps for general structural work. Reduce to 110–115 amps for vertical-up passes to maintain puddle control without sagging.
Can I run a 7018 rod on an AC machine?
Standard 7018 rods are designed for DCEP. Some versions are labeled 7018 AC and are formulated to work on alternating current, but not all 7018 rods are interchangeable. If you only have an AC machine, a 6011 rod is a more reliable choice for structural-quality welds.
Why does my welding rod keep sticking?
Rod sticking is almost always a low-amperage problem. The arc doesn’t have enough energy to establish or sustain itself, so the rod fuses to the base metal. Increase amperage in 5–10 amp increments and make sure your ground clamp is making clean contact with bare metal.
What is the difference between 6010 and 6011 rods?
Both are fast-freeze, deep-penetration rods used on rusty or dirty steel. The key difference is polarity: 6010 requires DCEP and will not work on AC machines, while 6011 is formulated to run on AC or DCEP. The 6011 has slightly softer arc characteristics and marginally lower penetration.
How do I know if my welding rod settings are correct?
A well-set rod produces a consistent crackling sound — like eggs frying — a smooth bead with even edges, and no excessive spatter. If the arc sounds erratic, the bead is irregular, or the rod keeps sticking, your amperage or polarity is off. Bead appearance is your best real-time feedback tool.
Does rod storage affect welding settings?
Yes, especially for low-hydrogen rods like 7018. Moisture absorbed into the flux coating causes hydrogen-induced cracking and porosity, which no setting adjustment will fix. Keep 7018 rods in a sealed container or rod oven. If the coating looks chalky or flakes off easily, the rod has absorbed too much moisture.
Can I use the same rod settings for different metals like stainless or cast iron?
No. Rods like 7018 and 6013 are designed for mild steel. Stainless requires a matching stainless rod such as a 308L or 316L type, and cast iron needs a nickel-based electrode like an ENiFe rod. Using the wrong rod on these materials produces brittle welds regardless of the amperage setting.
Getting your welding rod settings right isn’t complicated once you understand the logic behind the numbers. Match rod diameter to metal thickness, confirm you have the correct polarity for your rod type, and start in the middle of the amperage range before fine-tuning based on bead behavior. The sound and shape of your bead will tell you everything you need to know — a steady fry and a flat, even ripple means you’re in the right range.