
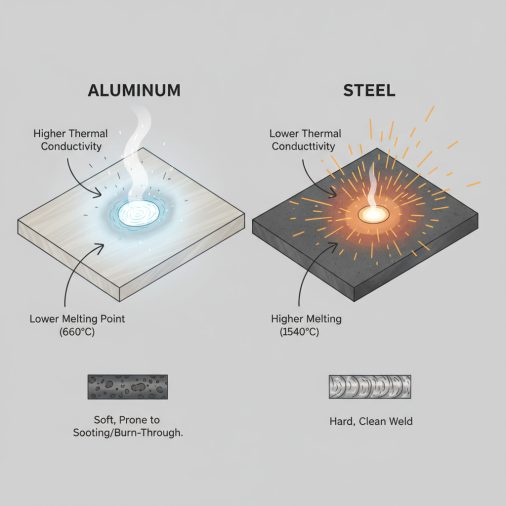
Why Aluminum Behaves Differently Than Steel
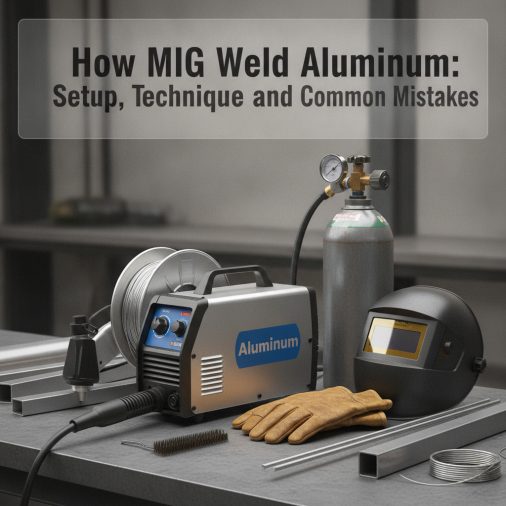
Equipment You Actually Need
Preparing the Aluminum Before You Weld
This step is where most beginners cut corners and then wonder why their welds look terrible. 1. Degrease first. Wipe the weld area with acetone or a dedicated aluminum cleaner to remove oils, cutting fluids, and handling residue. Do this before any mechanical cleaning. 2. Brush the oxide layer off. Use a clean stainless steel brush — one used exclusively for aluminum, never steel. Scrub the weld joint and surrounding area just before welding. Don’t brush and then wait 20 minutes; the oxide reforms quickly. 3. Pre-heat thicker sections. For material over about 3/8″ thick, pre-heating to 200–250°F helps the arc penetrate consistently. Use a temperature stick or infrared thermometer to verify — overheating softens aluminum significantly. Never skip the cleaning process. Contaminated aluminum produces porous, weak welds with a rough, bubbly surface that no amount of technique will fix.Machine Settings for Aluminum MIG Welding
Aluminum settings run differently from steel. The following table gives a practical starting reference using common wire sizes and material thicknesses.| Material Thickness | Wire Size | Voltage (V) | Wire Speed (IPM) | Gas Flow (CFH) |
|---|---|---|---|---|
| 1/16" (1.6mm) | 0.030" | 16–18 | 200–250 | 20–25 |
| 1/8" (3.2mm) | 0.035" | 19–21 | 300–380 | 20–25 |
| 3/16" (4.8mm) | 0.035" | 21–23 | 380–450 | 25–30 |
| 1/4" (6.4mm) | 0.035" | 23–25 | 450–520 | 25–30 |
Welding Technique: How to Actually Run the Bead
Push, don’t pull. With aluminum, always push the gun away from the completed weld, pointing toward the unwelded joint ahead. Pulling (dragging) traps oxides in the weld pool and produces inferior results. This is the opposite of what many welders do with flux-core wire on steel. Travel angle: Keep the gun at roughly 10–15 degrees push angle. Too steep and you’ll get poor penetration; too flat and you’ll lose arc control. Travel speed: Move faster than you think you need to. Aluminum’s high thermal conductivity pulls heat away from the weld pool rapidly at first, but as the workpiece heats up, the heat builds. Slowing down mid-weld on a longer joint is a reliable way to blow through thin sections. Tack welds: Place tack welds at regular intervals before running the full pass. Aluminum expands and contracts more than steel, and skipping tacks allows distortion to accumulate quickly. Stringer vs. weave: For most aluminum work, straight stringer beads produce better fusion and less distortion than wide weave patterns. Save weaving for cases where you need to fill a wider joint.Common Problems and How to Fix Them
Porosity (holes or bubbles in the weld): – Contaminated base metal is the most frequent cause — go back to cleaning protocol – Moisture in the shielding gas line; purge the gas briefly before welding – Gas flow rate too low or a draft blowing the gas coverage away from the weld Wire bird-nesting at the drive rolls: – Using V-groove drive rolls instead of U-groove – Drive roll pressure set too high, crushing the soft wire – Liner or contact tip partially clogged with aluminum debris — replace regularly Burn-through on thin sections: – Travel speed too slow – Voltage too high for the material thickness – Insufficient tacking, allowing heat to build in one spot Rough, irregular bead appearance: – Oxide layer not fully removed before welding – Inconsistent travel speed – Wrong shielding gas (any CO2 content will cause this on aluminum) If you’re questioning whether your process is working correctly, learning what a good MIG weld looks like gives you a useful visual benchmark for aluminum bead quality.Pulse MIG for Aluminum: Is It Worth It?
Pulse MIG welding alternates between a high peak current and a lower background current at a set frequency. For aluminum, this reduces average heat input significantly while maintaining good fusion — a major advantage when working on thinner sections or heat-sensitive assemblies. Double pulse (also called pulse-on-pulse) adds a second frequency that creates a stacked-coin appearance similar to TIG welding. Whether double pulse actually matters for aluminum MIG welding depends on whether you need that aesthetic or if reduced distortion on thin material justifies the added machine cost. For basic fabrication on 1/8″ and thicker aluminum, standard spray transfer produces excellent results. Pulse becomes genuinely useful when you’re working on material under 3/32″ or running long welds where heat accumulation becomes a problem.FAQ
Can I use a regular MIG gun instead of a spool gun for aluminum? Technically possible with a very short cable, a Teflon liner, and low drive roll pressure, but it’s unreliable in practice. The soft aluminum wire deforms easily over longer distances, causing feeding problems and inconsistent welds. A spool gun eliminates most feeding issues and is worth the investment for any regular aluminum work. What’s the difference between ER4043 and ER5356 wire? ER4043 contains silicon, which lowers the melting point and makes it more fluid and easier to weld — it’s more forgiving for general fabrication and repairs. ER5356 is a magnesium-alloyed wire that produces stronger welds with better crack resistance for structural or marine applications. ER5356 is not recommended for use with alloys like 2XXX or 7XXX series aluminum. Why does my aluminum weld look black and sooty? A black or sooty appearance around the bead usually means contamination — oil, residue, or oxide wasn’t fully removed before welding. It can also result from gas coverage problems or using a shielding gas that contains CO2. Check your cleaning process and confirm you’re running 100% argon. Attempting to weld aluminum without proper shielding gas will always produce contaminated, porous results. How do I prevent warping and distortion on aluminum panels? Aluminum warps more than steel because it expands and contracts more during heating and cooling. Use frequent tack welds, weld in short intermittent passes rather than one continuous run, and allow the workpiece to cool between passes. Clamping the workpiece to a flat surface or using a copper backing bar for thin sections also helps manage distortion. What shielding gas flow rate should I use for aluminum MIG welding? Generally 20–30 CFH depending on nozzle size and conditions. More is not always better — excessively high flow creates turbulence at the nozzle that actually pulls atmospheric air into the shielding zone. In drafty environments, use a larger nozzle and shield the work area rather than simply cranking up the gas flow. Can I MIG weld aluminum outdoors? Yes, but wind is a serious problem. Even a light breeze can strip the argon shielding away from the weld pool and cause immediate porosity. Use windbreaks or welding screens and keep gas flow high enough to compensate. Welding aluminum outdoors in strong wind is rarely practical with standard gas coverage. Is TIG welding better than MIG for aluminum? TIG gives you more control over heat input and produces cleaner, more precise welds — it’s the preferred process for thin sections, critical structural work, and appearance-critical parts. MIG is faster and more practical for thicker sections, longer runs, and production applications. Both processes have legitimate uses; the right choice depends on your material, application, and available equipment.Aluminum MIG welding rewards preparation more than most welding processes. Get the cleaning right, set up a spool gun, dial in 100% argon, and push the gun at a consistent angle — those four fundamentals solve the majority of problems beginners run into. The technique itself becomes intuitive quickly once the equipment is configured correctly and the base metal is properly prepared.


