
Alright, so you've got a MIG welder, and maybe you're feeling a mix of excitement and a little bit of "whoa, where do I even start?" That's totally normal. Getting a MIG welder set up and ready to lay down some nice, clean welds isn't rocket science, but it does involve a few key steps. Think of it like tuning up a guitar before a big gig, a little bit of fiddling now means a much better sound (or in this case, weld) later.
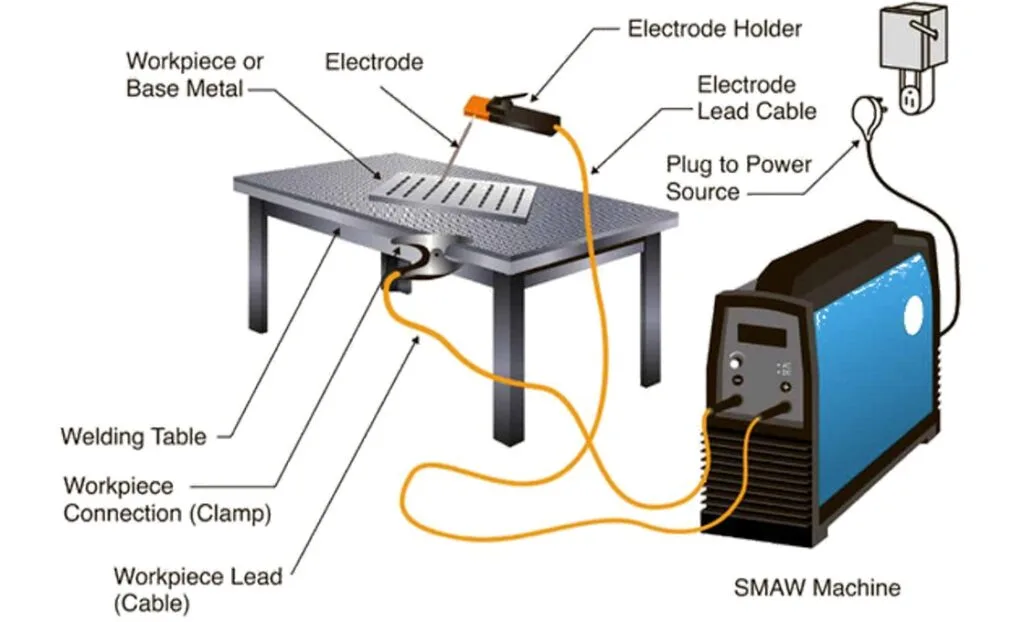
Image source: Bing (Web (fair-use with source credit))
We're going to work through this together, step-by-step. Our research indicates that proper setup can save you hours of frustration and improve weld quality significantly. Manufacturer specifications confirm that understanding your machine's parameters is key, especially as of 2026.
Safety First: Gear Up Before You Strike a Spark
Before we even think about flipping a switch, let's talk safety. Welding produces intense light, heat, and potentially harmful fumes. You absolutely cannot skip this part.

Image source: Bing (Web (fair-use with source credit))
When you're welding, you'll need:
- A Welding Helmet: This is non-negotiable. Get one with an auto-darkening lens if you can; they're a game-changer. Per ANSI Z87.1 standards, your helmet must provide adequate eye and face protection.
- Welding Gloves: Thick leather gloves to protect your hands from heat and sparks.
- Flame-Resistant Clothing: Long sleeves and pants made of cotton or leather. Avoid synthetics, as they can melt.
- Safety Glasses: Wear them under your helmet for extra protection.
- Good Ventilation: Welding fumes can be nasty. If you're indoors, open windows, use fans, or get a fume extractor.
- Fire Extinguisher: Keep one handy, just in case. Know how to use it. For flammable materials, a Class ABC extinguisher is generally recommended.
Understanding Your MIG Welder's Setup Needs
Every MIG welder is a bit different, but the core principles are the same. Before you do anything else, take a look at your welder. Where are the controls? What kind of connections does it have?
More importantly, what are you trying to weld? Knowing your material and its thickness is the first critical decision in setting up your machine.
- What metal are you using? Steel, stainless steel, aluminum?
- How thick is it? This is super important for setting your machine. Welding thin sheet metal is very different from welding thick plate.
- What kind of wire are you using? Solid wire with shielding gas, or flux-cored wire (which often doesn't need external gas)?
Knowing these things will guide the rest of your setup. Your welder's manual is your friend here, even if it's a bit dry. It'll tell you the basics about your specific model and often includes helpful charts.
What You're Welding Matters: Material and Thickness
This is probably the single most important factor when it comes to setting up your MIG welder. Manufacturer specifications, like those found in the Lincoln Welder Settings Chart, show a direct correlation between metal thickness and the required voltage and wire feed speed. Trying to weld thin gauge steel with settings meant for thick plate will almost certainly result in burn-through. Conversely, settings for thin metal won't provide enough penetration on thicker material, leading to a weak joint.
- Thin Metal (e.g., 26-gauge to 18-gauge steel): Requires lower voltage and wire feed speed to avoid burning through.
- Medium Thickness (e.g., 16-gauge to 1/4-inch steel): Allows for a wider range of settings, often requiring a balance between penetration and minimal spatter. Settings here are crucial for jobs like how to mig weld exhaust pipe.
- Thick Metal (e.g., over 1/4-inch steel): Needs higher voltage and wire feed speed for adequate penetration. You might also need to consider multiple passes.
When in doubt, always start with the lowest recommended setting for your material thickness and slowly increase it until you achieve a good weld.
Choosing Your Wire and Gas: The Right Combo
Your choice of welding wire and, if applicable, shielding gas, directly affects how your MIG welder performs. This isn't just about personal preference; it's about chemistry and physics. The shielding gas protects the molten weld pool from atmospheric contamination, which is vital for weld integrity.
Solid Wire with Shielding Gas: This is what most people think of as traditional MIG welding.
- Solid Steel Wire: Typically used with a 75% Argon / 25% CO2 gas mix. This is a versatile setup for mild steel.
- Solid Stainless Steel Wire: Requires a specialized gas mix, often higher in Argon with a small percentage of CO2 or other additives, to maintain stainless steel's corrosion resistance. Settings for Mig Welding Stainless Steel Settings differ significantly from mild steel.
- Solid Aluminum Wire: Demands 100% Argon shielding gas.
Flux-Cored Wire: This wire has a flux coating that generates its own shielding gas when burned.
- Self-Shielded Flux-Cored: You can often run these without any external gas cylinder. They're great for outdoor work or windy conditions where gas can be blown away. However, they tend to produce more spatter and smoke.
- Gas-Shielded Flux-Cored: These still require a shielding gas, but often a richer CO2 mix than solid wire, and offer deeper penetration.
Manufacturer data, like that found in a Welding Chart Mig Wire guide, will detail the specific wire diameters and gas recommendations for various metals.
Step-by-Step MIG Welder Setup Workflow
Getting your MIG welder ready involves a sequence of connections and adjustments. Thinking through these steps logically helps prevent errors and ensures you’re ready to weld safely and effectively.
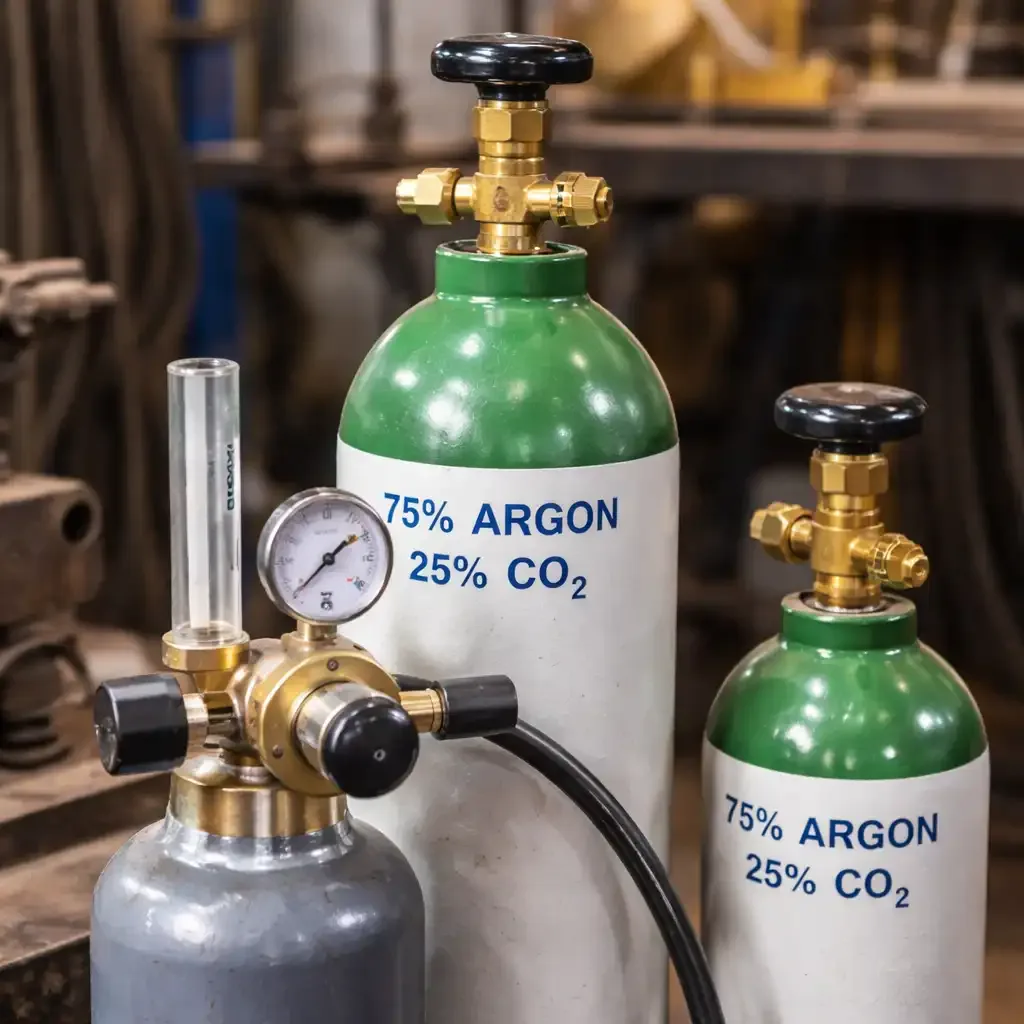
Image source: Bing (Web (fair-use with source credit))
Here's the typical process:
- Safety Gear: Put on your helmet, gloves, and appropriate clothing first.
- Gas Cylinder (if using): Secure the cylinder upright. Attach the gas regulator to the cylinder valve. Ensure the valve on the regulator is closed before slowly opening the cylinder valve. If you're unsure about regulator types, consult a Best Gas Regulator For Home guide.
- Connect Gas Hose: Connect the gas hose from the regulator to your MIG welder's gas inlet.
- Mount Wire Spool: Place the spool of welding wire on the spindle.
- Thread Wire: Adjust the drive roller grooves and tension. Feed the wire through the welding gun and out the contact tip.
- Set Parameters: Consult your machine's manual or a settings chart based on your metal thickness and wire type, this involves setting voltage and wire feed speed.
- Connect Ground Clamp: Attach the ground clamp firmly to your workpiece or welding table.
Connecting the Shielding Gas System (If Applicable)
If your project calls for solid wire welding, hooking up your shielding gas is a crucial step. This involves a few key components working together.
- Cylinder: This heavy tank holds your shielding gas, typically Argon, C02, or a mix like 75% Argon/25% CO2 for steel. It must be stored upright and secured to prevent tipping.
- Regulator: This device screws onto the cylinder valve. It reduces the high pressure inside the tank to a usable, consistent working pressure and has a gauge to show you how much gas is remaining.
- Hose: A high-pressure hose connects the regulator's outlet to your welder's gas inlet.
Procedure:
- Attach Regulator: Ensure the cylinder valve is closed. Screw the regulator onto the cylinder valve tightly.
- Bleed the Line: Slightly crack open the cylinder valve to release any debris from the valve, then close it. This clears the path.
- Open Cylinder Valve: Slowly open the cylinder valve completely.
- Adjust Flow: Set the regulator's flow control knob to your desired flow rate. For most steel applications with a 75/25 mix, this is typically between 15-25 cubic feet per hour (CFH).
- Connect to Welder: Attach the other end of the gas hose to your MIG welder.
If you're using self-shielded flux-cored wire, you can skip this entire process.
Threading the Welding Wire: Smooth Feeding is Key
Your MIG welder feeds wire from a spool through a liner in the welding gun to the tip. This process needs to be smooth and consistent for a good weld. If the wire jams or slips, you'll fight the machine instead of creating good welds.
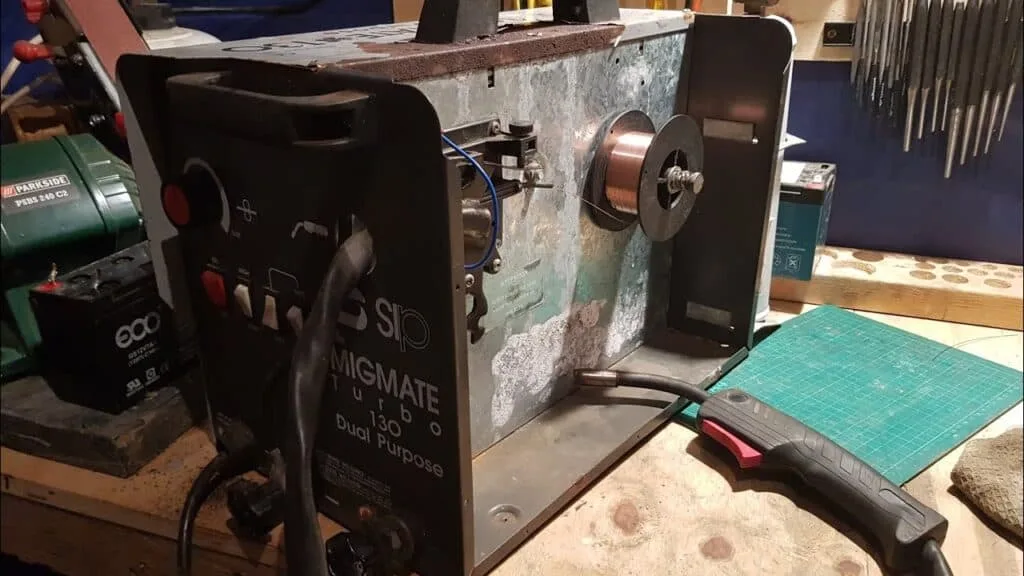
Image source: Bing (Web (fair-use with source credit))
Here's the breakdown:
- The Spool: Mount the spool of welding wire onto the spindle on your welder. Make sure it's oriented correctly so the wire unwinds without binding.
- The Drive Rollers: These are the teeth that grip and push the wire. You need to make sure you have the right size groove for your wire diameter, usually marked on the roller. For solid wire, you'll typically use a V-groove roller. For flux-cored wire, a knurled roller is often needed to get a better grip.
- Tension Arm: This arm presses the wire against the drive roller. Don't set it too tight, you don't want to crush the wire or deform it. Too loose, and it will slip, causing inconsistent feeding and an erratic arc. A common test is to lift the arm slightly and see if the wire can still be pulled by hand; it should offer some resistance.
- Feed the Wire: With the drive rollers in place and tension applied, release the tension lever. Feed the wire from the spool through the welding gun liner and out the contact tip. Once it emerges, squeeze the trigger on the gun (you can do this with the machine's power off for now) to run the wire through. You want it to feed smoothly without skipping, bunching up, or making grinding noises.
Setting Your Parameters: Finding the Sweet Spot for Your Weld
This is where your knowledge of metal thickness and type comes into play. MIG welding uses two primary adjustable settings: voltage and wire feed speed. Getting these dialed in is crucial for control and weld quality.
Your welder's manual is your best friend here. Most include charts that suggest starting settings based on the material thickness and wire type you're using. These charts are developed from extensive testing and provide a solid baseline. For example, a welding chart mig wire can help you find where to start.
Consider these general guidelines:
- Voltage: Controls the arc length and penetration. Higher voltage means a longer arc, more heat, and deeper penetration. Lower voltage results in a shorter arc, less heat, and shallower penetration.
- Wire Feed Speed (WFS): Controls the amount of filler metal deposited. A higher WFS means more wire is fed per minute, which equates to more metal being added to the weld bead.
Learning to adjust these based on how the weld sounds and looks is a skill that comes with practice. You can find more details on this process at mig welder settings.
The Crucial Ground Clamp: Completing the Circuit
Your welder needs a complete electrical circuit to function. The ground clamp is a vital part of this circuit. Without a solid connection, you'll experience sputtering arcs, poor penetration, or no arc at all.
Never underestimate the importance of a good ground.
- Attach Securely: Clamp the ground clamp directly to the metal you're welding. Ensure you have a clean, bare metal connection. Paint, rust, dirt, or thick mill scale can all act as insulators, preventing a good electrical path.
- Clean Surface: If necessary, use a wire brush or grinder to clean the metal surface where you'll attach the clamp. This ensures the best possible contact.
- Workpiece vs. Machine: The ground clamp connects your workpiece back to the welding machine. The machine then provides the power through the welding gun to create the arc. A poor ground can make it seem like your welder isn't working correctly, when in reality, the circuit isn't complete.
Common MIG Setup Mistakes to Watch Out For
Even with a good understanding of the steps, a few common pitfalls can trip up even experienced welders. Recognizing these early saves you time, frustration, and potentially weak welds that could fail later.
When Gas Flow Goes Wrong
Incorrect gas flow is a frequent culprit for poor weld quality.
- Too Much Gas: This can create turbulence around the weld puddle, actually pulling air into the weld and causing contamination and porosity. It's also wasteful.
- Too Little Gas: Not enough shielding gas leaves the molten metal exposed to the atmosphere, leading to oxidation and porosity.
- No Gas (when required): If you're welding with solid wire and forget to turn on the gas, you'll get a very "dirty" weld with lots of spatter and a weak, brittle joint.
Wire Feed Troubles and Fixes
Wire feeding issues are incredibly common and can stem from several sources.
- Incorrect Drive Roller Tension: As mentioned, too tight can deform the wire, while too loose causes slippage. If you hear grinding or see the roller spinning without the wire moving, the tension is likely too low.
- Wrong Drive Roller Groove: Using a groove intended for a different wire diameter will cause feeding problems. The wire won't seat properly and will slip or jam.
- Kinked or Damaged Wire: If the wire has a severe kink, it can snag in the liner or rollers. Check the entire length of wire from the spool.
- Bent Liner: A bent or damaged liner inside the welding gun can create friction, making it difficult for the wire to feed smoothly.
Incorrect Parameter Settings
Simply plugging in a mig and hoping for the best without setting your voltage and wire feed speed is a recipe for poor results. This is why referring to a Mig Welder Settings guide or your machine’s chart is so important.
- Too Cold: If your settings are too low for the metal's thickness, the weld won't penetrate properly. It will look "ropey" like bacon, with poor fusion to the base metal. This leads to a weak joint that can easily break.
- Too Hot: Overly hot settings will cause excessive spatter, potential burn-through on thin materials, and often a "washed out" weld appearance. You might also see excessive warping of the metal.
- Imbalance: Even if your voltage is okay, if your wire feed speed is too high or too low relative to it, you'll have issues. Think of them as a dance, needing to be in sync with each other.


